

Local Administrator Password Solution (LAPS)
Protect your Domain-Joined servers and computers.

My name is Brandon, and I currently work as an Information Technology Consultant in the Atlanta metropolitan area.
I am not a developer, but I enjoy learning about cloud and data center technologies. I also technically own "Brandon's Cloud, LLC" as my own consulting company.
Problem
When you set up a new computer or Windows server, Systems Administrators have been notoriously guilty of using the same password, with a local administrator account, and never changing it.
Face it. We are all guilty of it. Password reuse is human nature. There have even been studies about it.
Even seasoned Information Security professionals have the same password on multiple websites. I know I probably do. However, I have improved my password usage once I invested in a password manager (LastPass) and my passwords are mostly randomly generated. However, there may be a few lingering accounts out there with old and reused passwords.
So what could go wrong if I use the same local administrator password across all of my computers and servers?
If one of your domain servers or workstations becomes compromised, an attacker could easily use those local administrator credentials to migrate across each system in your environment. An attacker does not even need to know the exact password but could use the password hash to authenticate to other systems and computers in your environment.
Former attorney, current IT & Information Security Consultant, and a very informative Twitter account I follow, "Brian in Pittsburgh" recently tweeted three reasons why attackers gaining local administrator access is bad.
Solution
Microsoft introduced the Local Admin Password Solution (LAPS) in 2015 as a free tool to Domain Administrators to combat the use of local administrator passwords being left on domain-joined servers and computers.
LAPS will set a different and random password for the local administrator account to every computer in your domain and can rotate those passwords based on your domain's password policy. These passwords are then saved in Active Directory and only authorized administrators can retrieve these passwords when required.
How does LAPS work?
In the LAPS download documentation, you will find a section that discusses how it works in your environment. However, this documentation can be a little difficult to comprehend. Here is (hopefully) an easier breakdown of how LAPS works.
A small application installed on your computers and servers (client-side extension (CSE)), is deployed by a small script (Group Policy Object) from your Domain Controller.
This small application (CSE) checks whether the password of the local Administrator account has expired (based on your Domain's password policy). If the password is deemed to have expired or is close to expiring, the CSE generates a new password.
The new password is then validated against the Domain Password Policy to make sure it meets password length and complexity requirements or isn't on a list of passwords you can't use.
The CSE reports the password and the next expiration time to Active Directory, and it is stored in a confidential attribute associated with the computer account in Active Directory.
The CSE changes the password of the local administrator account on the computer.
The password then can be read from Active Directory by users (administrators) who are allowed to do so.
How to configure LAPS?
LAPS can be downloaded directly from Microsoft.

We should first check the System Requirements.
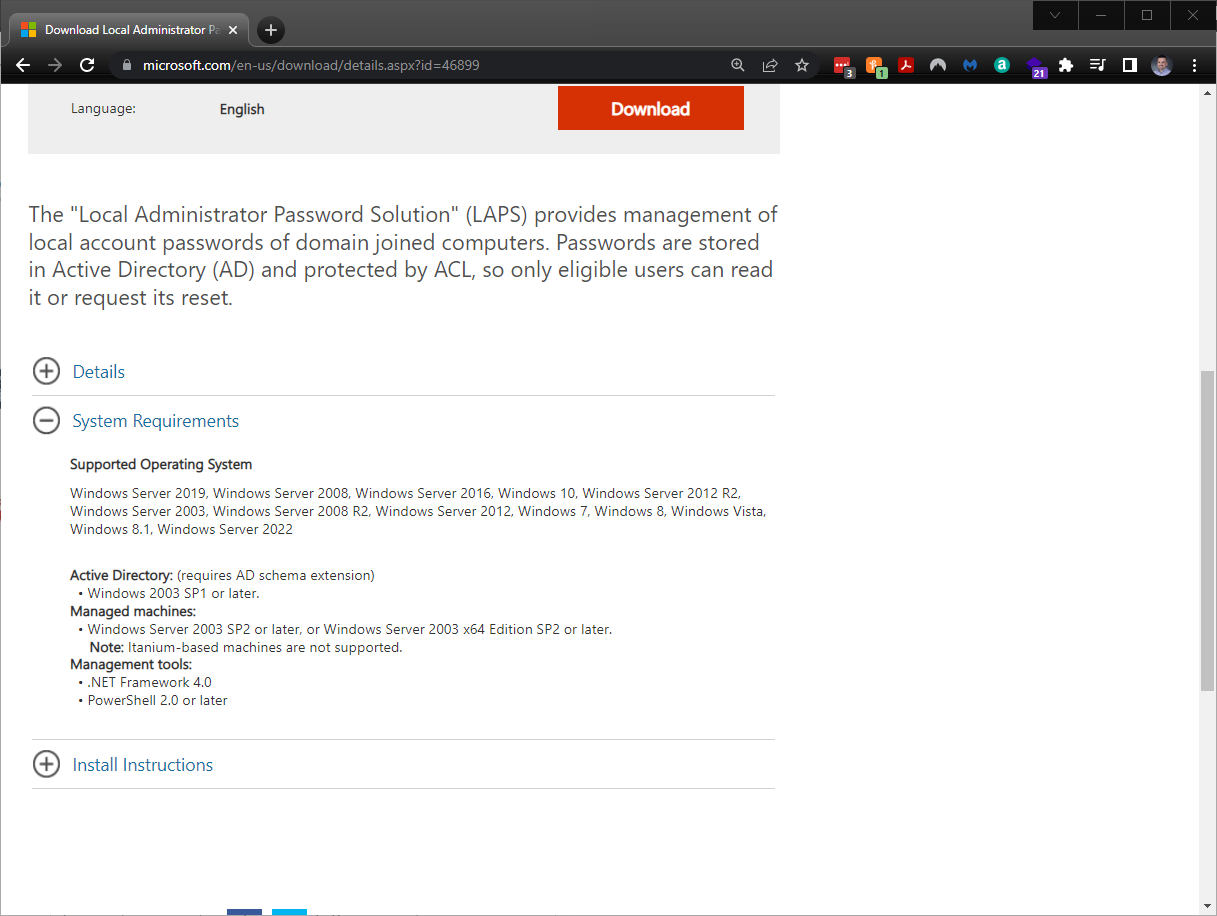
LAPS is only supported on the following operating systems:
- Windows Server 2022
- Windows Server 2019
- Windows Server 2008
- Windows Server 2016
- Windows 10
- Windows Server 2012 R2
- Windows Server 2012
- Windows Server 2008 R2 (EOL January 2020)
- Windows Server 2003 (EOL July 2015)
- Windows 8.1
- Windows 8
- Windows 7 (EOL January 2020)
- Windows Vista (EOL April 2017)
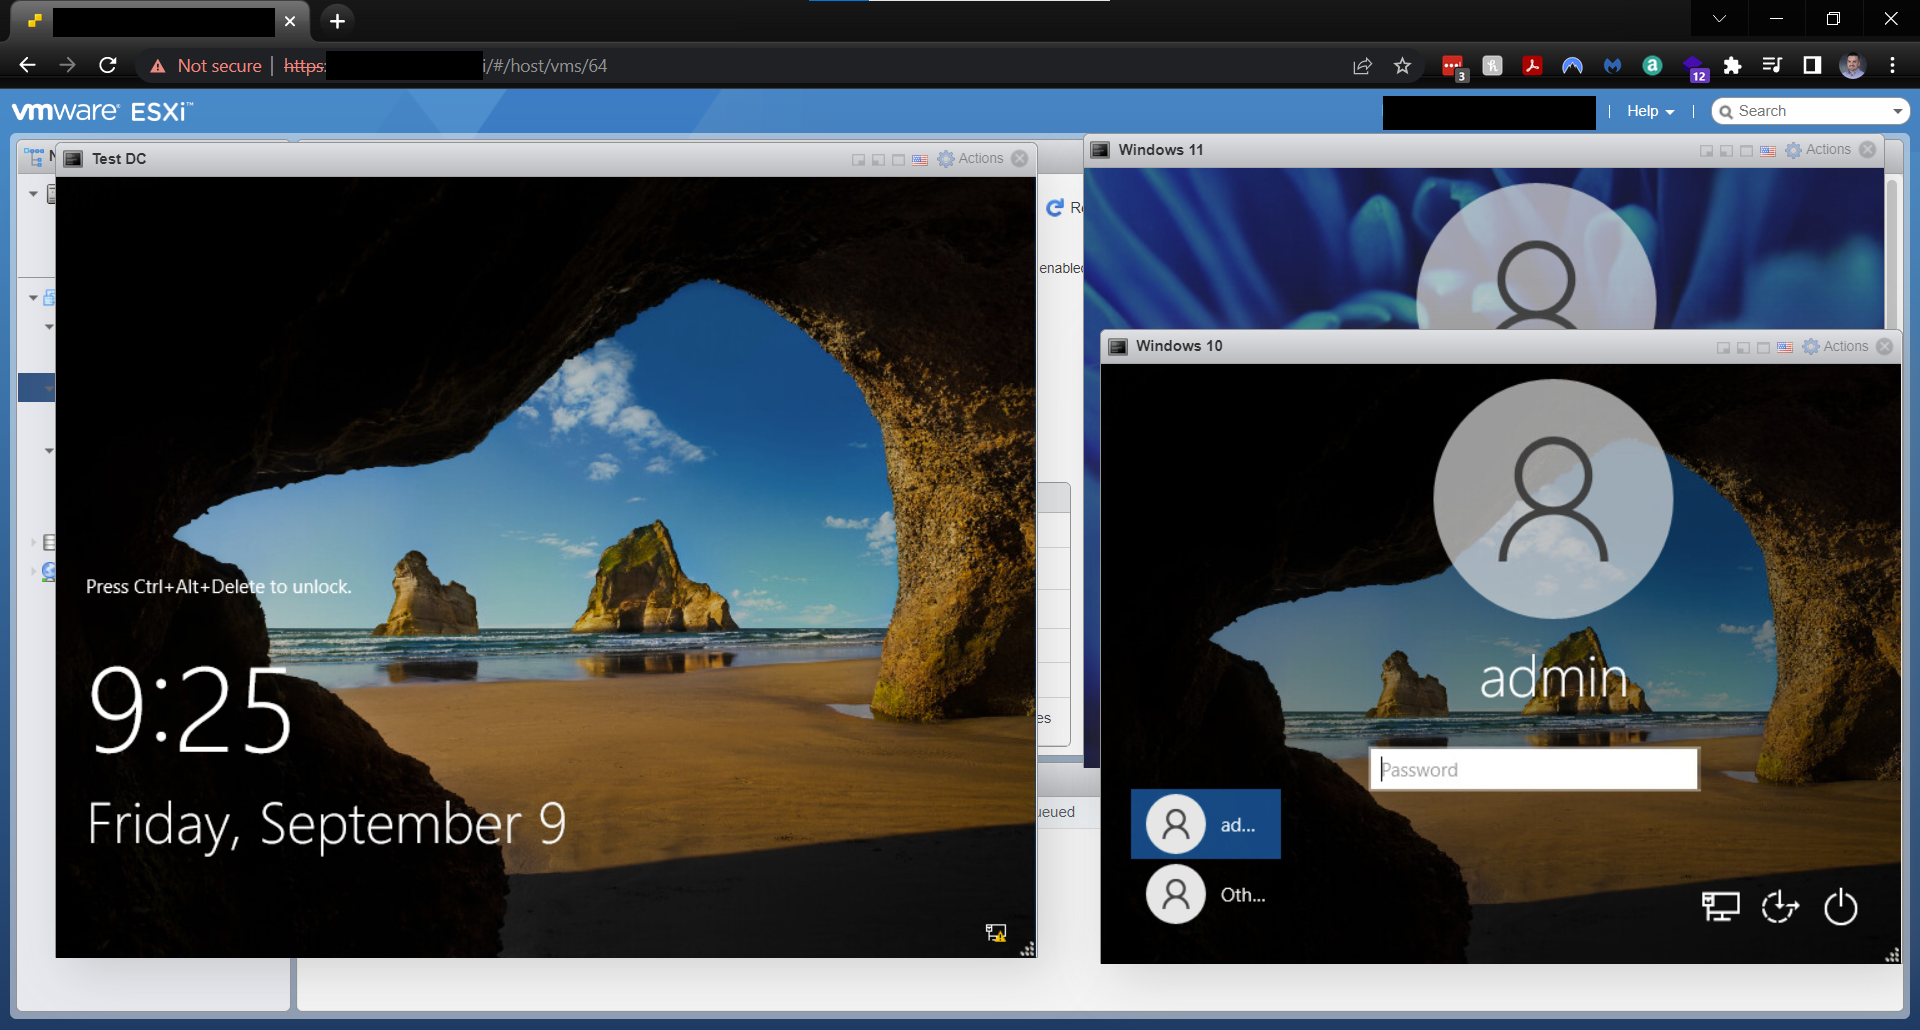
In my test environment, I will use a Windows Server 2019 virtual machine for my Domain Controller, and two client virtual machines running Windows 10 and Windows 11. I am thankful that I do have a development server, running VMware ESXi, to host the virtual machines.
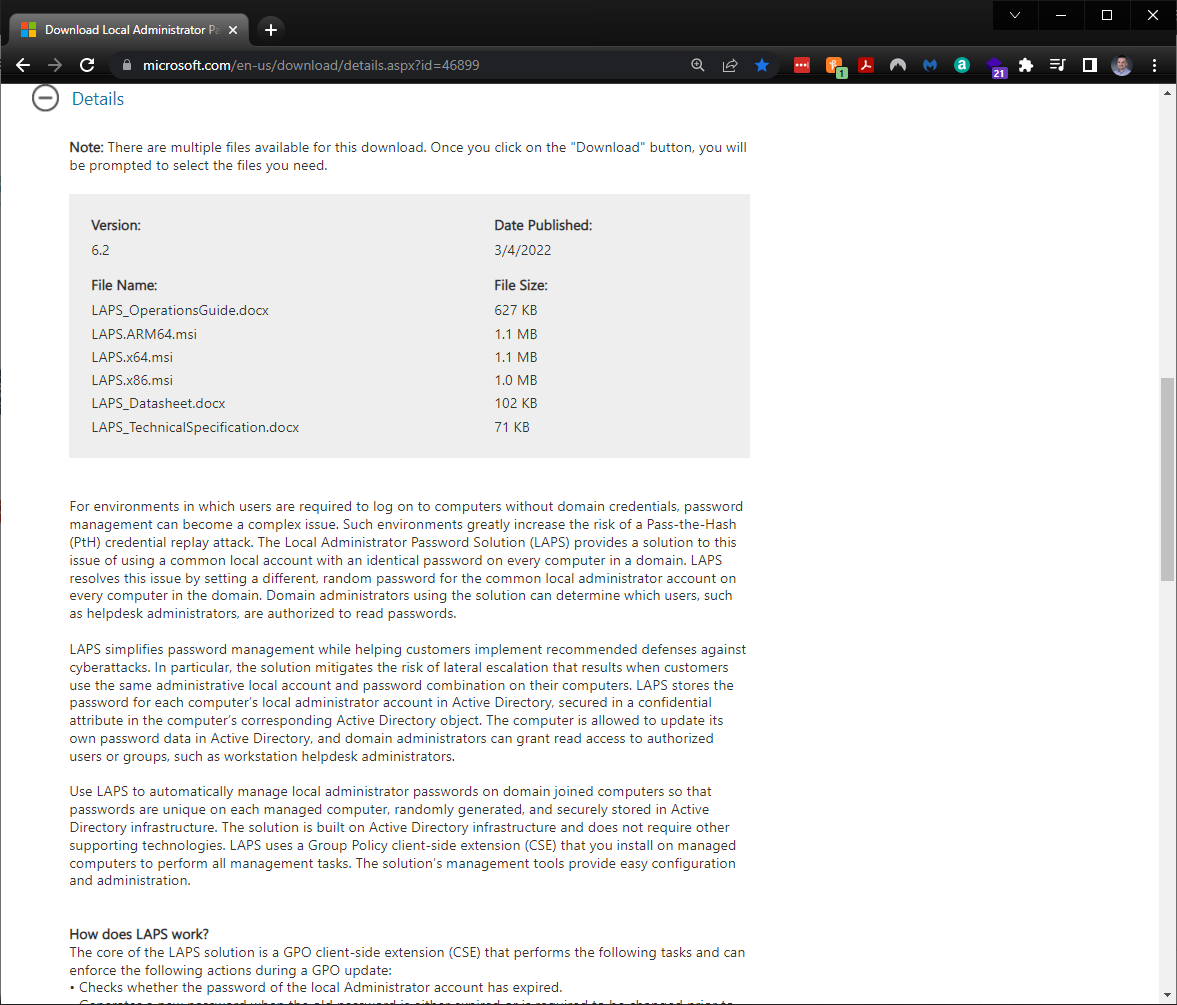
In the Details section of the Download page, you will see a lengthy description of why LAPS was created, how LAPS works, and its features. I highly recommend reading through this section carefully.
When you are ready to download the files, you are given several file options.
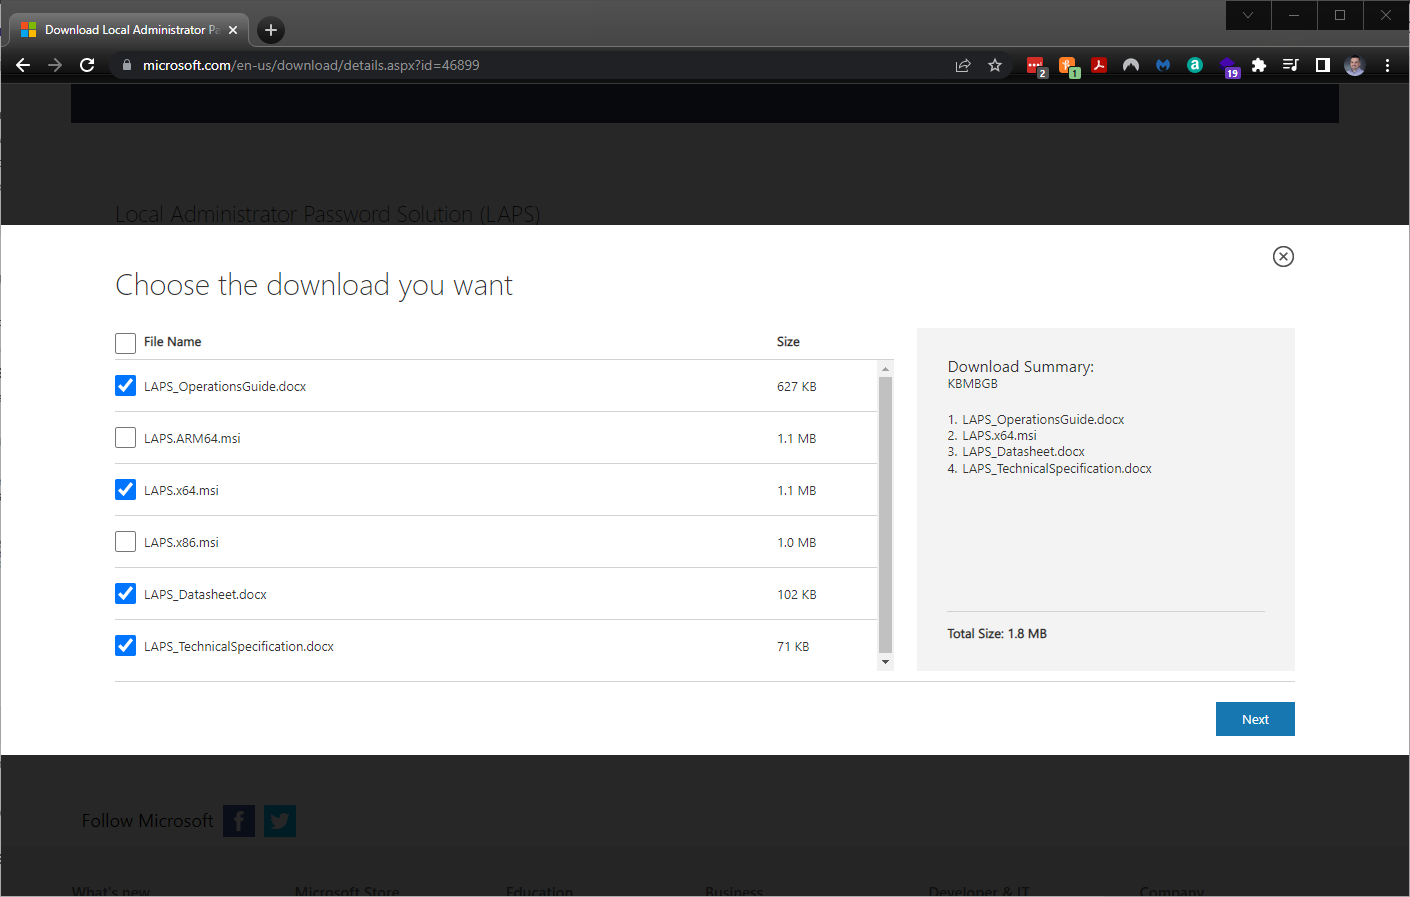
For my test environment installation, I downloaded the following files:
- LAPS_OperationsGuide.docx
- LAPS.x64.msi
- LAPS_Datasheet.docx
- LAPS_TechnicalSpecification.docx
Installing LAPS on the Management Computer
The first step was to install LAPS.x64.msi on my Domain Controller. Following the instructions from the guides, I will deselect the AdmPwdGPO Extension and ensure all of the Management Tools are selected.
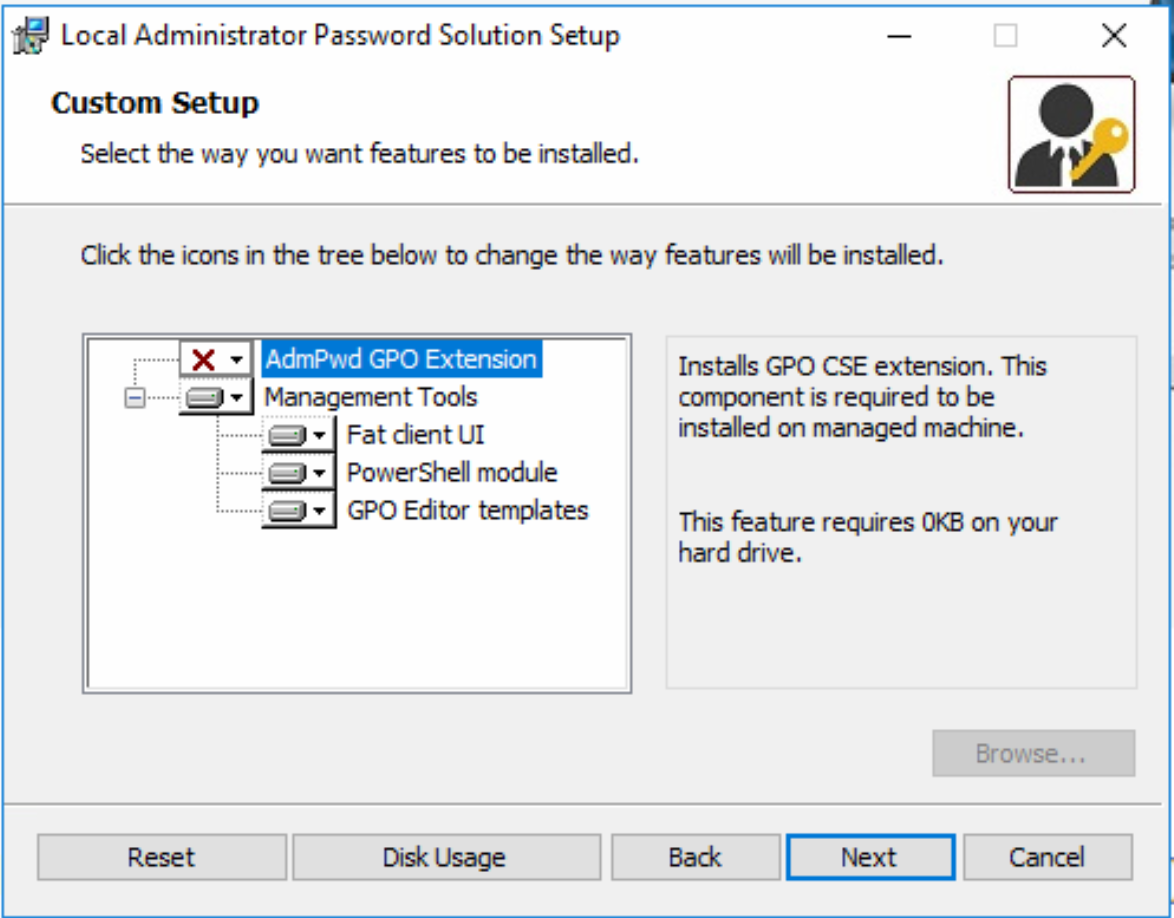
Here is a brief description of what each component of LAPS.x64.msi does:
- AdmPwd GPO Extension — this is a LAPS agent that need to be installed on all computers
- Fat Client UI — GUI tool for viewing the local administrator password
- PowerShell Module — allows you to manage LAPS using PowerShell
- GPO Editor templates — admx/adml GPO templates for configuring LAPS
After the LAPS UI finishes installing, you will see the LAPS UI icon on your desktop. Opening up the LAPS UI will look as such:

Extend the Active Directory Schema for LAPS
We next need to run some PowerShell commands in order to extend the Active Directory Schema so that LAPS can store the data in attributes in Active Directory. LAPS will be storing data in the following attributes:
- ms-Mcs-AdmPwd - stores the password
- ms-Mcs-AdmPwdExpirationTime - stores the password expiration time
While logged in to my Administrator account on the Domain Controller, I will need to run the following PowerShell commands to extend the Active Directory Schema:
1) Import the PowerShell LAPS module:
Import-module AdmPwd.PS
2) Extend the Active Directory schema:
Update-AdmPwdADSchema
You should see the following results:

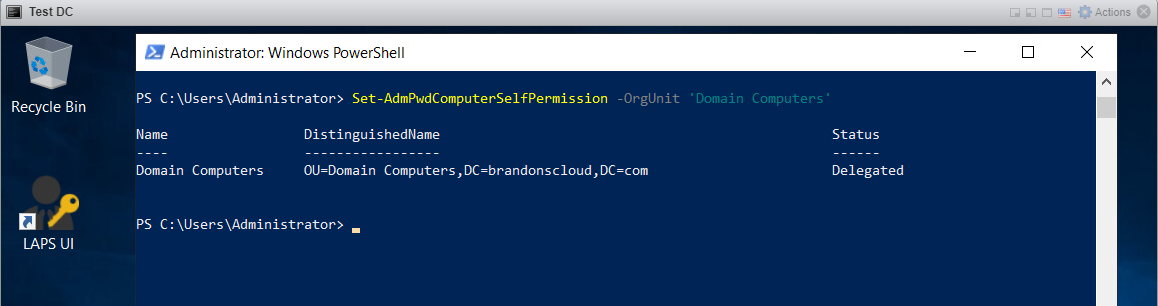
Change Computer Object Permissions
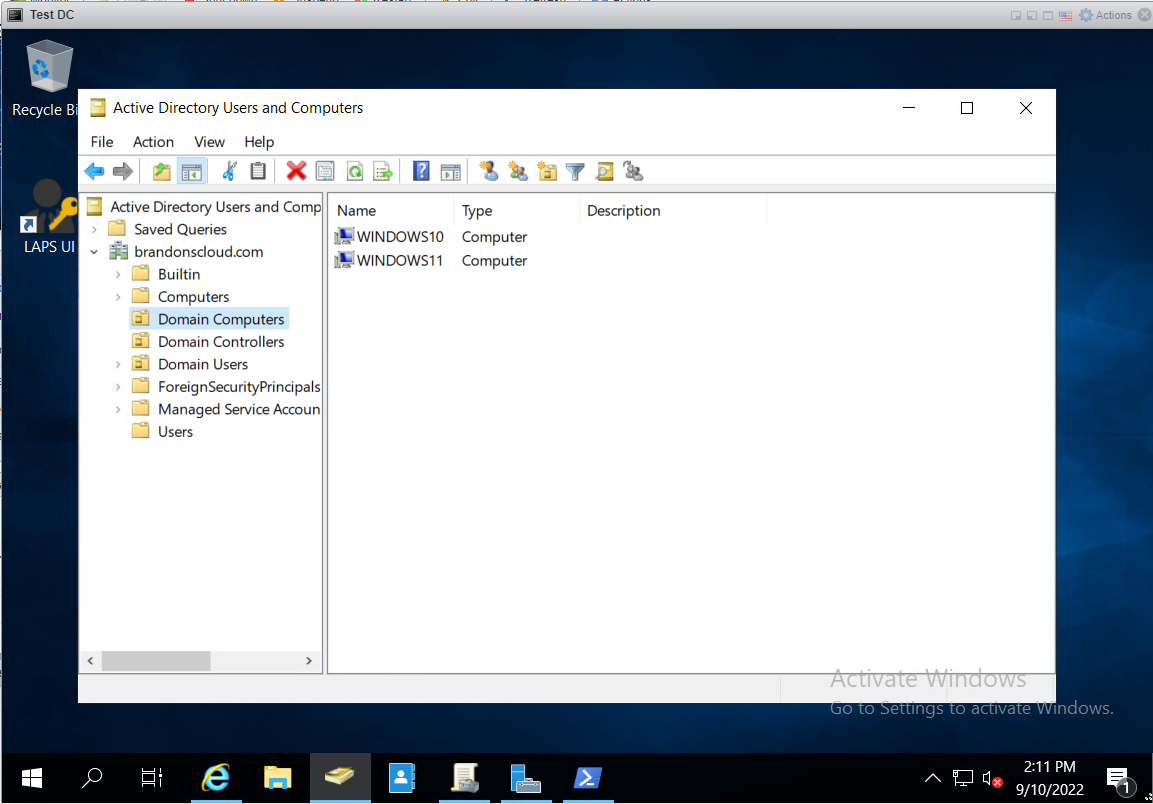
Now, I need to apply LAPS policies to my "Domain Computers" OU within Active Directory. As you can see, I have two workstations, WINDOWS10 and WINDOWS11, in my "Domain Computers" OU. I want to apply the LAPS policies to that group of computers.
I now need to allow the workstations to have the proper permissions to write values to the ms-Mcs-AdmPwd and ms-Mcs-AdmPwdExpirationTime attributes in the Active Directory Schema (via the CSE that will be installed on each computer in "Domain Computers").
To this, I will run the following PowerShell command:
Set-AdmPwdComputerSelfPermission -OrgUnit 'Domain Computers'
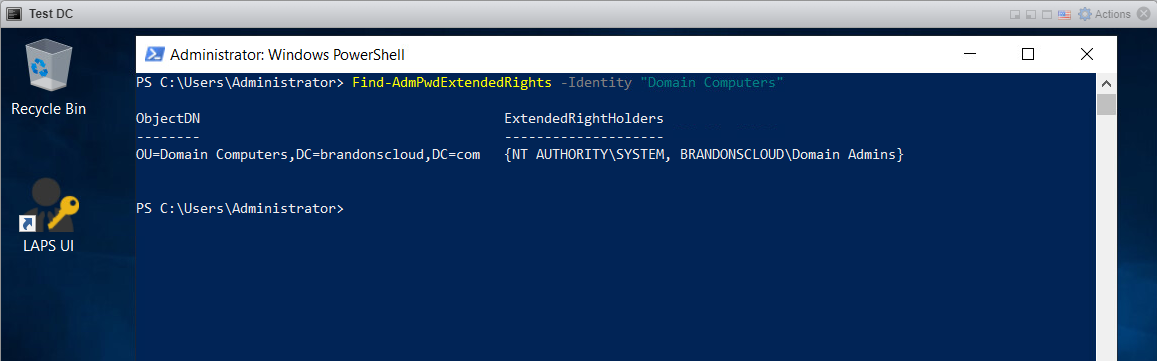
Assign Permissions to Administrators
I will then assign the proper permissions to allow administrators to view the passwords stored in Active Directory. First, I need to view the permissions that are currently set.
To this, I will run the following PowerShell command:
Find-AdmPwdExtendedRights -Identity "Domain Computers"
In my demo environment, I'm satisfied with only allowing administrators in the "Domain Admins" security group with access to the LAPS passwords. If you want to delegate permissions to an additional local administrators group (for example an "ITAdmins" group), you would need to run the following PowerShell command:
Set-AdmPwdReadPasswordPermission -Identity "Domain Computers" -AllowedPrincipals "ITAdmins"
Install the CSE on Workstations
There are several ways to install the CSE (LAPS.x64.msi) across your workstations. Manually installing it across every workstation may take some time, too. The easiest, and most convenient, way to deploy the CSE is using a Group Policy Object (GPO).
Microsoft already provides us with a .msi file. The "msi" file extension stands for Microsoft Software Installer. It is a Windows Installer format that uses Microsoft's Windows Installer service to configure installer packages, such as Windows applications or update packages. (ref. MSI File - What is, how to open and edit it?)
So knowing that I have a msi file that I can use to install software, I will create a GPO to deploy the application.
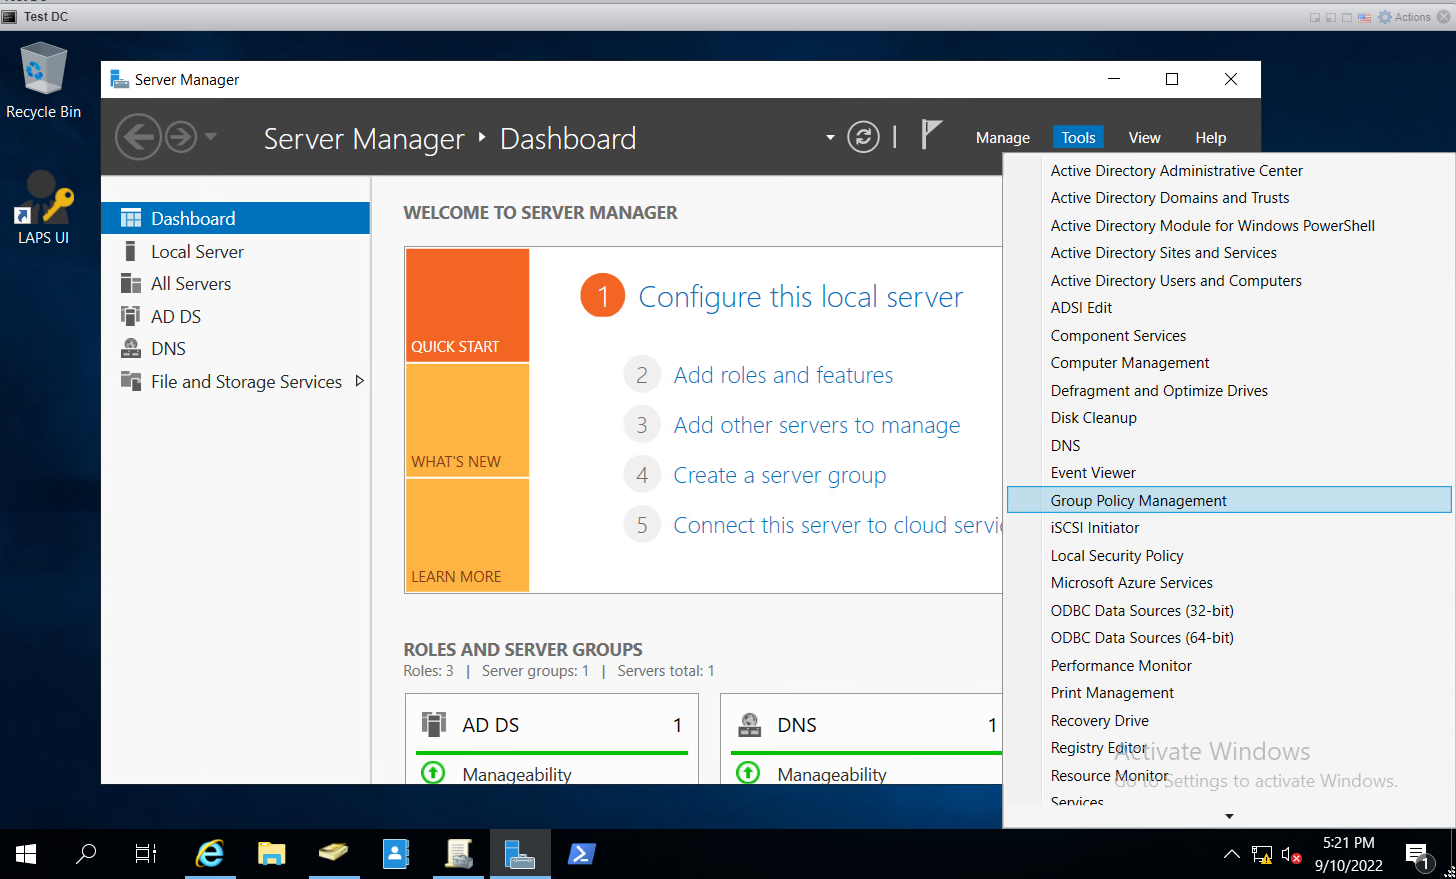
1) In your Domain Controller, launch GPMC (Group Policy Management Console) in Server Manager or search for gpmc.msc in the Windows start menu.
2) Create a new Group Policy under the Domain Computers OU.

3) Then right-click on the group policy and click on Edit
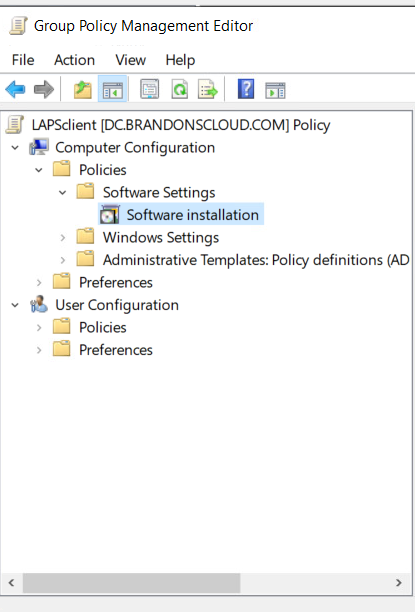
4) Then navigate to Computer Configuration | Policies | Software Settings | Software Installations
5) Right-click on it and select New | Package
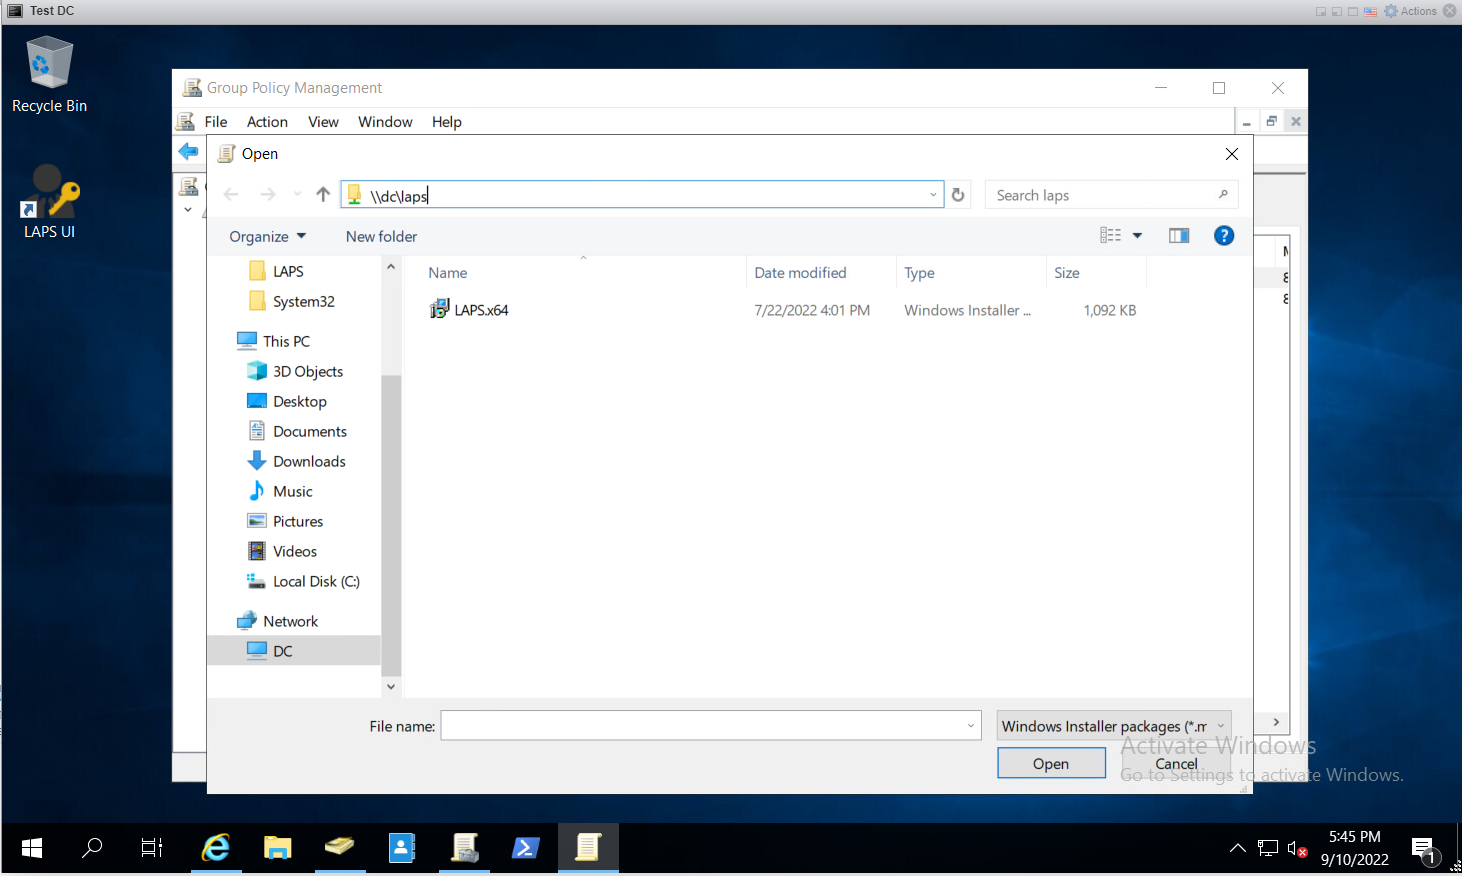
6) A File Explorer window will open. Then browse to a network share that has LAPS.x64.msi file. In this demo, I am using path \\dc\LAPS\LAPS.x64.msi and this share has read permissions for everyone.
7) Then in the next window select the deployment method as “Assigned”
This will deploy the LAPS agent to all the computers in the "Domain Computers" OU. The installation will require a reboot on the client's computer to complete the installation.
GPO for LAPS Password Settings
I now need to create a password policy for the computers using LAPS. You can use the same policy for the LAPS deployment, or you can create a new GPO.
1) With the GPMC (Group Policy Management Console) open, create a new Group Policy under the Domain Computers OU.
2) Then right-click on the group policy and click on Edit
3) Then navigate to Computer Configuration | Policies | Administrative Templates | LAPS
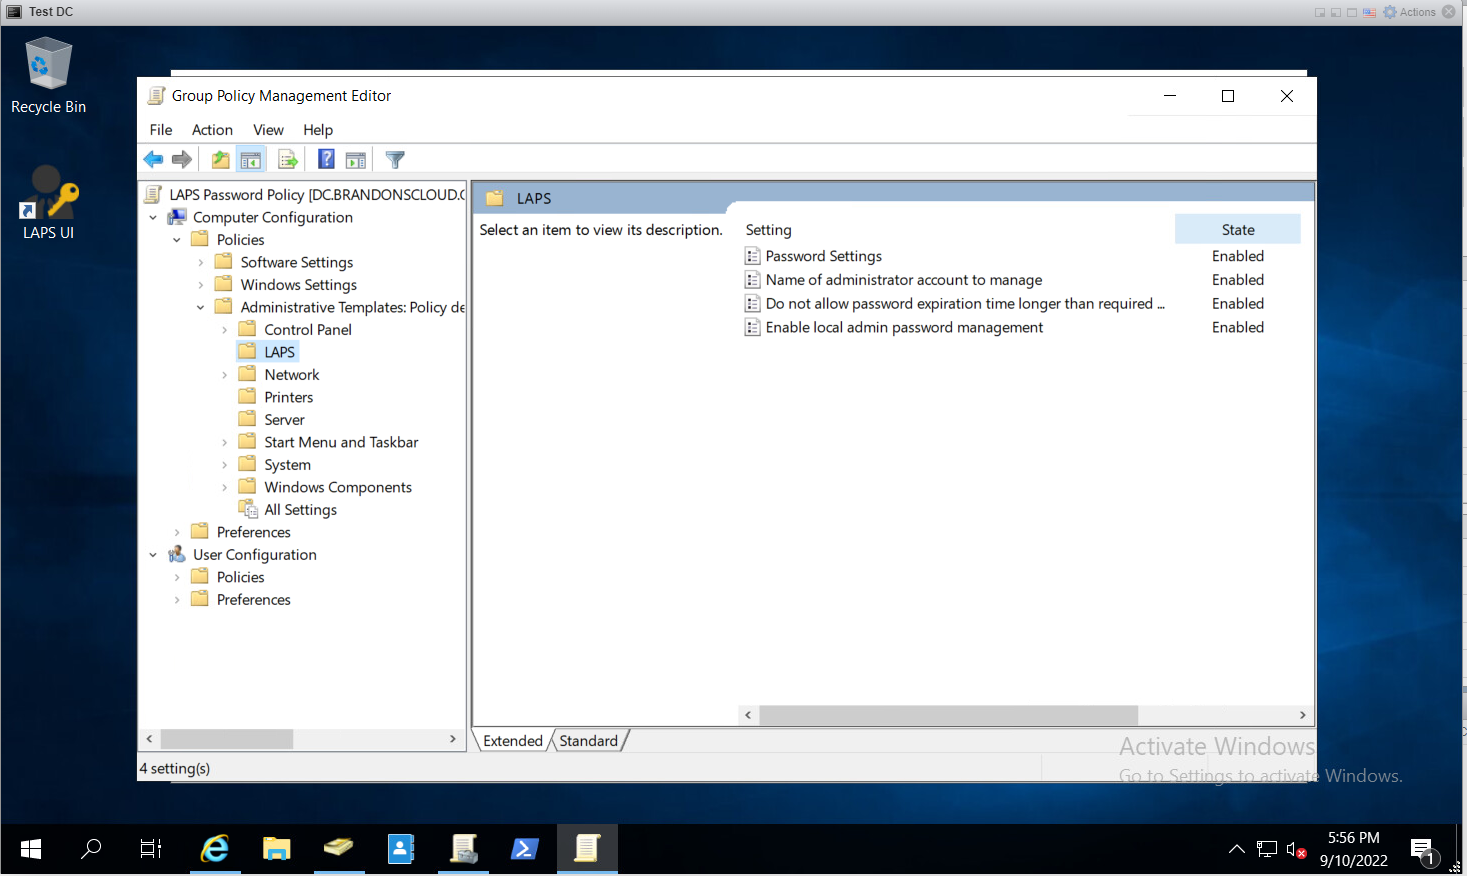
4) I will then go through all the listed polices and set them to Enable. The policies are described more in detail below:
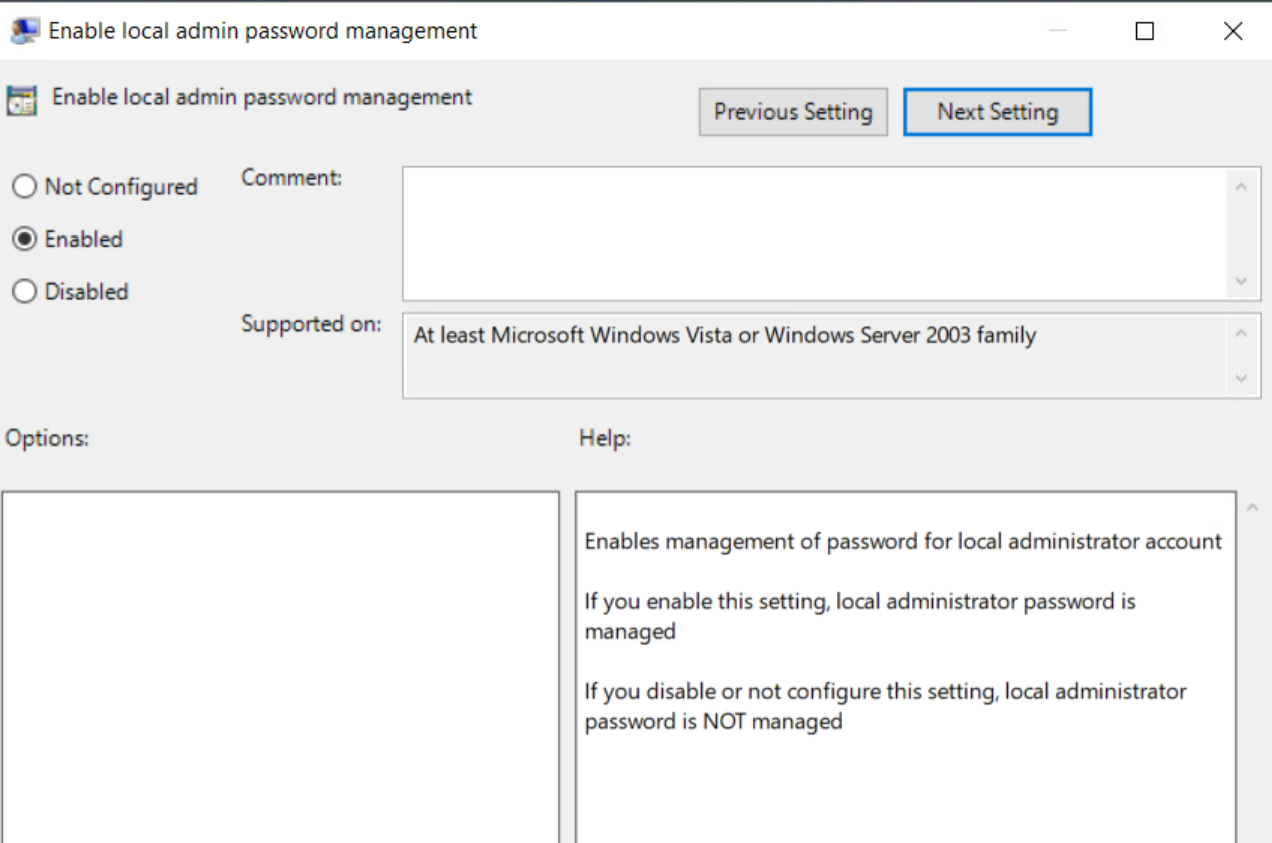
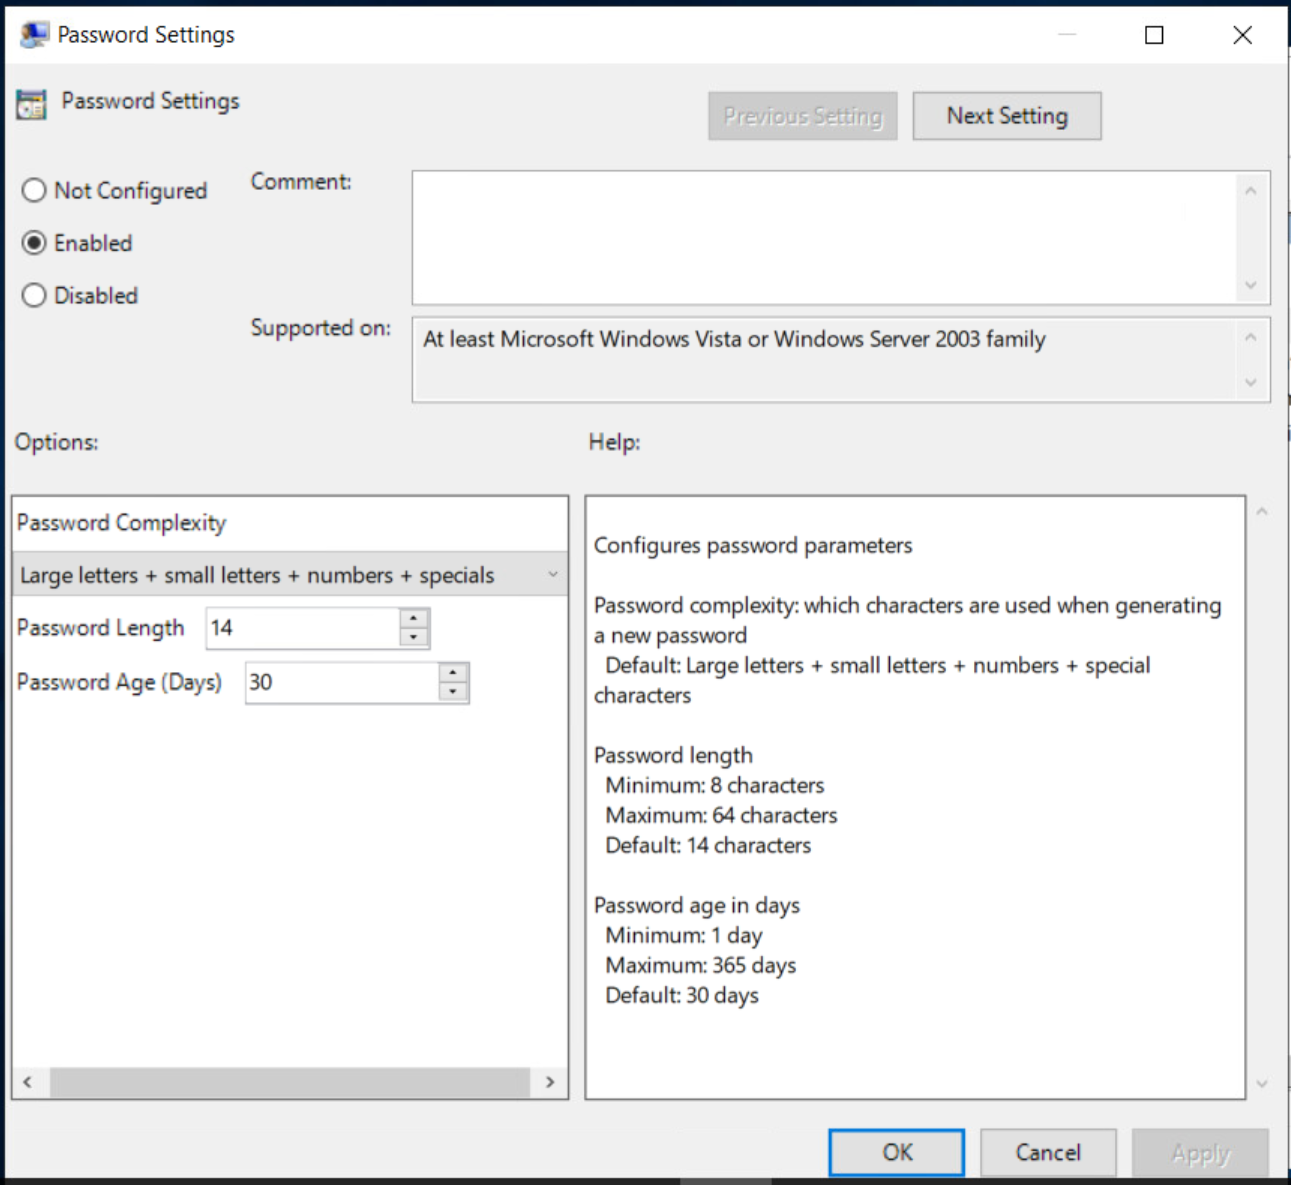
- Enable local admin password management: Enabled; This enables management of the local administrator account.
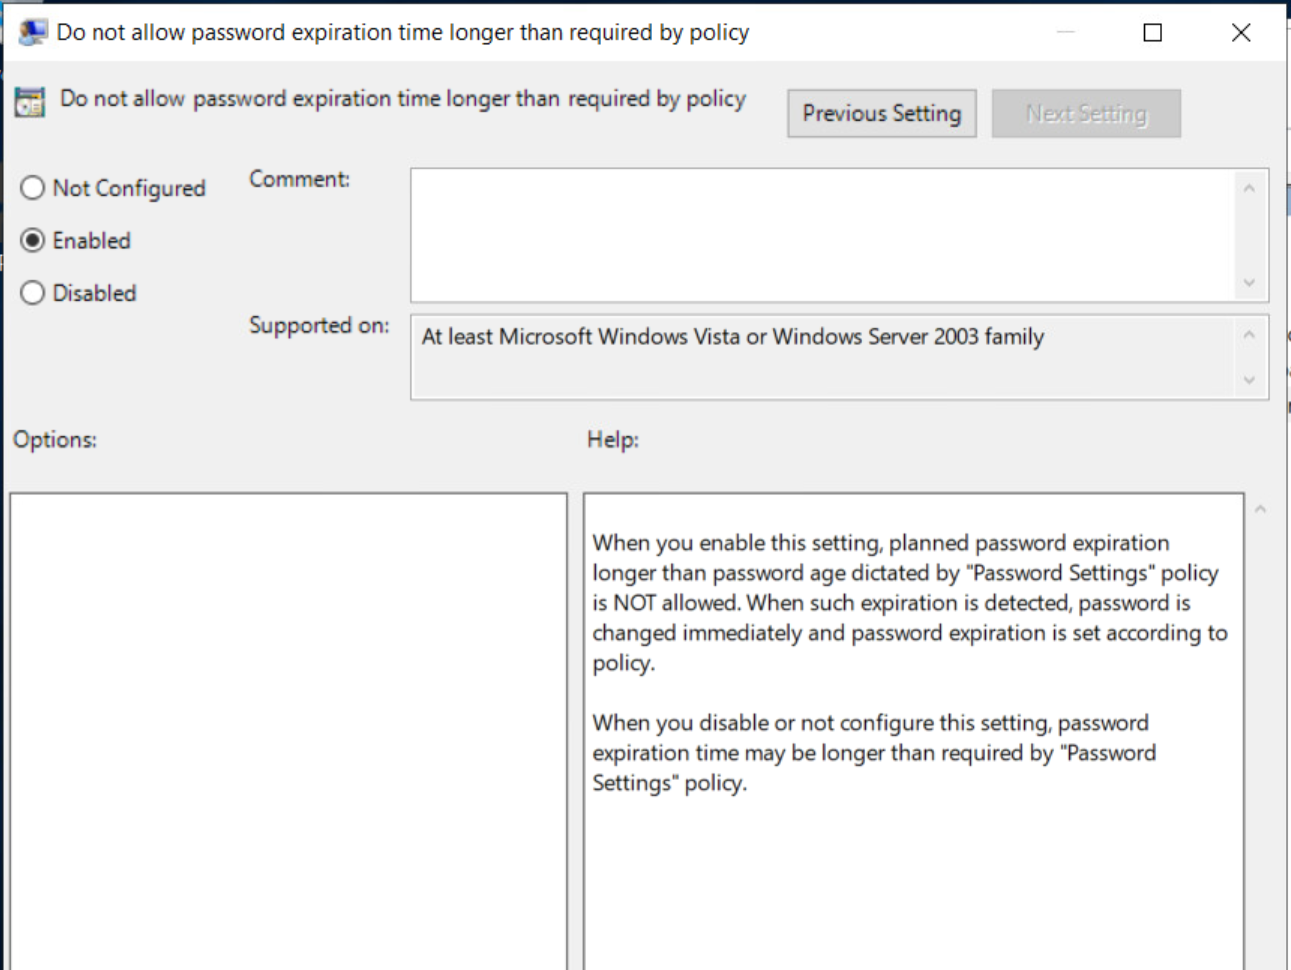
- Do not allow password expiration time longer than required by policy: Enabled; If an administrator password is expired, it will be changed immediately.
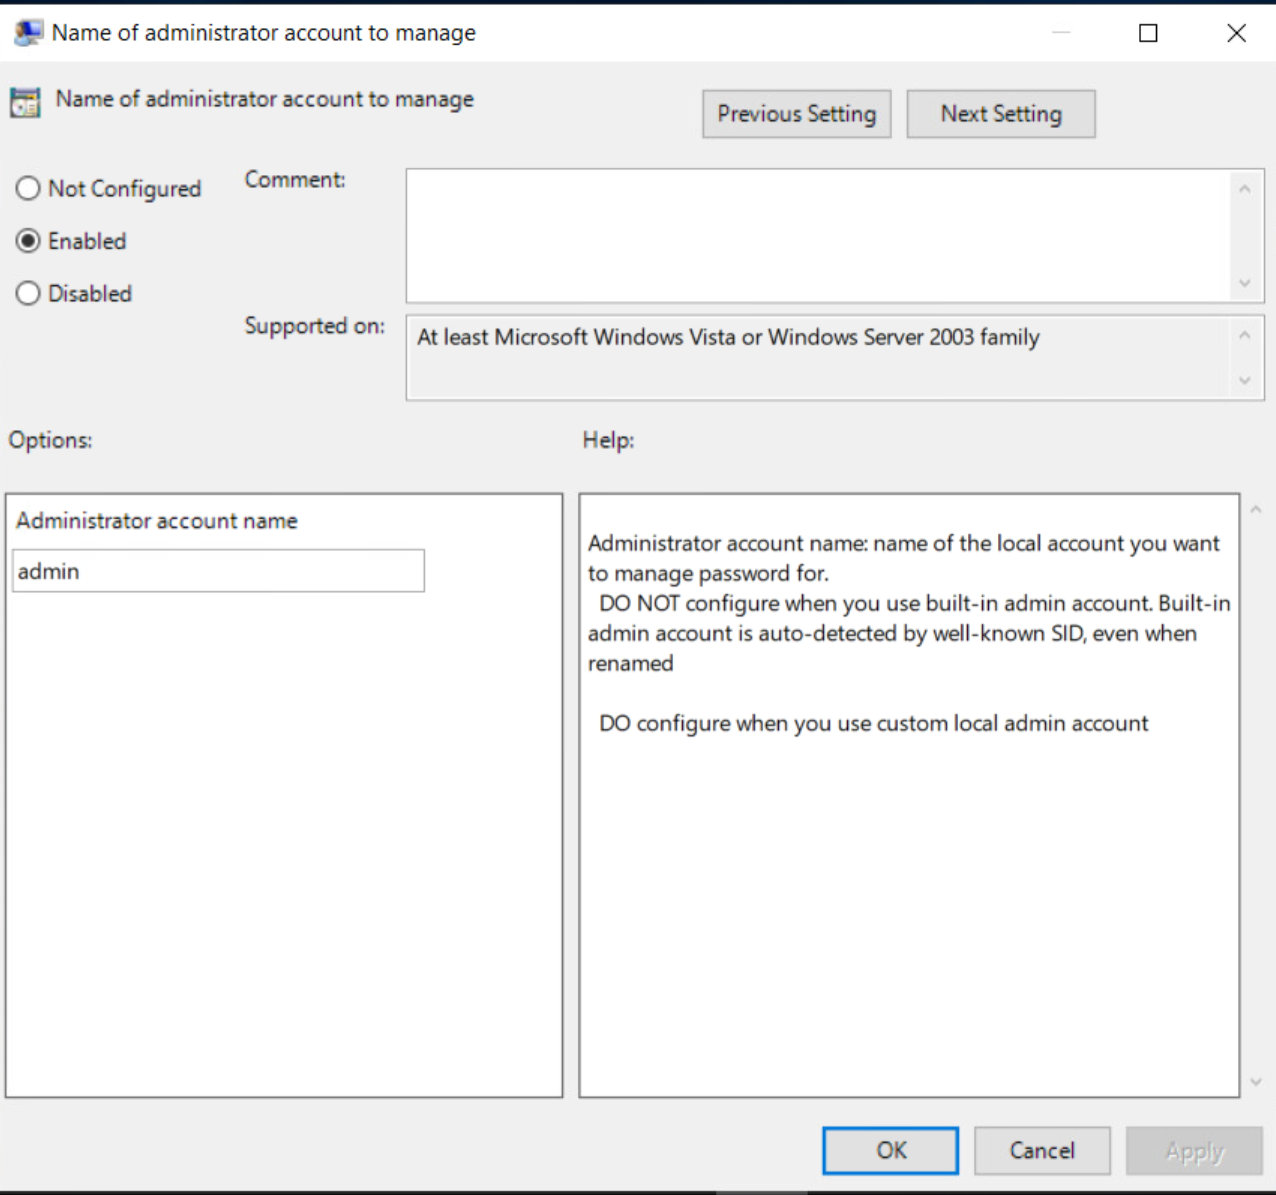
- Name of administrator account to manage: Use this policy if you use an administrator account other than the built-in Administrator; Sometimes you may use a different named account (ie. "admin" or "xadministrator")
- Password Settings: Enabled, configure the complexity, length, and frequency of changing the password here. I have mine set below.
Testing and Verifying LAPS is Working
Now that the LAPS policies have been set, we need to make sure the client computers are generating new passwords. Since we set the CSE to deploy using a Group Policy Object, we will need to wait for the workstations to update their Group Policy. According to the Microsoft documentation, Group Policy is automatically refreshed when you restart the domain member computer, or when a user logs on to a domain member computer. In addition, Group Policy is periodically refreshed. By default, this periodic refresh is performed every 90 minutes with a randomized offset of up to 30 minutes.
I then restarted the WINDOWS10 and WINDOWS11 computers and logged in with a domain account. Once the workstations were restarted, I can now check the LAPS UI on the Domain Controller.
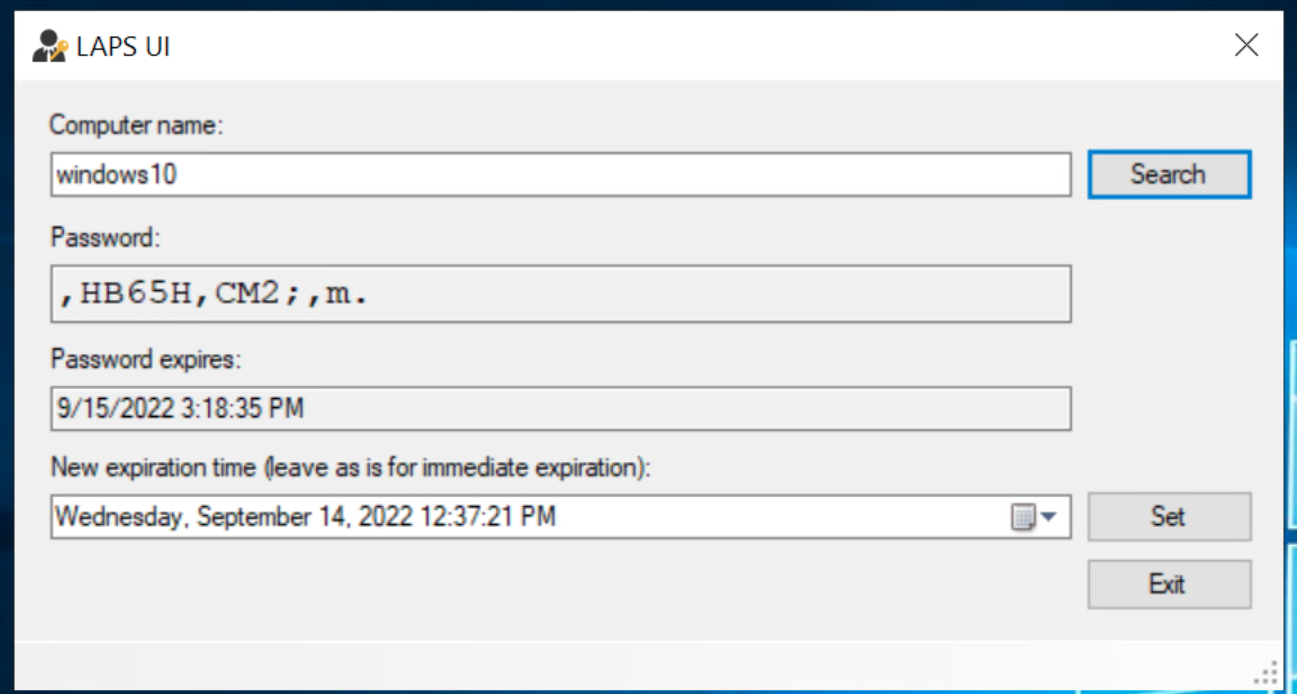
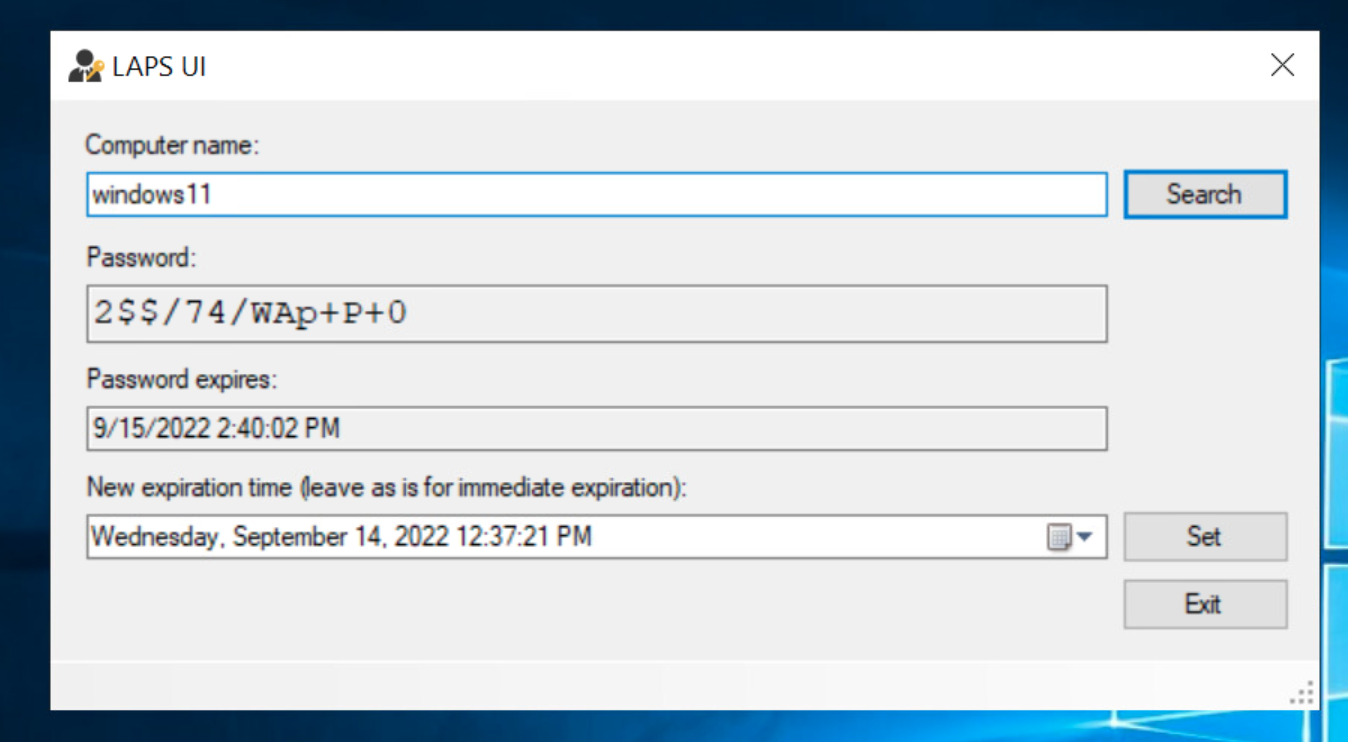
It looks like it's working as expected. I can also set a new password expiration time in the last box in the LAPS UI. By default, it will enter the current date and time. If I select "Set" that will set that date and time to the expiration time.
And we are done!
Conclusion
Hopefully, this guide will be able to help you set up LAPS in your Domain environment. The instructions in the LAPS documentation may be a bit intimidating, but thankfully there are additional step-by-step guides out there that were able to help me. Please see the following two guides for additional information:
Blog cover photo by Hal Gatewood on Unsplash


