

Reverse Proxies for Web Applications
How you can deploy one with NGINX

My name is Brandon, and I currently work as an Information Technology Consultant in the Atlanta metropolitan area.
I am not a developer, but I enjoy learning about cloud and data center technologies. I also technically own "Brandon's Cloud, LLC" as my own consulting company.
At my current employer, we host a fleet of virtualized servers that runs a logistics web application. This web application allows our member distributors to effectively manage the transportation of shipments.
However, each server in the fleet has been assigned its own public IP address. If I have 10 web servers, it means that I must provision 10 public IP addresses. That could be a significant chunk of my public IP addresses that I theoretically rent from my Internet Service Provider (ISP). If my ISP gives me a /27 or /28 address block, then that could be a problem for other services I need to provide a public IP address to (30 useable IP addresses for a /27 and 14 useable IP addresses for a /28).
Provisioning all those public IP addresses also increases my company’s digital footprint. For 10 webservers, that could give hackers 10 different attack vectors.
Ouch! I do love my job, but I’m not trying to lose sleep overnight over it. So how can I fix this?
This is where a Reverse Proxy Server would be useful.
What is a Reverse Proxy Server?
According to NGINX (pronounced “Engine X”, one of the most commonly used open-sourced web servers used for web serving, reverse proxying, caching, load balancing, media streaming, and more), a reverse proxy server is a type of proxy server which directs client requests to the appropriate backend server. It provides an additional level of abstraction and control to ensure the smooth flow of network traffic between clients and servers.
In layman’s terms, it’s a server that sits in front of your other web servers and acts as a “traffic cop,” directing requests to the appropriate server.
Other benefits of having a Reverse Proxy Server include the following:
Improved Security: A reverse proxy server intercepts requests headed for your backend servers. This protects the identities of your backend servers against common web attacks. By placing your pool of web servers behind a reverse proxy, you only expose one server to the public internet, further protecting all your backend servers.
Load Balancing: If your web application is hosted across multiple servers, the Reverse Proxy Server can distribute web requests across your pool of servers preventing any single server from being overloaded.
Improved Performance: A reverse proxy server can compress both inbound and outbound data, cache content, and conduct SSL encryption, resulting in faster performance.
How does a Reverse Proxy Work?
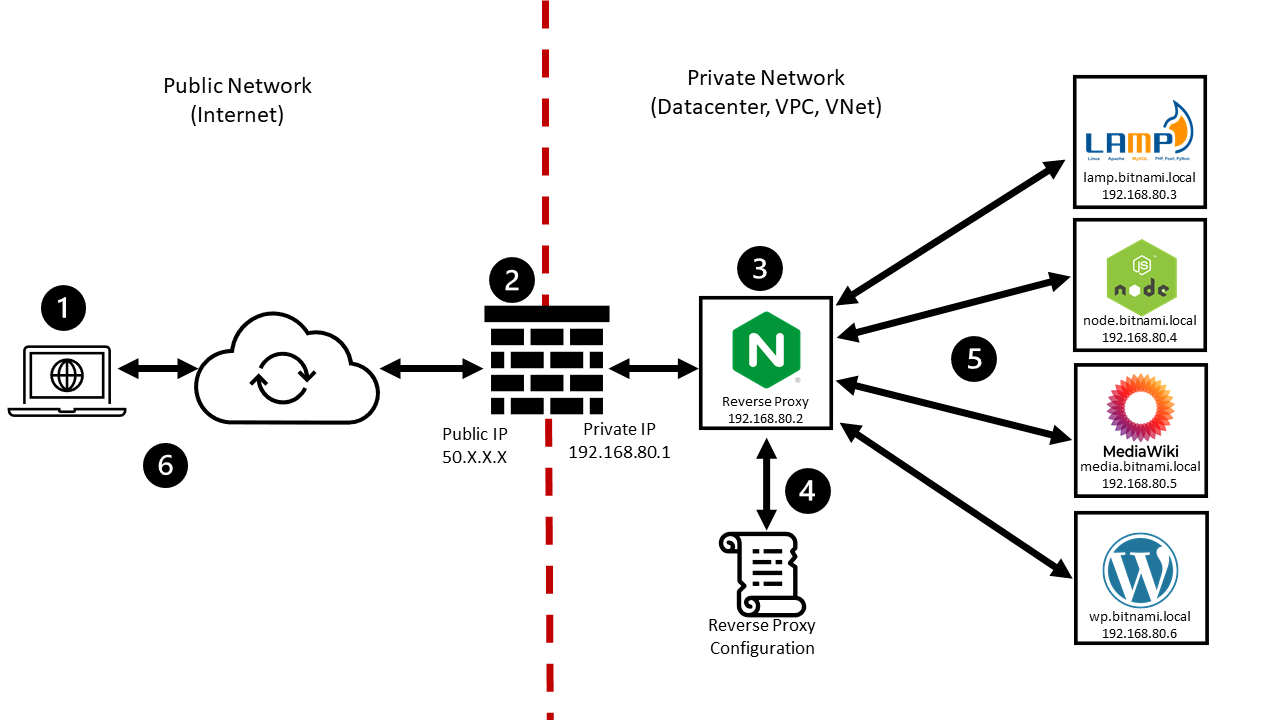
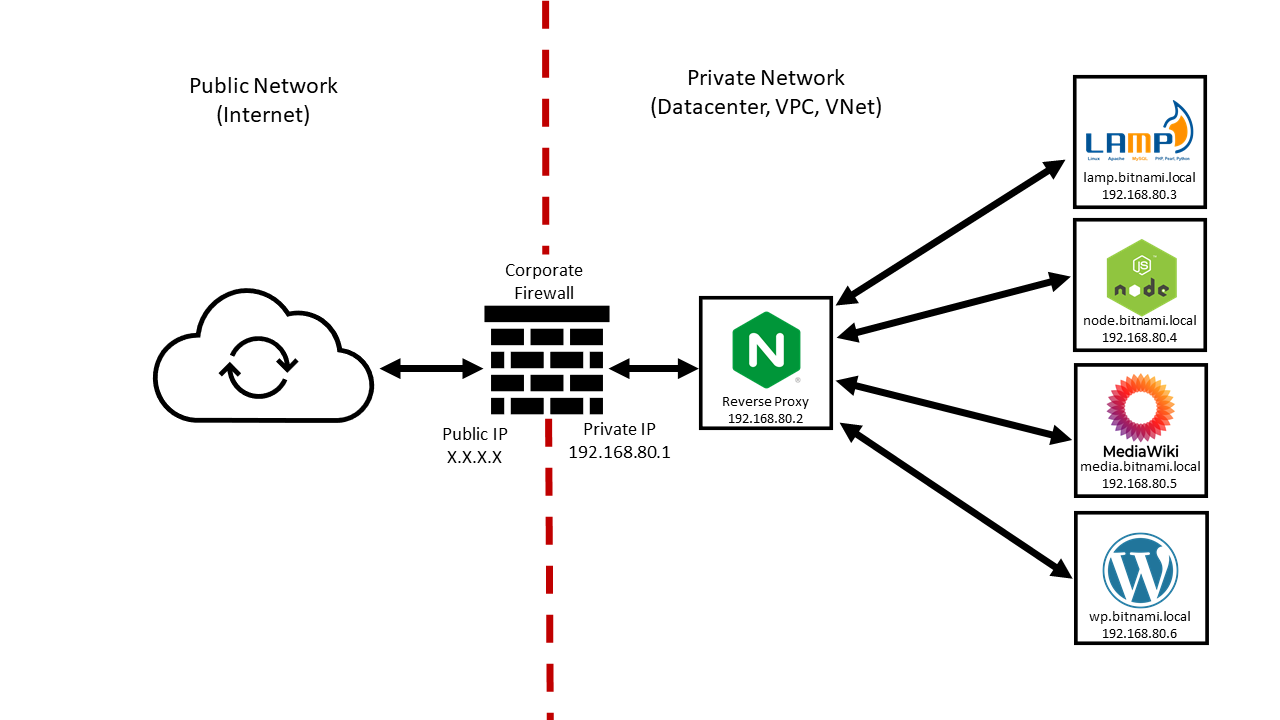
If you look at the above diagram may make you a bit confused about how a reverse proxy would work. Let me try to simplify this process in a step-by-step manner:
- A public user will first request to access your web server via the public internet.
- The corporate firewall receives the request on the publicly facing interface, inspects the request, and forwards it to the Reverse Proxy in the private corporate network.
- The Reverse Proxy receives the incoming request and inspects the destination address.
- The Reverse Proxy then checks the reverse proxy configuration file to determine the appropriate private IP address to send the request to.
- The incoming request is then sent to the appropriate backend web server.
- The backend web server then sends the response data back to the public user.
Demonstration Setup
To demonstrate this concept of a reverse proxy, I set up a lab environment on VMware Workstation Pro using an NGINX virtual machine and four different pre-made web-application virtual machines from Bitnami.
Deploying Virtual Machines
Bitnami by VMware provides pre-packaged images for the automated setup of popular server software on Windows, Mac OS X, and Linux platforms. Bitnami also provides pre-packaged virtual machines. Using the Bitnami Virtual Machine (VM) image requires hypervisor software such as VMware Player or VirtualBox. Both of these hypervisors are available free of charge.
In this lab, I chose the following Bitnami Virtual Machines:
This gave me a decent sample of various web applications. I also installed NGINX on a virtual machine running Ubuntu Server 20.04 LTS.
Once I had the VMs running, logged in to each VM and assigned a static IP address. I kept it simple and assigned static private addresses in sequential order. I didn’t start with a .1 address because that would be the gateway address to the virtual subnet (VLAN).
- NGINX – 192.168.80.2
- LAMP – 192.168.80.3
- Node.JS – 192.168.80.4
- MediaWiki – 192.168.80.5
- WordPress – 192.168.80.6
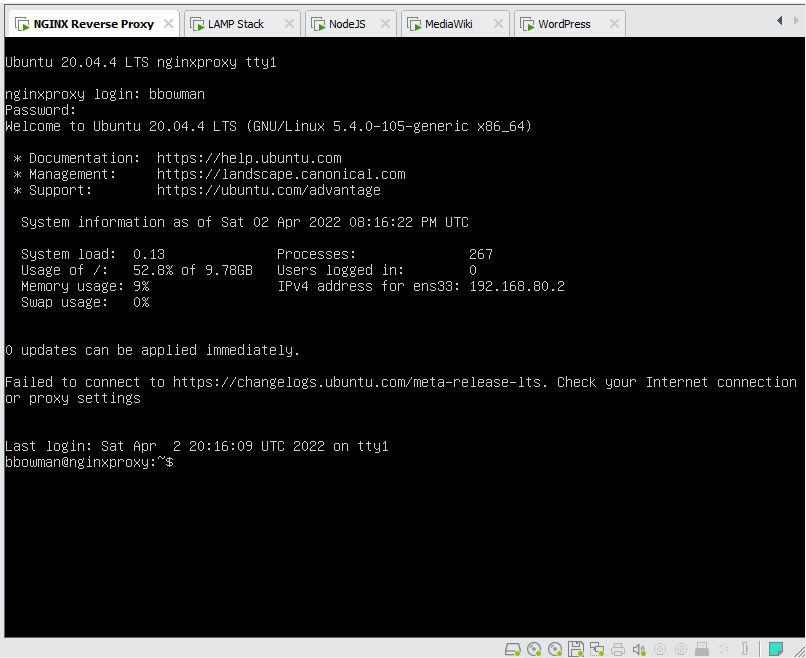
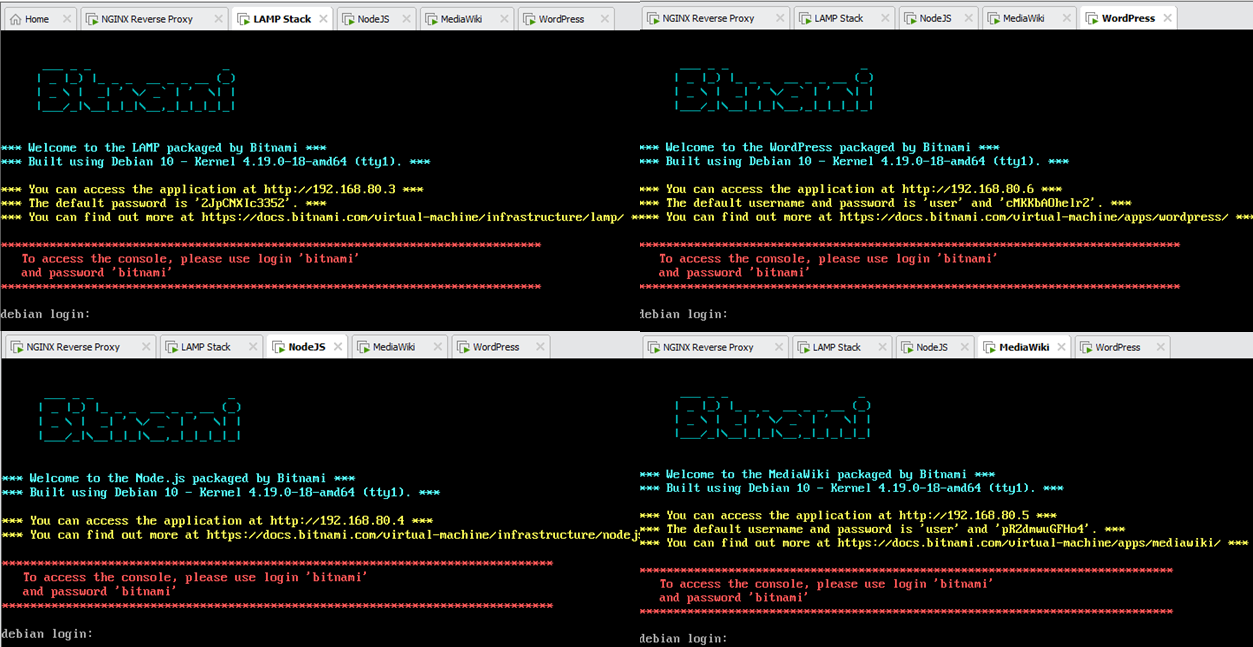
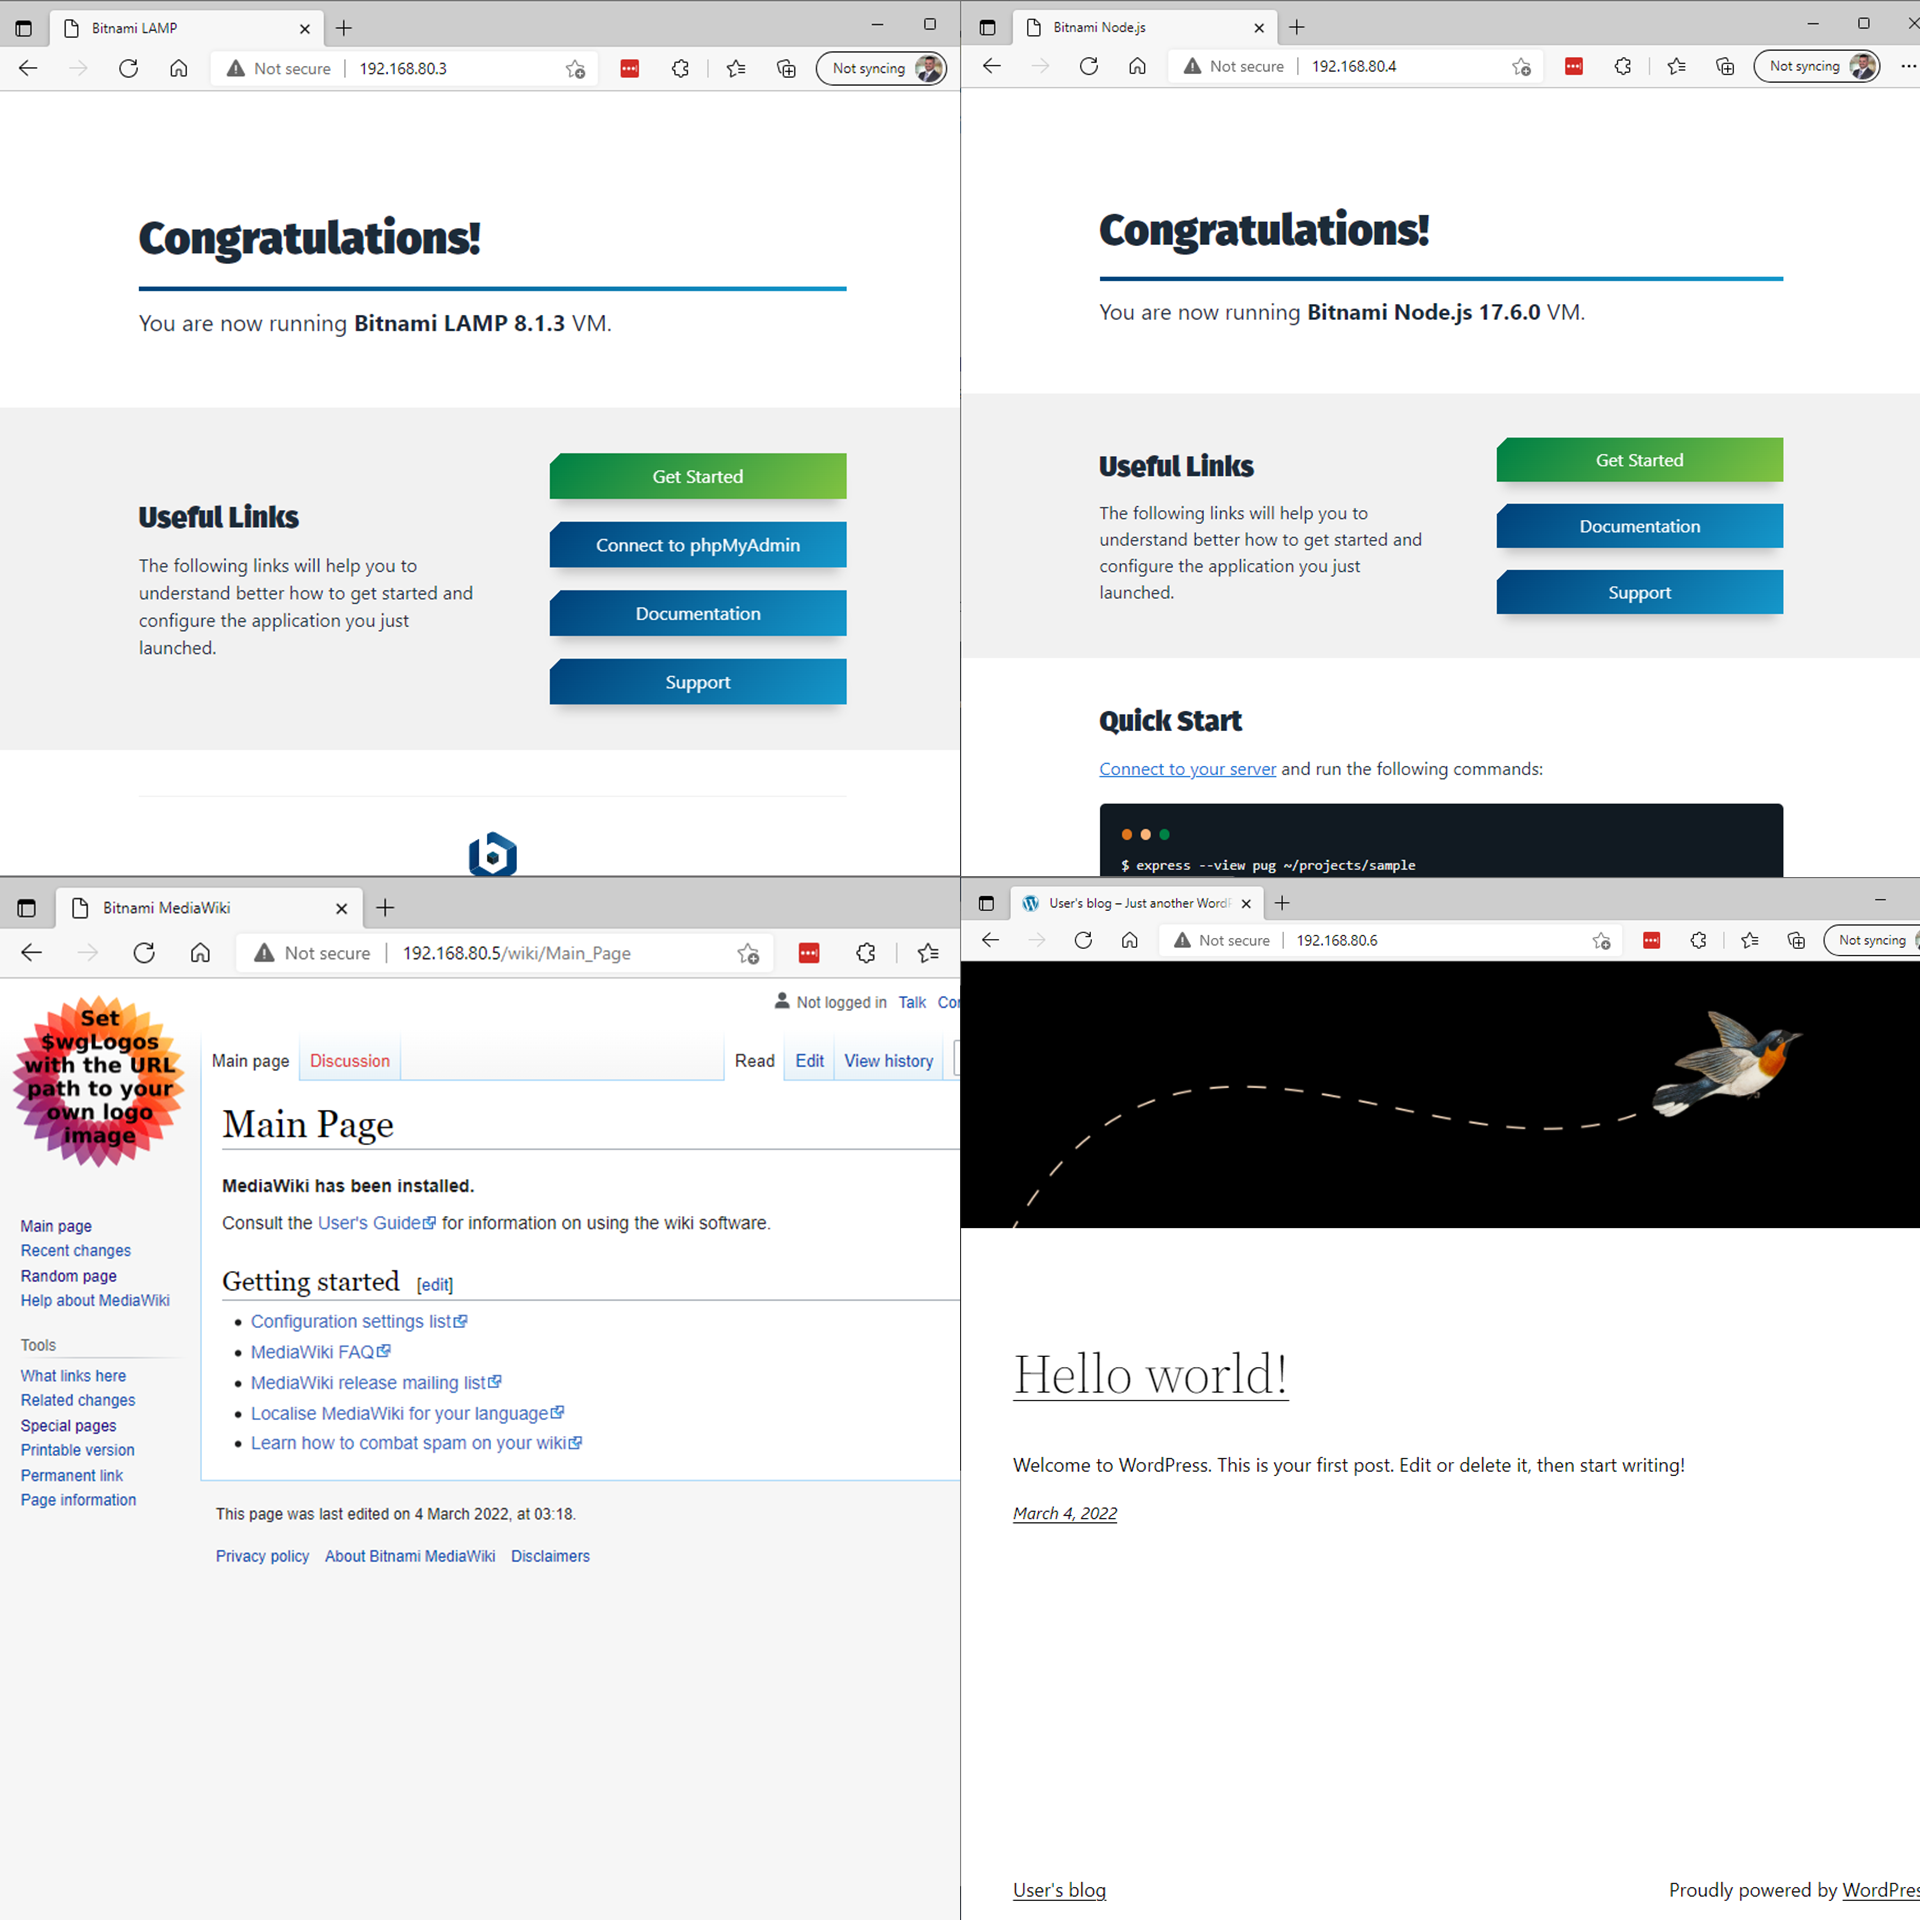
The images above show my 5 virtual machines running in VMware Workstation Pro all with the appropriately assigned addresses, and running as expected in their default states.
NGINX Configuration Files
Once I had the static IP addresses configured, I had to edit the reverse proxy configuration file on the NGINX virtual machine. First I need to look at the default NGINX configuration file.
NGINX uses text-based configuration files written in a particular format. The default configuration file is named nginx.confand is commonly located in the /etc/nginx directory. The location of the nginx.conf depends on the package system used to install NGINX and the operating system. It is may be found in /usr/local/nginx/conf, /etc/nginx, or /usr/local/etc/nginx. An example of the NGINX configuration file can be found here.
Here is what my default nginx.conf looks like:
user www-data;
worker_processes auto;
pid /run/nginx.pid;
include /etc/nginx/modules-enabled/*.conf;

events {
        worker_connections 768;
        # multi_accept on;
}

http {

        ##
        # Basic Settings
        ##

        sendfile on;
        tcp_nopush on;
        tcp_nodelay on;
        keepalive_timeout 65;
        types_hash_max_size 2048;
        # server_tokens off;

        # server_names_hash_bucket_size 64;
        # server_name_in_redirect off;

        include /etc/nginx/mime.types;
        default_type application/octet-stream;

        ##
        # SSL Settings
        ##

        ssl_protocols TLSv1 TLSv1.1 TLSv1.2 TLSv1.3; # Dropping SSLv3, ref: POODLE
        ssl_prefer_server_ciphers on;

        ##
        # Logging Settings
        ##

        access_log /var/log/nginx/access.log;
        error_log /var/log/nginx/error.log;

        ##
        # Gzip Settings
        ##

        gzip on;

        # gzip_vary on;
        # gzip_proxied any;
        # gzip_comp_level 6;
        # gzip_buffers 16 8k;
        # gzip_http_version 1.1;
        # gzip_types text/plain text/css application/json application/javascript text/xml application/xml application/xml+rss text/javascript;

        ##
        # Virtual Host Configs
        ##

        include /etc/nginx/conf.d/*.conf;
        include /etc/nginx/sites-enabled/*;
}


#mail {
#       # See sample authentication script at:
#       # http://wiki.nginx.org/ImapAuthenticateWithApachePhpScript
#
#       # auth_http localhost/auth.php;
#       # pop3_capabilities "TOP" "USER";
#       # imap_capabilities "IMAP4rev1" "UIDPLUS";
#
#       server {
#               listen     localhost:110;
#               protocol   pop3;
#               proxy      on;
#       }
#
#       server {
#               listen     localhost:143;
#               protocol   imap;
#               proxy      on;
#       }
#}
Now, this may seem like a lot of information, but most of the configuration is commented out. The NGINX Beginner's Guide explains this structure in an easier manner:
I can see that in the http{ top-level directive, referred to as a context, there is a section for Virtual Host Configs that includes the following:
        ##
        # Virtual Host Configs
        ##

        include /etc/nginx/conf.d/*.conf;
        include /etc/nginx/sites-enabled/*;
This means that any configuration files I place in /etc/nginx/conf.d/ and /etc/nginx/sites-enabled/ will be included into the default NGINX configuration. I don't exactly want to place my reverse proxy configuration straight into the default nginx.conf because that could make things a little unorganized.
If I look into the /etc/nginx directory, I can see that there is also a /sites-available directory available.

What's the difference between sites-available and sites-enabled?
The sites-available folder will hold all of your virtual host configuration files, whether you use them or not.
The sites-enabled folder will contain symbolic links to files in the sites-available folder. This will allow you to disable your virtual host just by removing the symbolic link.
I will now create my reverse-proxy.conf and place it in the /etc/nginx/sites-available/ directory.
cd etc/nginx/sites-available/
sudo vi reverse-proxy.conf
I will then paste the following strings into the file:
server {
    listen 80;
    server_name lamp.bitnami.local;
    location / {
        proxy_pass http://192.168.80.3;
        }
}

server {
    listen 80;
    server_name nodejs.bitnami.local;
    location / {
        proxy_pass http://192.168.80.4;
    }
}

server {
    listen 80;
    server_name media.bitnami.local;
    location / {
        proxy_pass http://192.168.80.5;
    }
}

server {
    listen 80;
    server_name wp.bitnami.local;
    location / {
        proxy_pass http://192.168.80.6;
    }
}
In the reverse-proxy.conf I have included several server blocks that are all listening on port 80 (http). Each sever``` block will have aserver_name``` directive. When a request comes in, NGINX will test only the request’s header field “Host” to determine which server the request should be routed to. If its value does not match any server name, or the request does not contain this header field at all, then NGINX will route the request to the default server for this port. In the configuration above, the default server is the first one — which is NGINX’s standard default behavior.
You can also explicitly set which server should be default, with the default_server parameter in the listen directive. If I wanted to set my LAMP application to be the default, I would have placed the following into the configuration:
server {
    listen 80 default_server;
    server_name lamp.bitnami.local;
    location / {
        proxy_pass http://192.168.80.3;
        }
}
However, if requests without the "Host" header field (requests without a pre-defined URL) should not be allowed, I could insert the following server block that just drops the request:
server {
    listen      80;
    server_name "";
    return      444;
}
Here, the server_name is set to an empty string that will match requests without the “Host” header field, and a special NGINX’s non-standard code 444 is returned that closes the connection. I will add this block to my reverse-proxy.conf.
Configuring My Local DNS
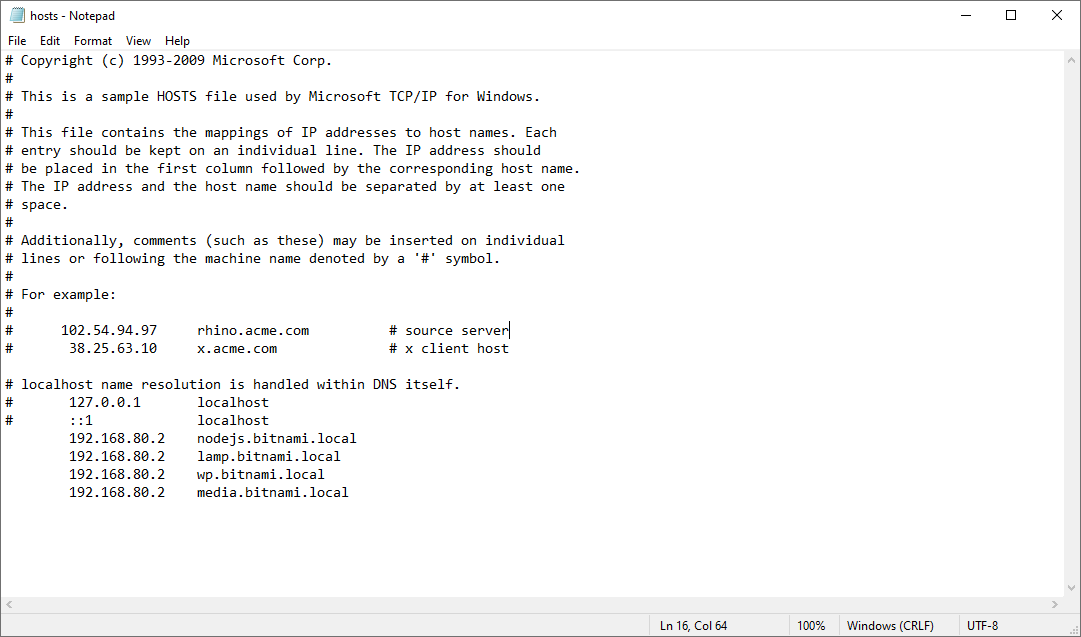
Since these web applications are not available to the public internet, I now have to edit my hosts file on my local machine to assume the role of a Domain Name Service (DNS).
On a Windows 10 computer, you will have to search for Notepad in the Windows Search menu and choose to Run as administrator. Once you’ve done so, open up the following file using the File -> Open feature. The hosts file is located in the C:\Windows\System32\drivers\etc folder.

Feel free to check out the tutorial in the link below if you're having trouble with this.
I will then edit the hosts inserting entries into the file by placing the IP address of the NGINX proxy next to the server_name entries of the web applications. All the server_name entries will have the same IP address so that the web requests can go through the NGINX reverse proxy. Save the file when this is complete.
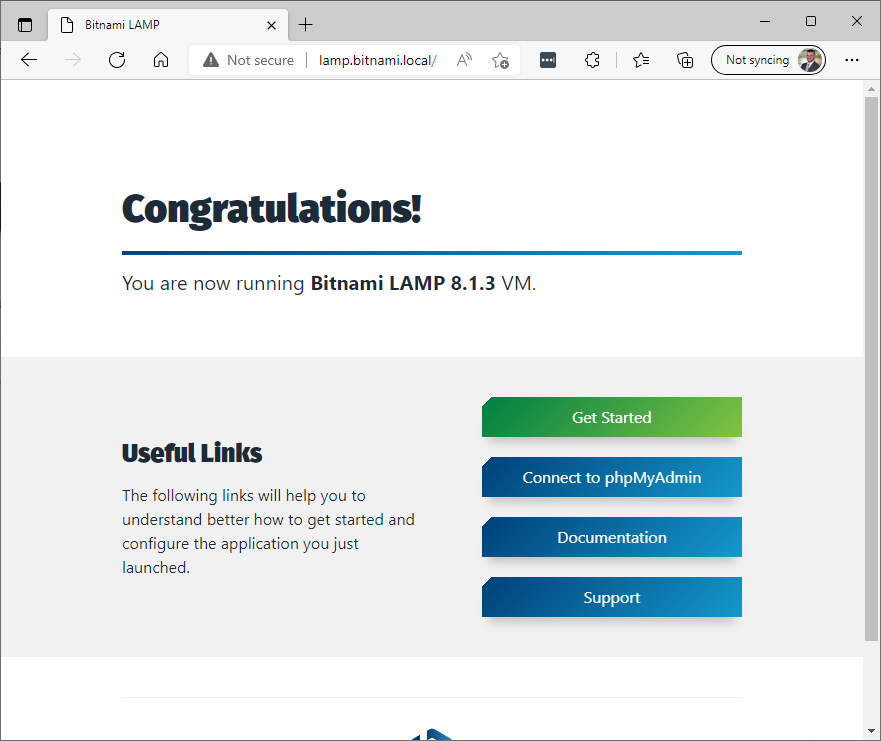
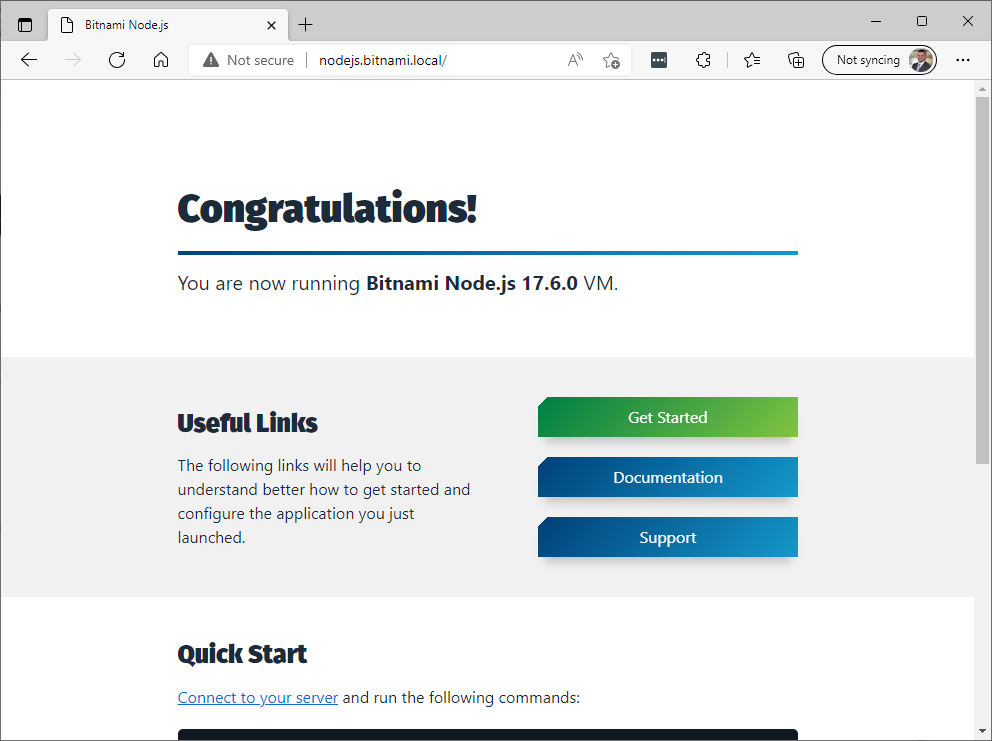
Testing the Reverse Proxy
Now we will test the reverse proxy. By default, most browsers will assume that you are trying to connect to a website that has a SSL/TLS certificate installed and will insert https:// into your request. Therefore, I will have to type out the entire address.
http://lamp.bitnami.local
http://nodejs.bitnami.local
http://media.bitnami.local

http://wp.bitnami.local
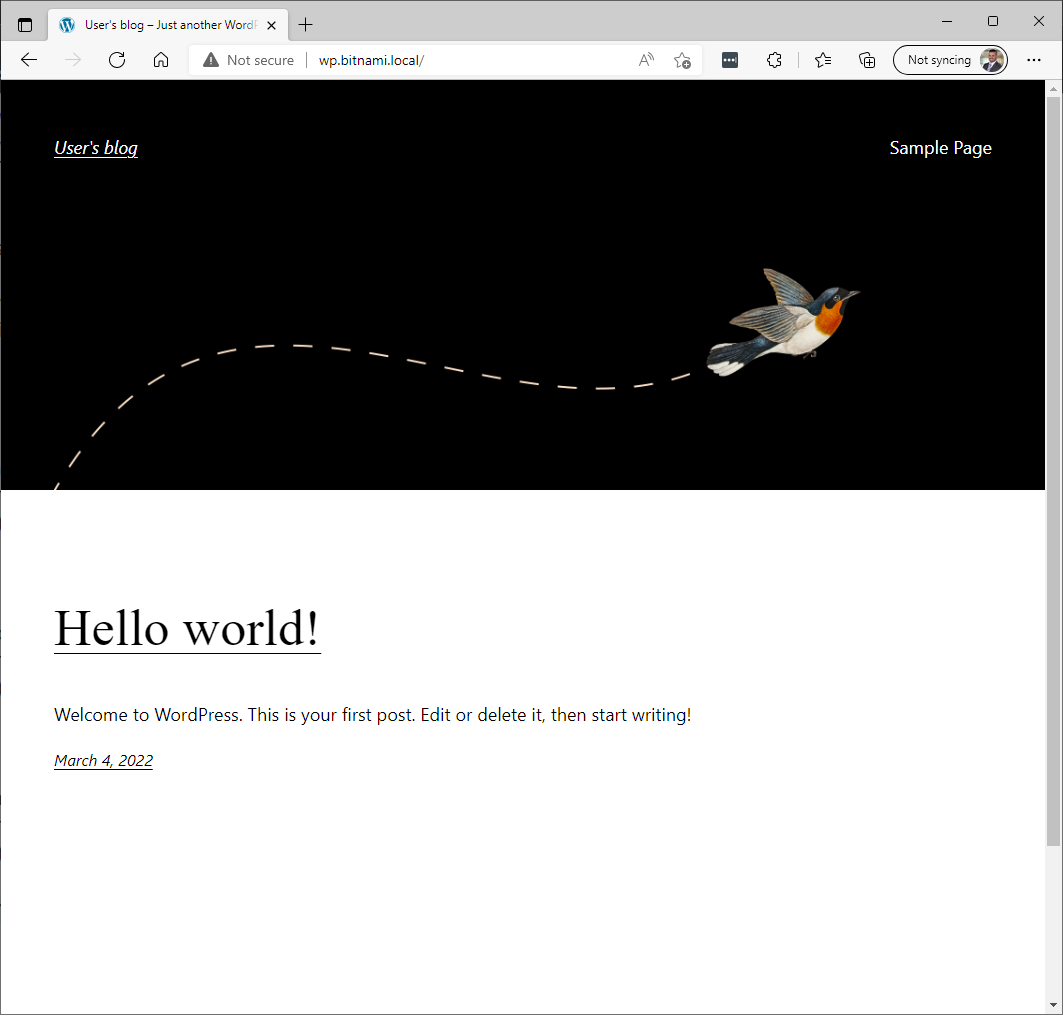
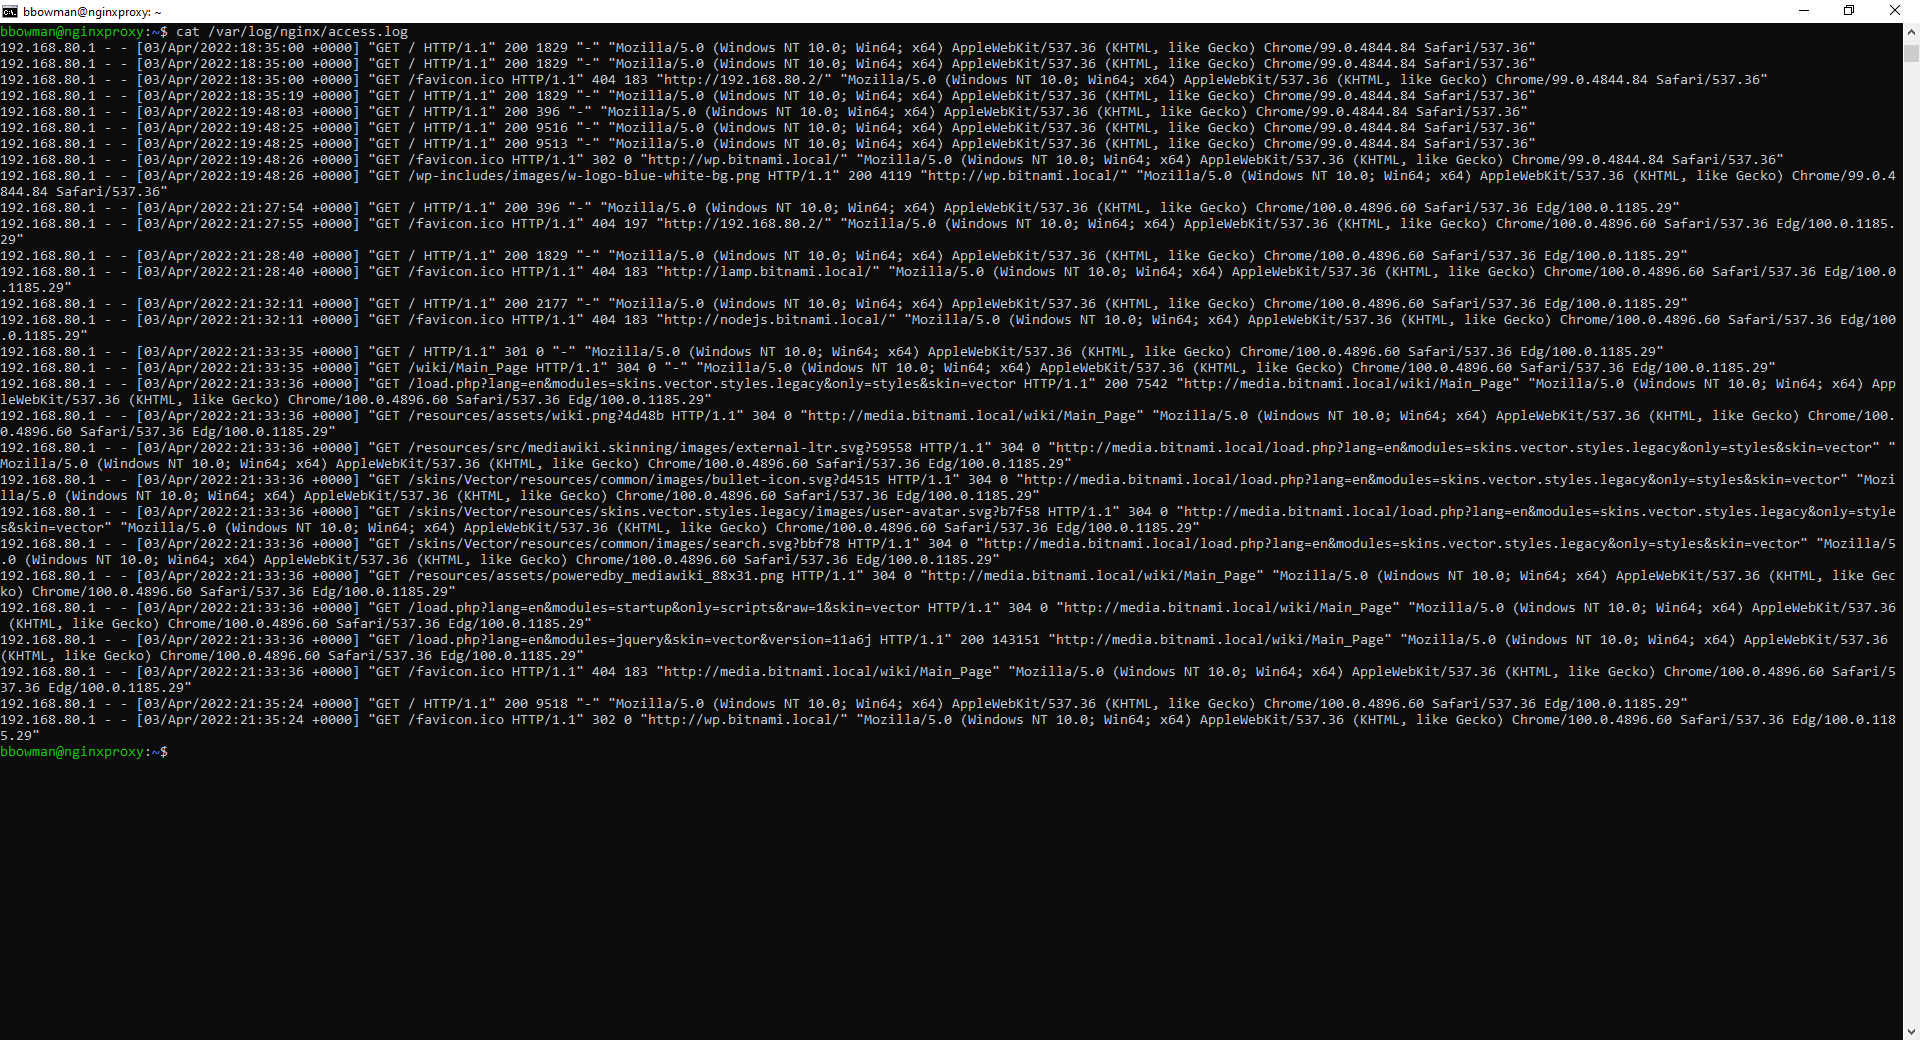
Everything looks good! I can now look at the NGINX access.log to see the requests. This file is located at /var/log/nginx/access.log
This was just a simple demonstration of how a reverse proxy works and how it can be easily configured. There are many options you can include in the reverse-proxy.conf such as passing request headers and choosing an outgoing IP address. Check out the NGINX documentation for more information.
For a complete tutorial on NGINX, please feel free to look at The NGINX Handbook from FreeCodeCamp below.
Thank you for your time and please leave some comments below.
UPDATE:5/5/2022 Found this awesome webinar from NGINX if you're interested in getting a hands-on demonstration:
Hashnode Blog Photo by Jaffer Nizami on Unsplash


