Improving Security: Duo Access Gateway
Ripping out our Microsoft AD FS and implementing MFA to secure our Office 365 accounts
UPDATE February 15, 2022: Received an email that DUO is planning to deprecate the Duo Access Gateway with an End-of-Life by October 2023. Your best option is to use their cloud-hosted solution, Duo Single Sign-On.
Duo (owned by Cisco) is a user-centric access security platform that provides two-factor authentication, endpoint security, remote access solutions and more to protect sensitive data at scale for all users, all devices and all applications. They offer multiple products to help secure your organization from Multi-Factor Authentication, Device Trust, Remote Access, and Single-Sign-On.
Our company has been using Duo Security for Multi-Factor Authentication for several years now to protect some of our more critical assets, such as Remote Server access and Office 365 accounts. Outside of work purposes, I personally use the Duo Mobile app for a number of commercial services that allow for 2FA (ie. Amazon accounts, LinkedIn, banking, etc.)
When we ran a legacy Windows ADFS server, to federate our domain and allow a Single Sign-On for Office 365, we implemented Duo Authentication for Microsoft AD FS as our Multi-Factor Authentication (MFA) provider. It worked well with the AD FS 2.0 integration.
It worked fairly well and was pretty reliable. In January 2020, Microsoft officially ended support for Windows Server 2008 and it came time to update those ADFS servers.
Configuring a Windows ADFS server (and a web application proxy) isn't too challenging, and I was able to find enough articles online to get it working and installed within a few days. In a small business environment, it's hard to get any scheduled maintenance times during the week. Therefore I had to wait to get it done over the weekend; which isn't much of a problem.
Then it came to configuring the Duo Authentication for Microsoft AD FS. According to the Duo Security documentation, "the Duo AD FS module supports relying parties that use Microsoft's WS-Federation protocol, like Office 365, as well as SAML 2.0 federated logons for cloud apps like Google G Suite and salesforce.com." Duo Security provides step-by-step instructions which are pretty easy to understand. If you get stuck, then their Support personnel are quick to respond and easy to work with. I have had to call them a few times...
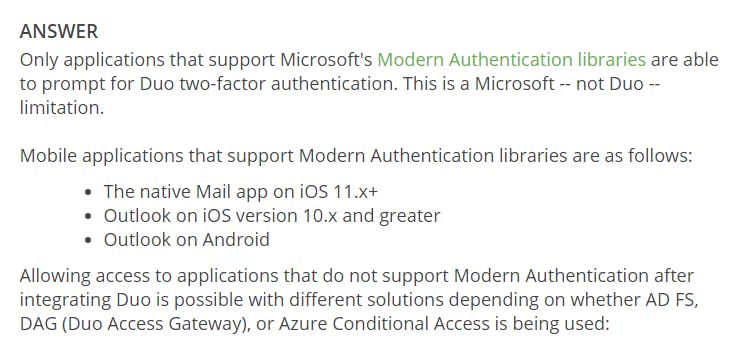
PROBLEM: After configuring the Duo AD FS module and testing, we were pretty confident that we had a good solution. Several days later, we had users reporting that they could not get email on their native mail apps on their mobile devices (iOS mail, Samsung Mail, etc.). One of those users was our CEO, who wanted to just use his iOS mail app. We tried to convince our users to move to the Outlook mobile app, but that was not successful. After some deep research, it turns out that these native mobile mail clients (at the time) ran on legacy Basic Authentication protocols. In a nutshell, Modern Authentication is more secure than Basic Authentication.
According to the Duo Security documentation, "this is a Microsoft -- not Duo -- limitation." But there is a solution! In the meantime, I had to disable the Duo AD FS module which did not provide secure our Office 365 accounts with MFA. Scary.... I know!
SOLUTION: After some research, I proposed implementing a Duo Access Gateway to completely replace our Microsoft AD FS.
"Duo Access Gateway is an on-premises solution that secures access to cloud applications with your users’ existing directory credentials (like Microsoft Active Directory or Google G Suite accounts) using the Security Assertion Markup Language (SAML) 2.0 authentication standard. SAML delegates authentication from a service provider to an identity provider, and is used for single sign-on (SSO) solutions."
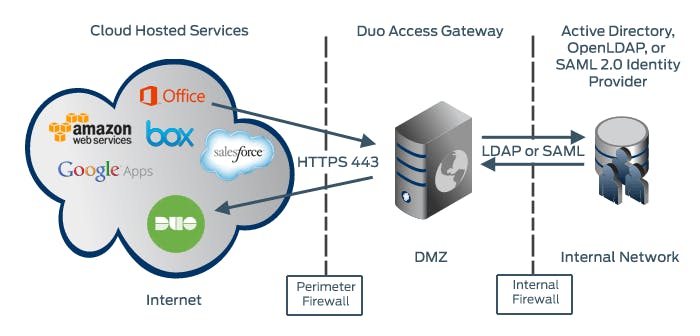
In terms of solving my problem, "Duo protection for Microsoft 365 via DAG includes a Basic Auth option that allows users accessing Office 365 from clients that do not support Modern Auth to still log in using only their AD username and password." Bingo! This could work!
(Duo has recently updated their DUO AD FS plugin that may now support Basic Auth clients, but I wanted the chance to deploy a fancy app on a single Linux server.)
Deploy a DMZ Server
So my first objective was to get a Linux server up and running. The minimum server requirements are as follows:
- Form Factor: Physical or virtual machine
- Processor: Two processors of 2 GHz or faster
- Memory: 4 GB RAM or greater
- Disk Storage: 20 GB or greater
- Operating System: See the Install Docker section of this document for supported Linux flavors and versions
I decided on running the Duo Access Gateway on Ubuntu Server LTS (Focal Fossa). Why Ubuntu Server? For one, it's free to use. Secondly, it is lightweight and doesn't require much maintaining unlike routinely checking on a Windows server.
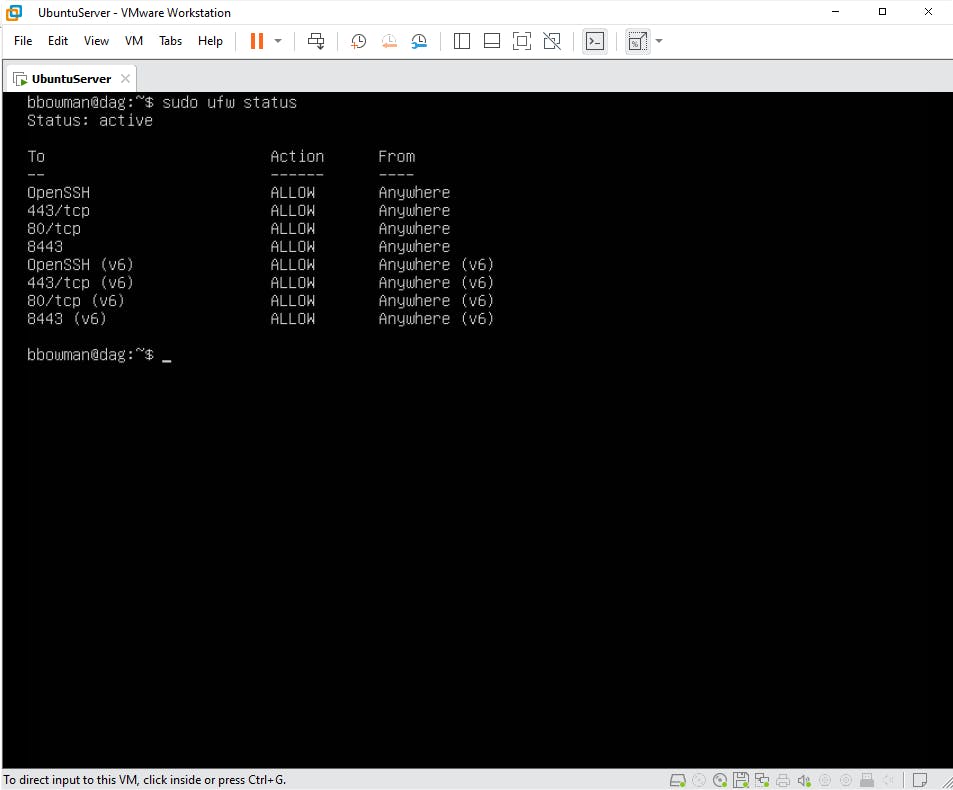
Following the Ubuntu Server documentation, we can easily install Ubuntu Server. One major difference between Ubuntu Server and Ubuntu Desktop is that the graphical environment used for the Desktop Edition is not installed for the Server. After the Operating System is installed, I went ahead and completed some basic hardening of the server and allowed the following ports to be open on the server's host-based firewall called the UFW (which literally means Uncomplicated Firewall):
Open ports 80 and 443 in the perimeter firewall for HTTP and HTTPS external traffic to and from the server (HTTP automatically redirects to HTTPS).
Port 8443 will be used for administrative purposes. Restrict traffic to this port to only authorized networks.
Open a port for LDAP (default 389) or LDAPS (default 636) traffic from the server to your internal Active Directory Domain Controller(s) or OpenLDAP directory server if you are using an on-premises directory.
I will open up port 22 for SSH for server administration purposes, but would restrict that to the local network.
DISCLAIMER: I'm not going to go through the entire Ubuntu Server installation and hardening here, but I'll have that in another blog soon. I also am going to demonstrate this deployment on a local VM that is set up on VMware Workstation Pro, instead of pulling the VM on our corporate infrastructure.
After deploying the server, we can now follow the Duo Access Gateway for Linux documentation. The guide is not too technical and provides you step-by-step instructions on how to deploy the DAG.
Install Docker
In a nutshell, the DAG is deployed on a Docker container. So the first requirement is to install docker. The documentation even tells you that "Docker is a tool that allows Duo Access Gateway to run inside its own self-contained environment, called a “container”, on top of your host operating system." I then would select the "Ubuntu" tab to get the directions.
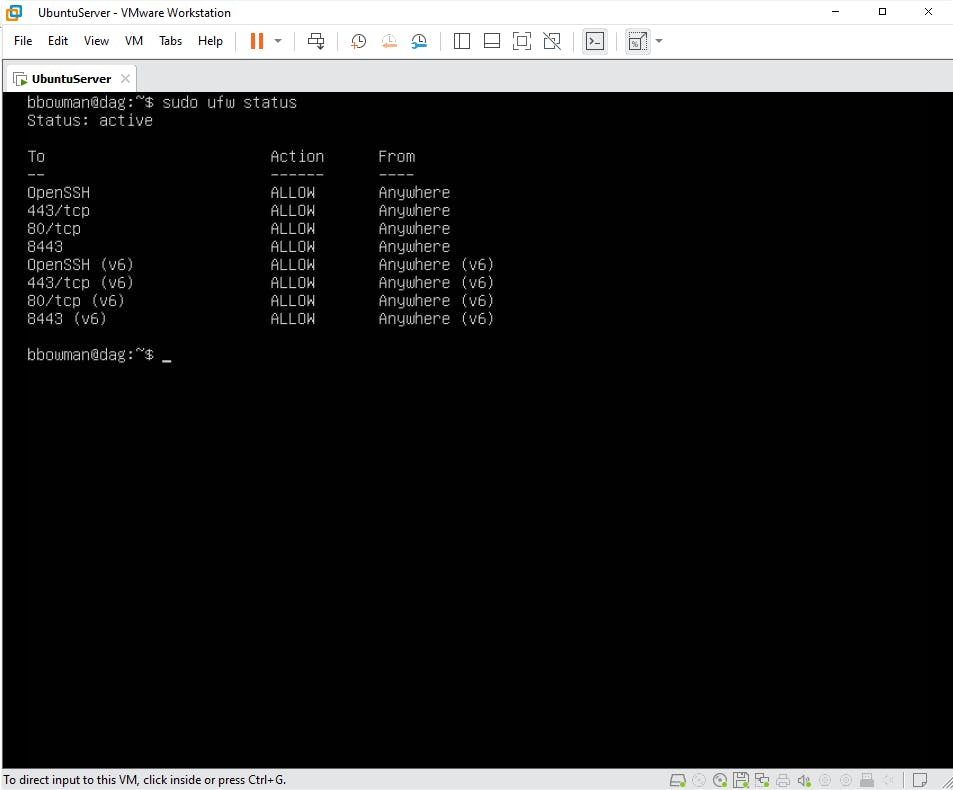
You will know that you installed Docker correctly when you get the following output after running the command "docker ps"

Install Docker Compose
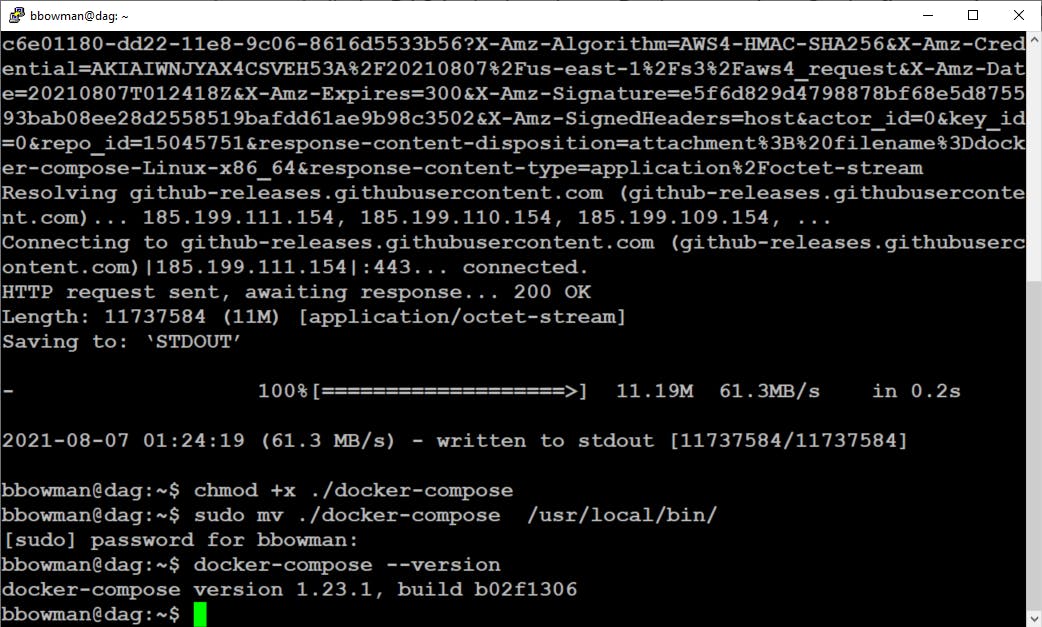
From there you will install Docker Compose. According to the Docker documentation, Compose is a tool for defining and running multi-container Docker applications. With Compose, you use a YAML file to configure your application’s services. Since DAG is deployed using a YAML file, you will need Docker Compose. You can verify that Docker Compose is working by typing docker-compose --version. You will see text similar to what is on the bottom of the following screenshot:
Install Duo Access Gateway
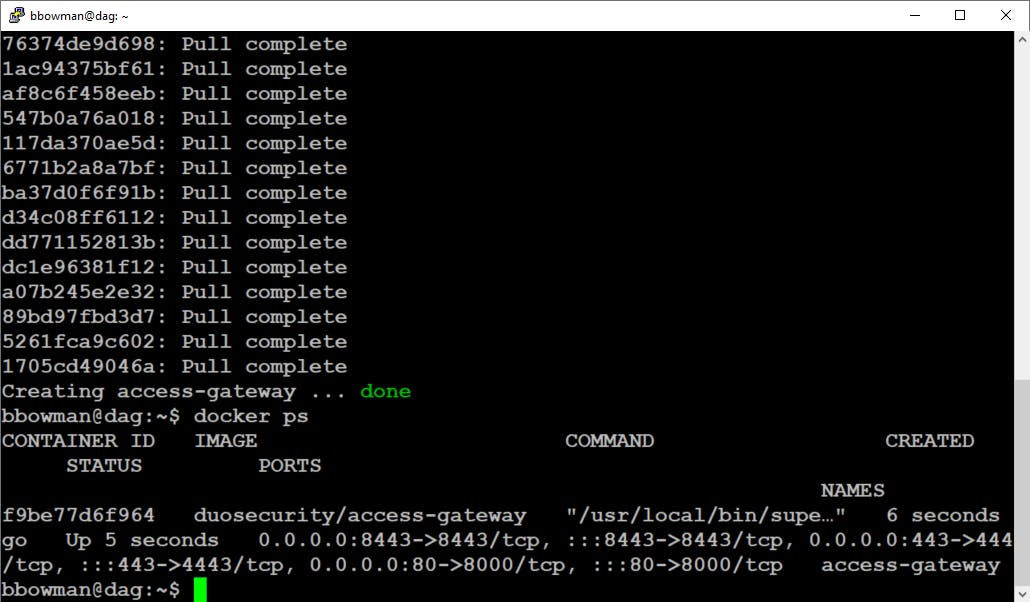
You then will download and install the Duo Access Gateway YAML file. You will be able to verify that the Duo Access Gateway container is running by typing docker ps and will see the output showing the container with a status of "up" similar to the following screenshot:
I can also verify that the installation was successful by navigating to URL-OF-ACCESS-GATEWAY:8443 from an internal network to log into the Duo Access Gateway admin console.
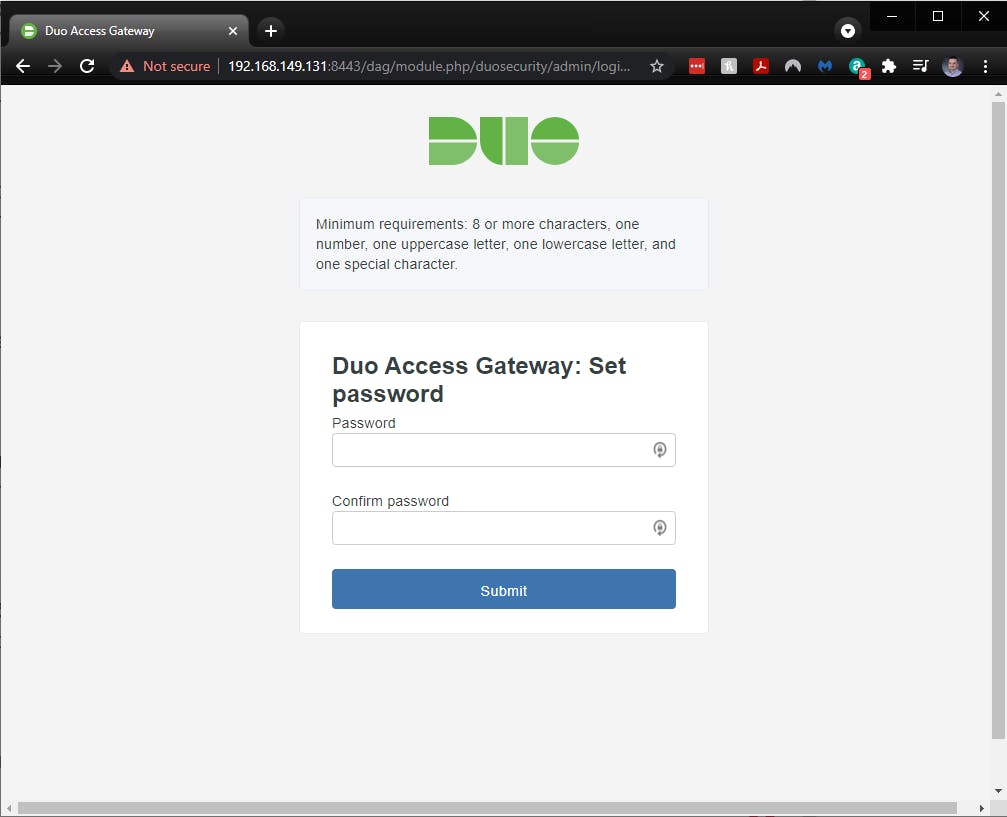
Yea! It's working!!!
Configure Duo Access Gateway
After choosing an Admin Console password, you will then configure your DAG with an appropriate hostname and uploading your SSL certificate and Private Key files. It's okay if you don't have one right now, you can continue through to the next screen.
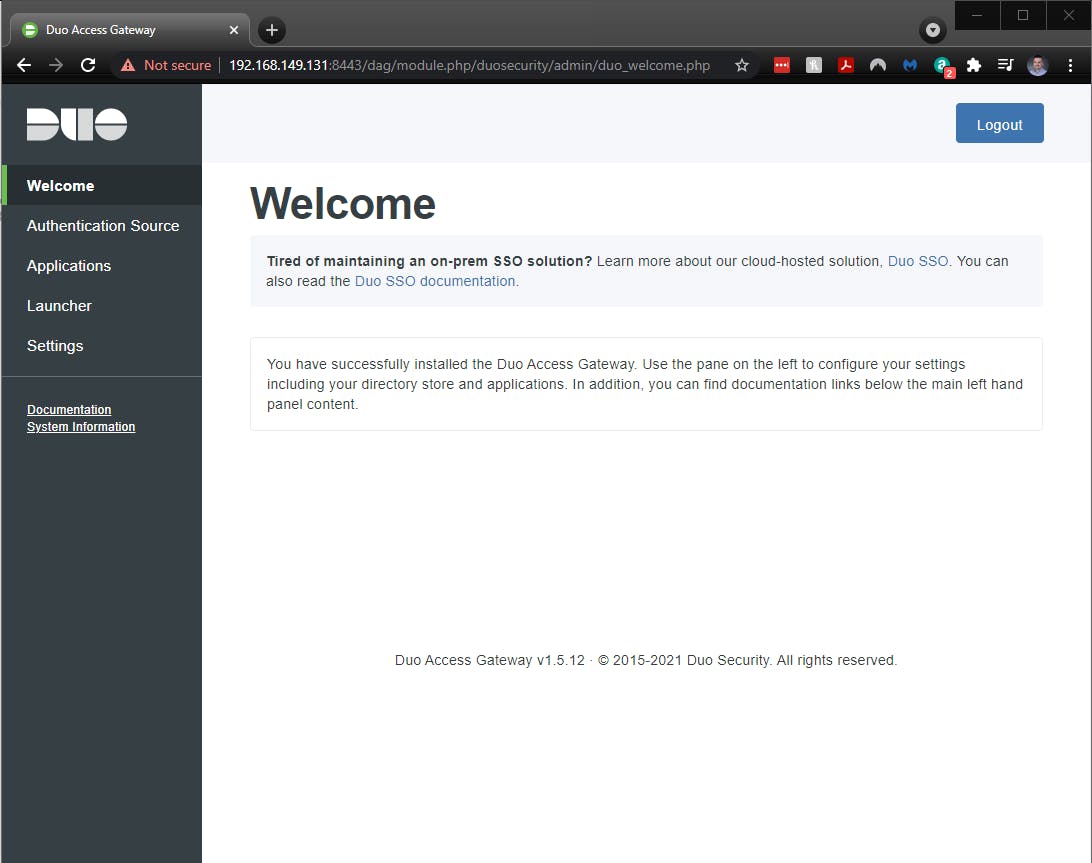
The next step would be to configure your authentication source. Duo Access Gateway supports the following authentication sources:
- Active Directory
- OpenLDAP
- SAML IdP
- Google (OpenID Connect)
- Microsoft Azure (OpenID Connect)
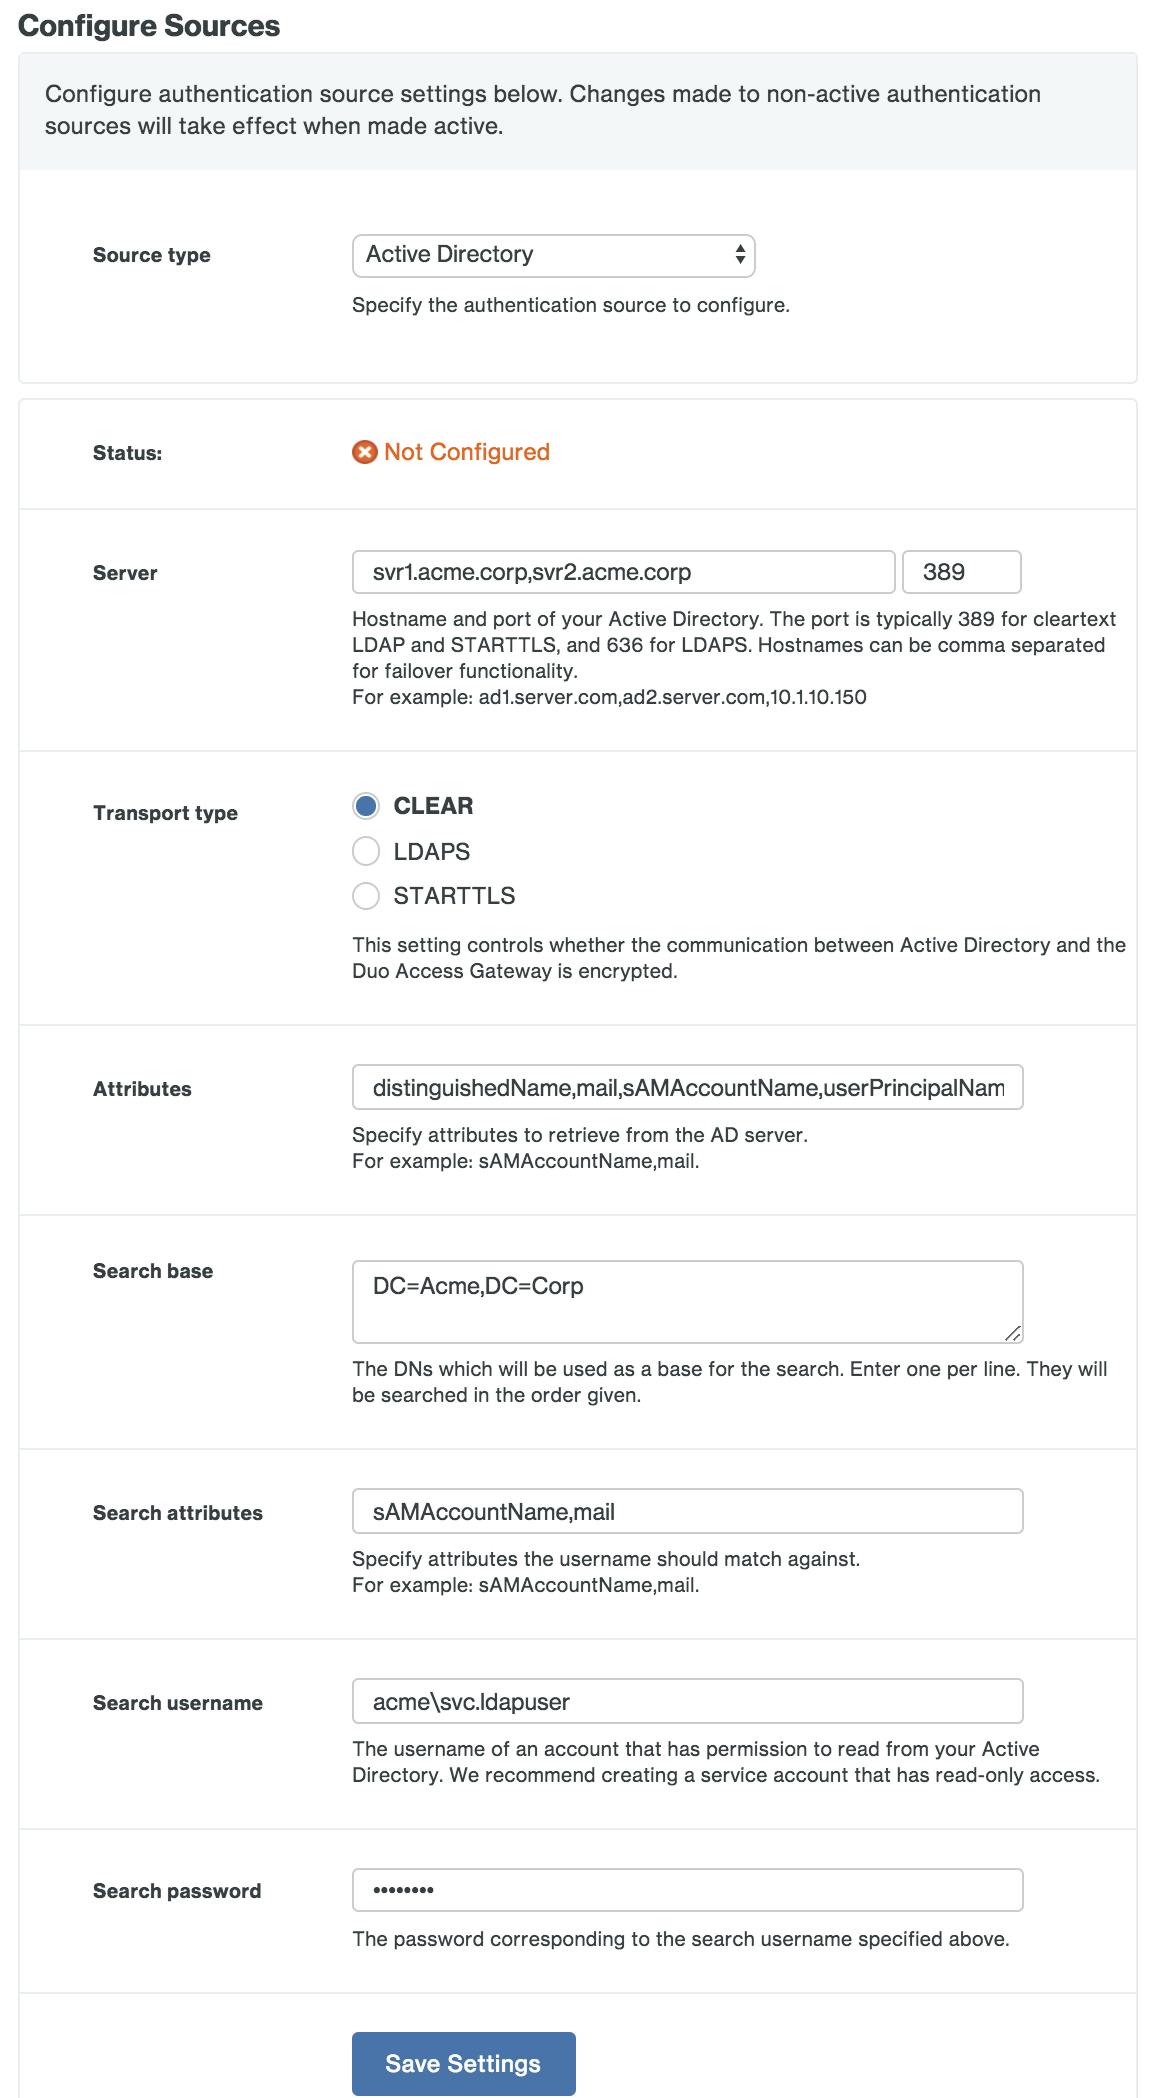
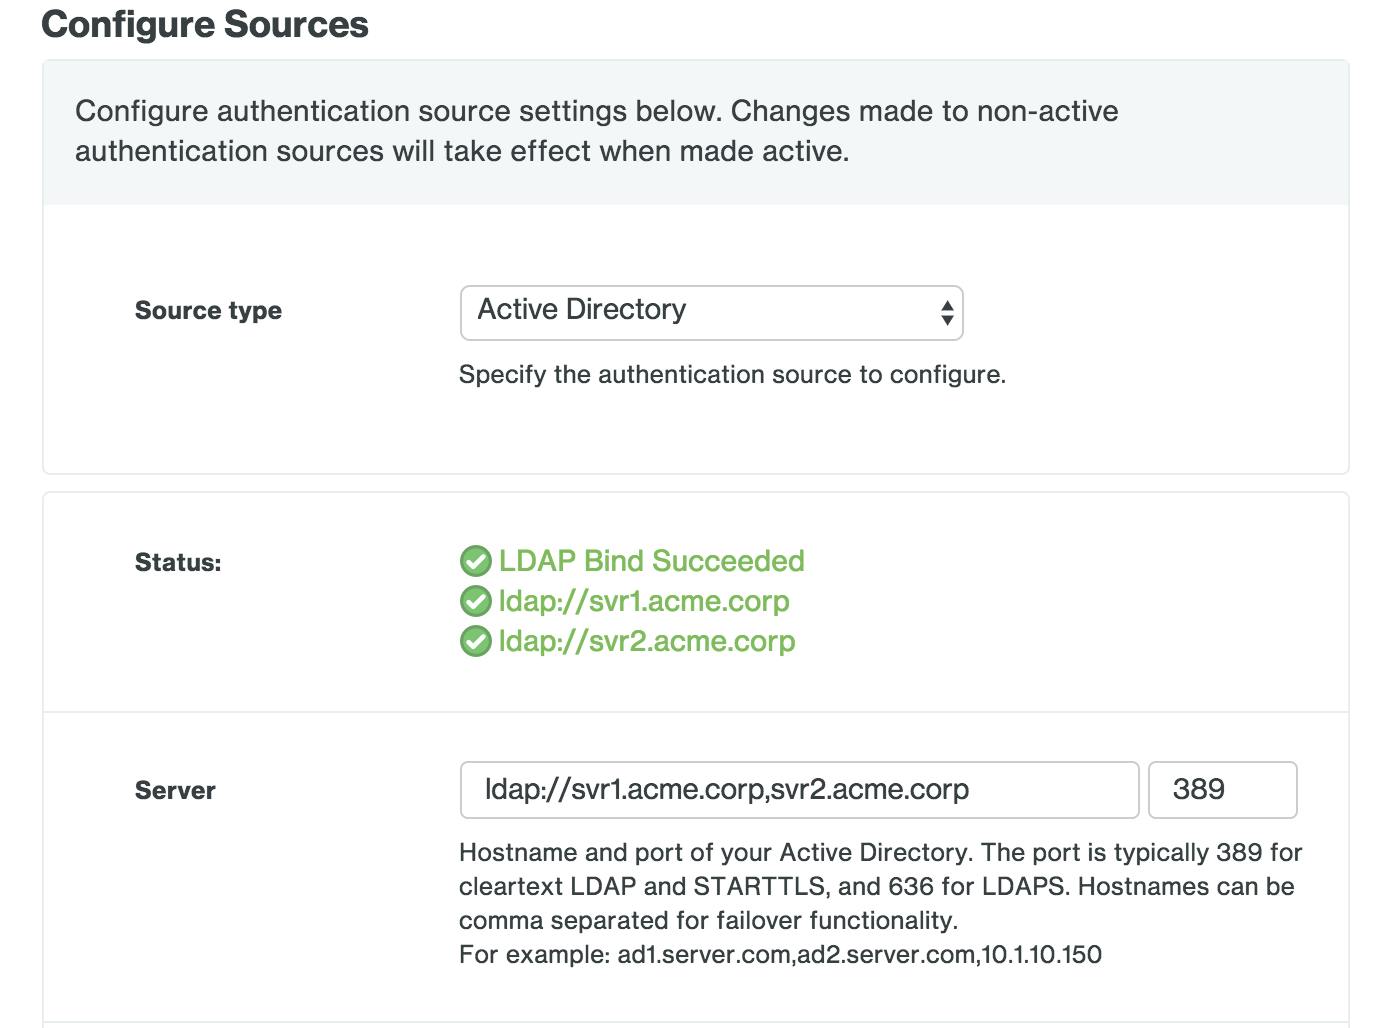
For our situation, we opted to use our Active Directory as our source that end-users will use for primary authentication. Configuring this portion took a little time for me, as I had to also consult the Duo Protection for Microsoft 365 with Duo Access Gateway documentation. The documentation stated that I must use Active Directory as my authentication source as well as include specific AD attributes in the "Attributes" field.
Here is what it will look like when you're configuring Active Directory as your authentication source:
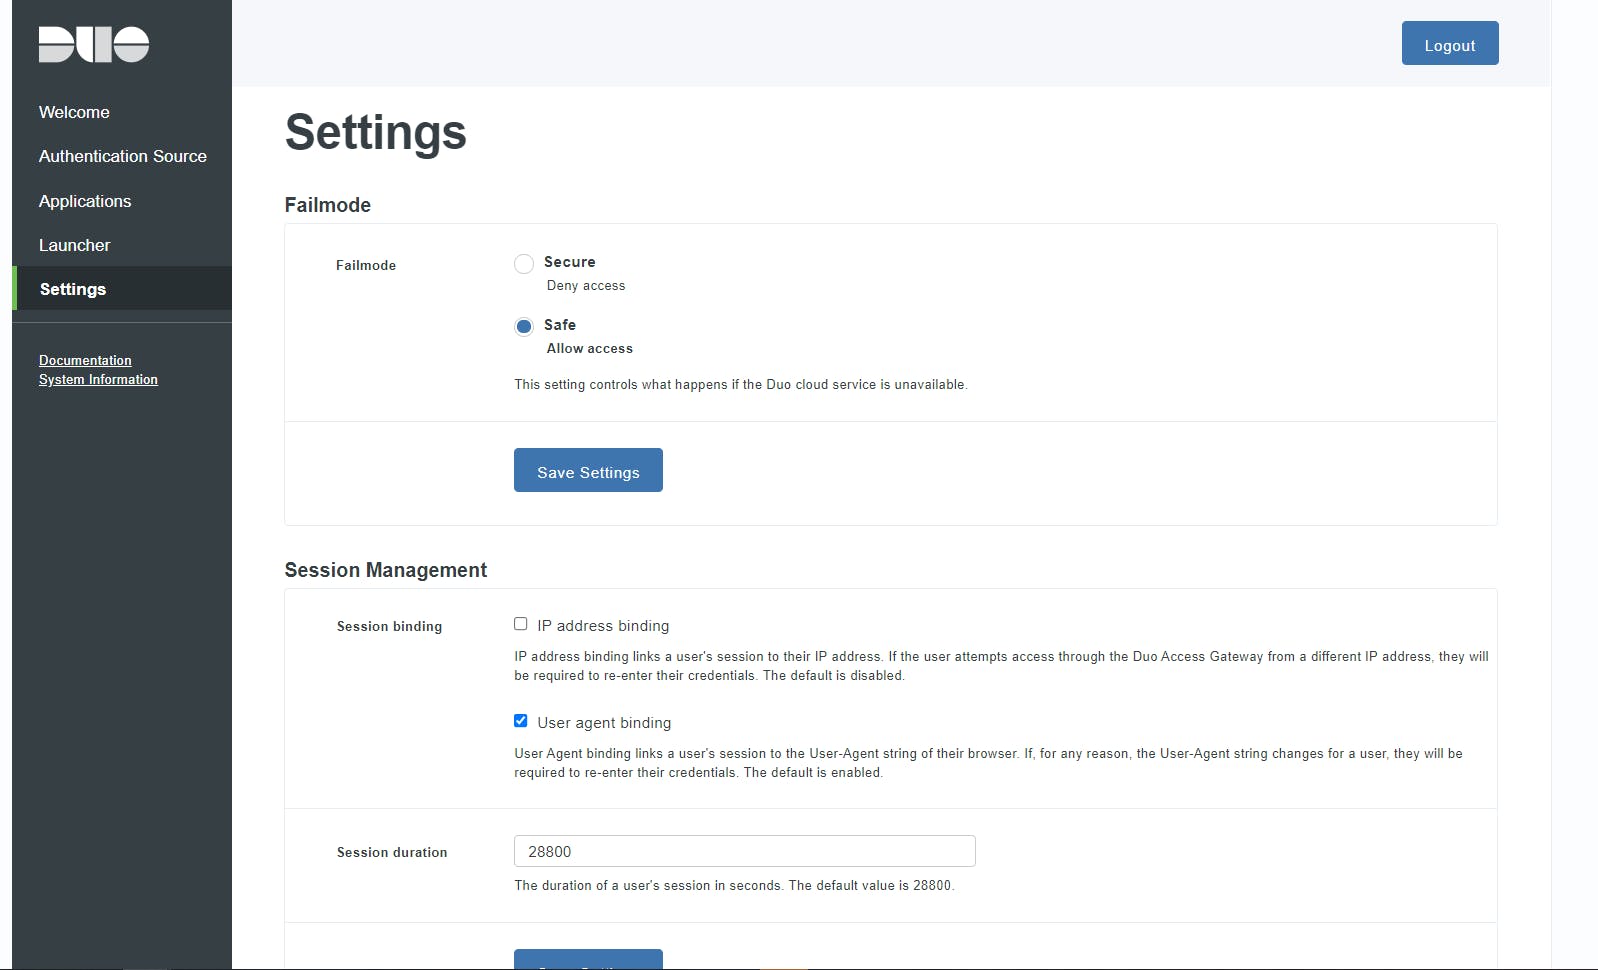
In the last portion of configuring your Duo Access Gateway, you can look at the Settings page and configure your "Fail Mode" (what happens when your DAG isn't available), Session Management (enhanced security for Admin console sessions), and other general settings (hostname, verbose logging, certificate change, and Admin password).
Before creating an application on the Duo Admin Panel, you need to download the certificate to obtain the token signing certificate (the downloaded file is named "dag.crt"). This is located on the Applications page in the Metadata section. A few of these variables will be used when you enable AD Federation to Microsoft 365 using your DAG.
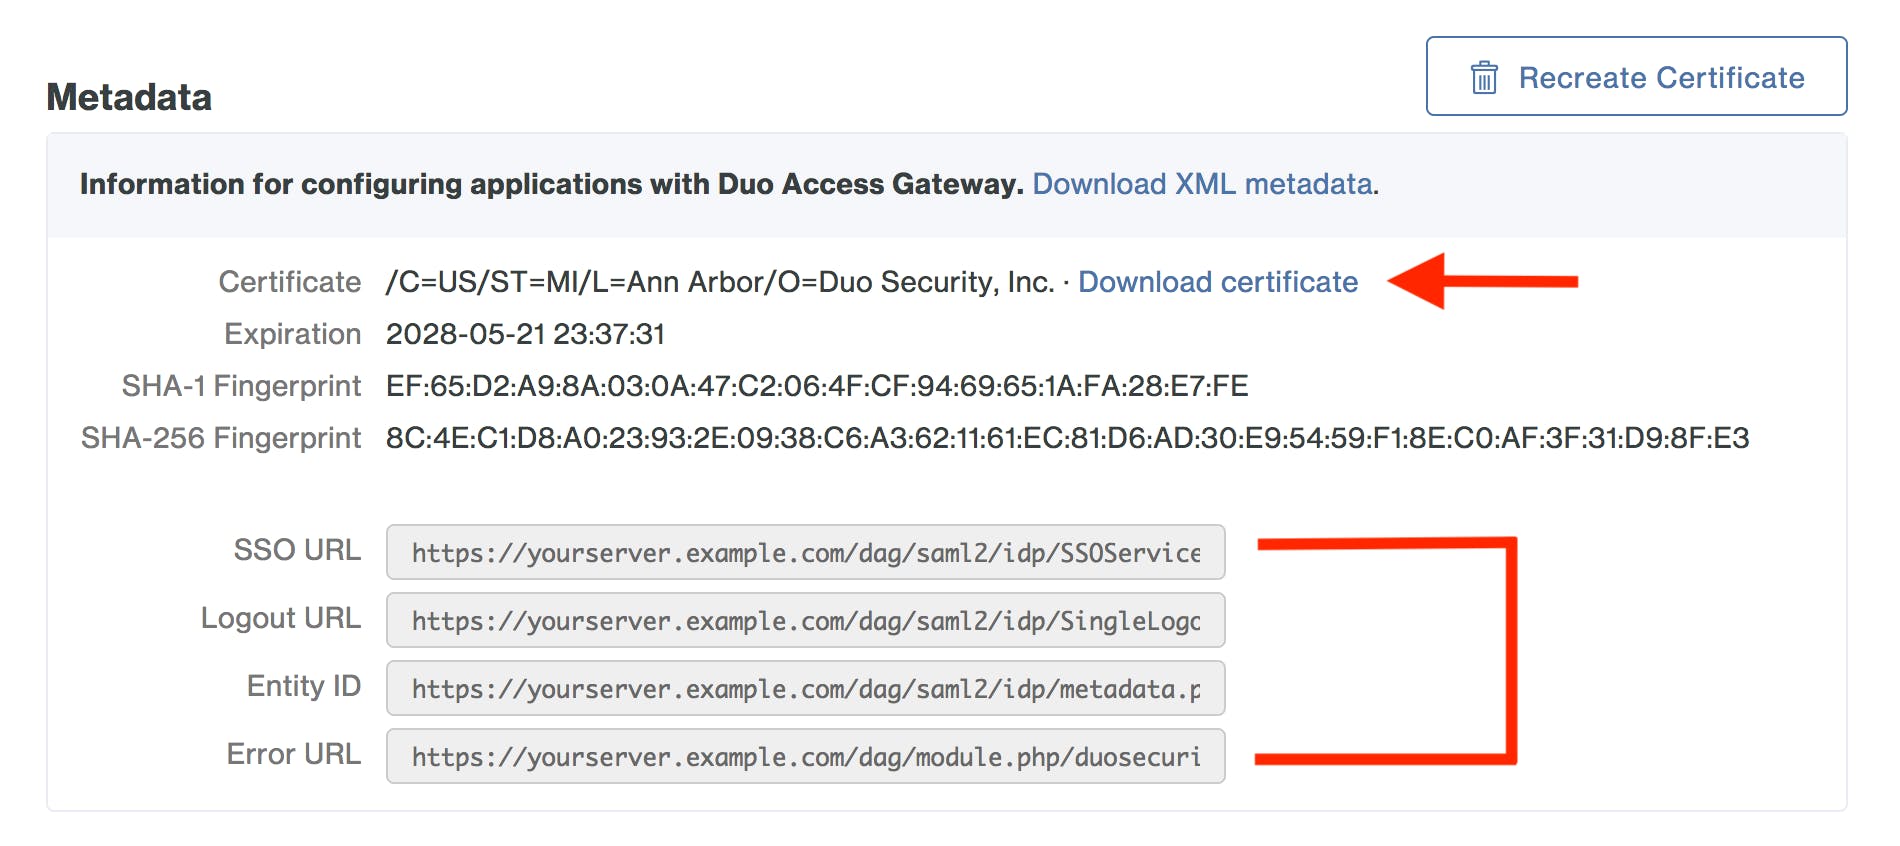
That's it for deploying and configuring your Duo Access Gateway. But then you need to create and deploy the Microsoft 365 Application in Duo.
Create the Microsoft 365 Application in Duo
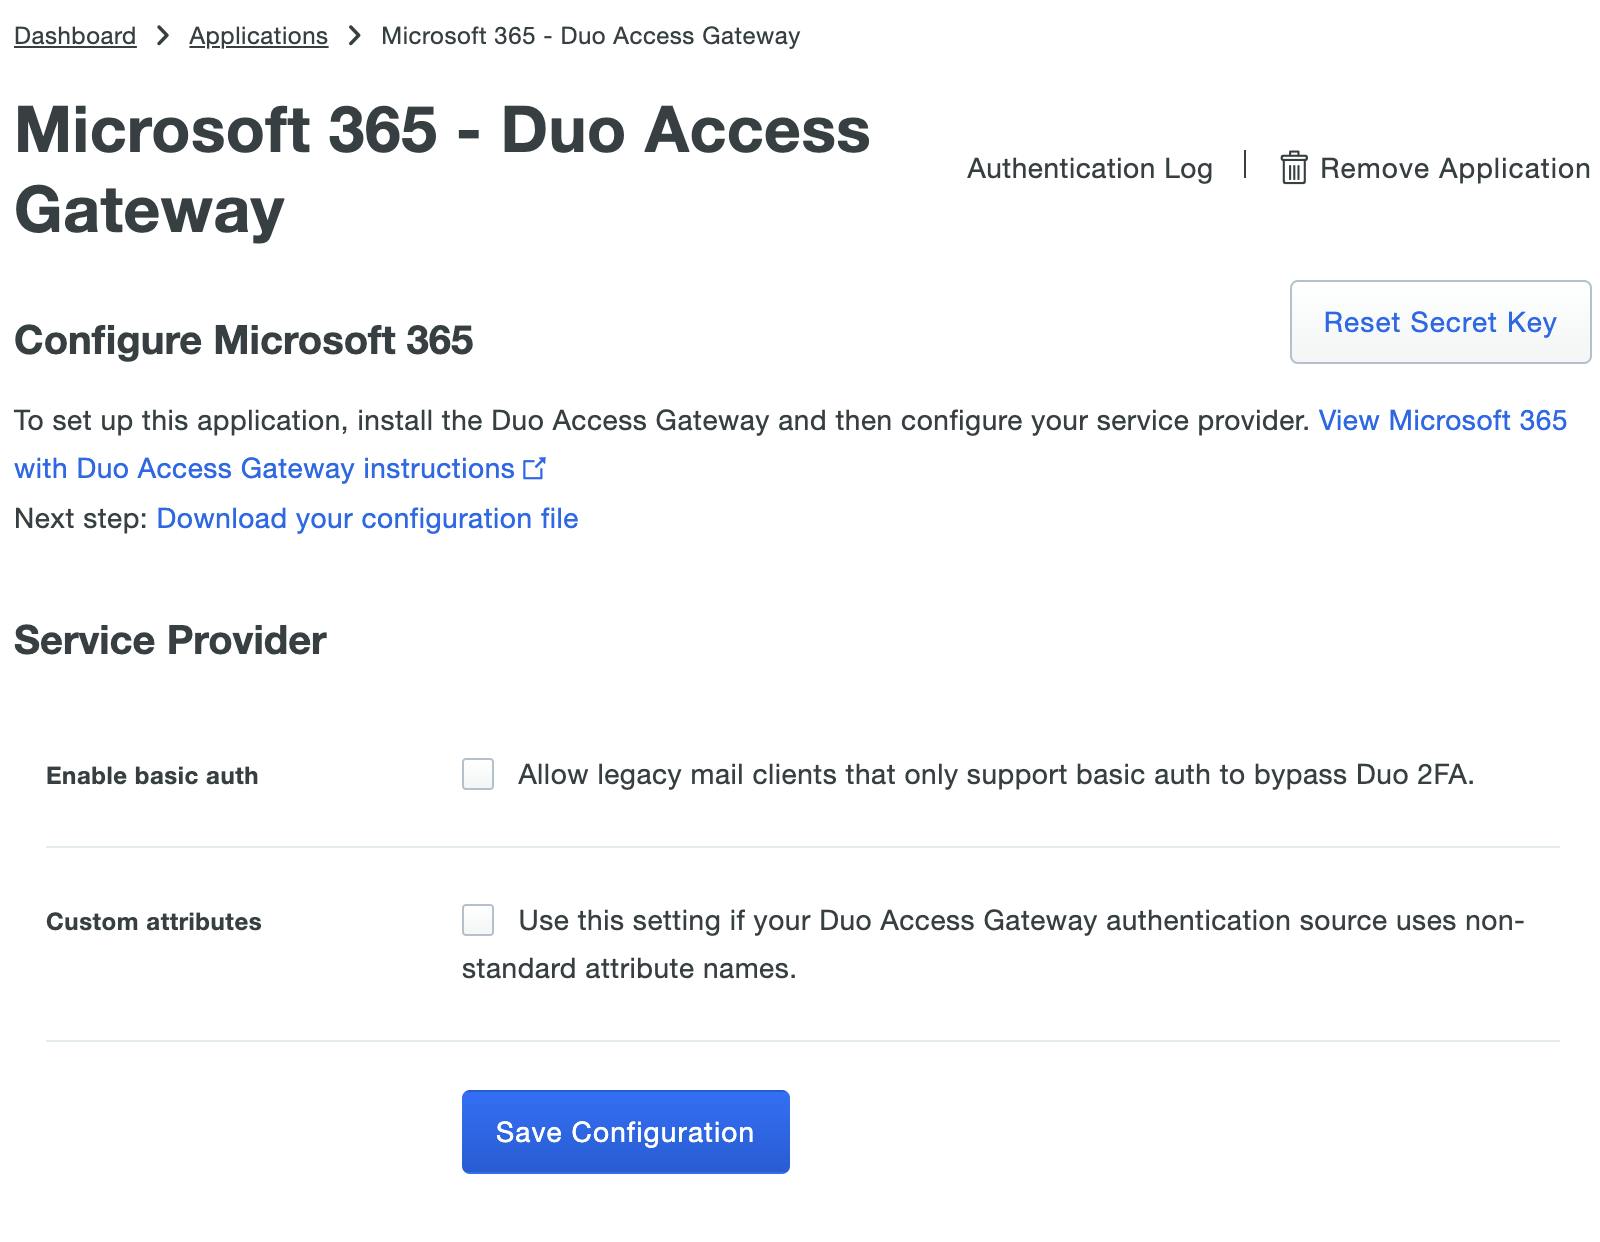
Following the documentation to create the Microsoft 365 application in Duo you will end up creating the application and then check the box next to Enable Basic Auth to allow legacy mail clients that do not support Modern Auth to still log in using only their AD username and password. When this option is configured users logging in with legacy mail clients will bypass Duo 2FA. That doesn't sound safe, right?
However, we deploy email profiles to mobile devices using Office 365 Device Security Polices. When the user enrolls their device using the Microsoft Company Portal application, they will still get the Duo 2FA when they sign in. Once the device is registered and checked for compliance, then the email profile is deployed and the user is only required to enter in their password. You still get the 2FA, but when enrolling the device.
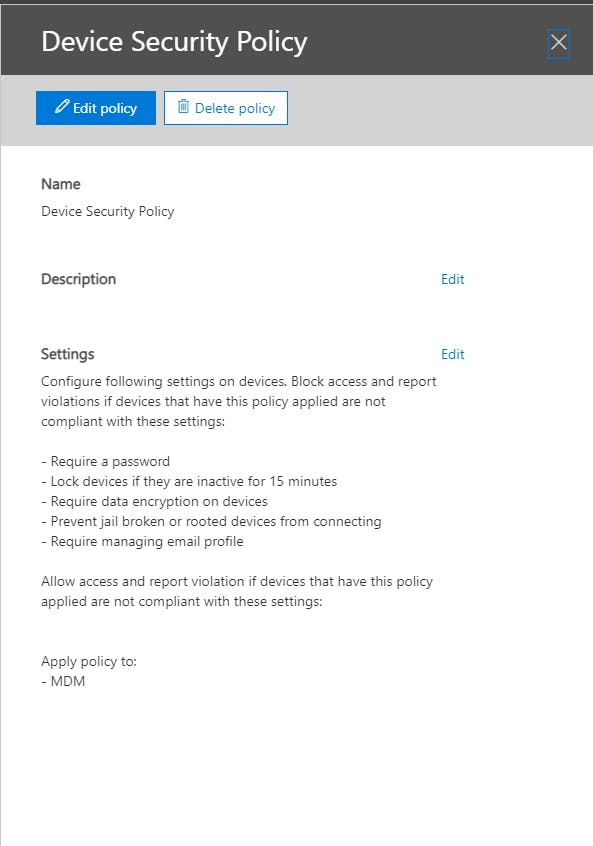
Now back to creating the Microsoft 365 application in Duo.... Once your settings are set, you click on Save Configuration to generate a downloadable JSON configuration file which you will upload into your Duo Access Gateway.
Add the Microsoft 365 Application to Duo Access Gateway
Return to the Applications page of the DAG admin console session.
Click the Choose File button in the "Add Application" section of the page and locate the Microsoft 365 SAML application JSON file you downloaded from the Duo Admin Panel earlier. Click the Upload button after selecting the JSON configuration file.
The Microsoft 365 SAML application is added.
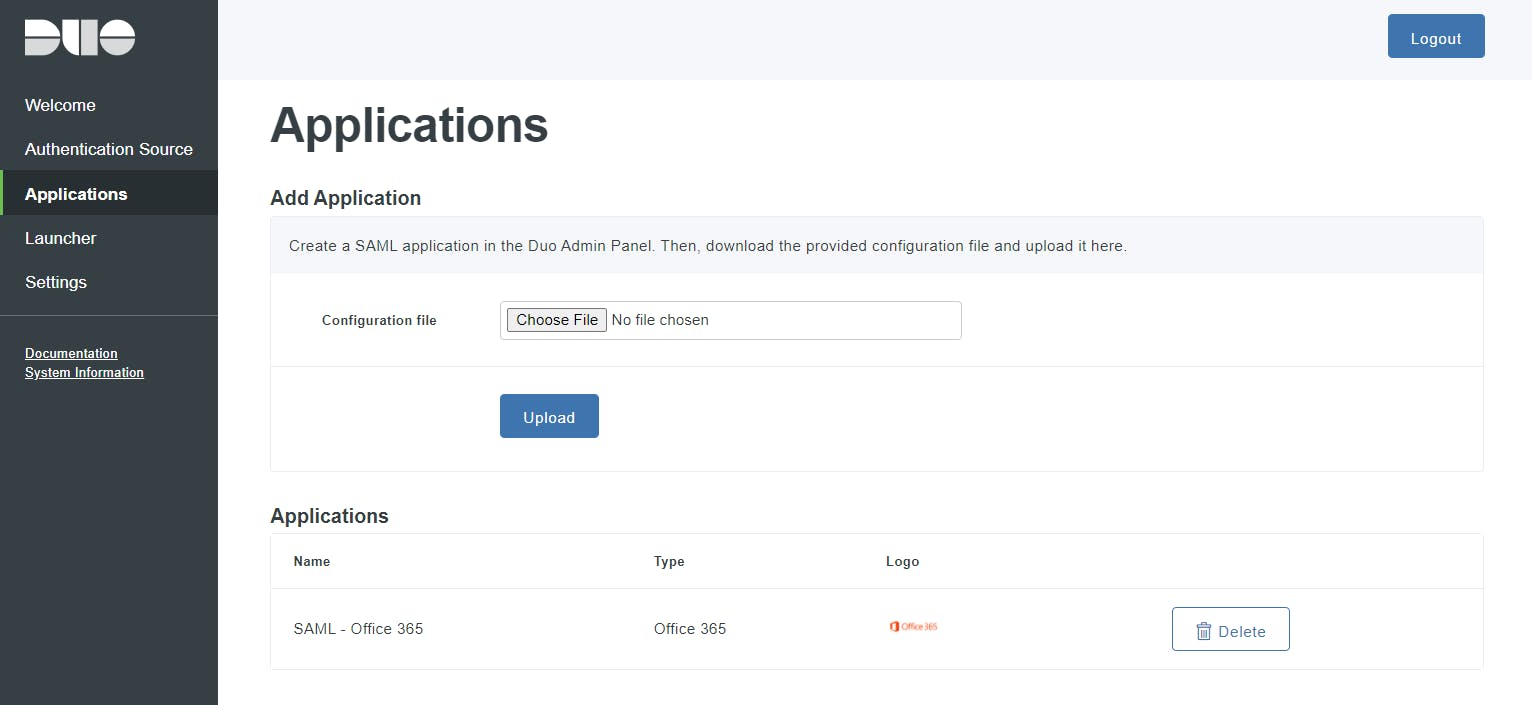
Since our organization had previously configured directory synchronization between your on-premises AD domain and Microsoft 365, we could skp the steps to enable directory sychronization in Microsoft 365.
Enable AD Federation to Microsoft 365 using DAG
Our next task was to enable AD federation to Microsoft/Office 365 using DAG. This step required me to basically take down our AD FS. Any users that were not already authenticated, would not be able to access Office 365 resources temporarily. I ended up doing this on a Sunday afternoon, outside of normal business hours.
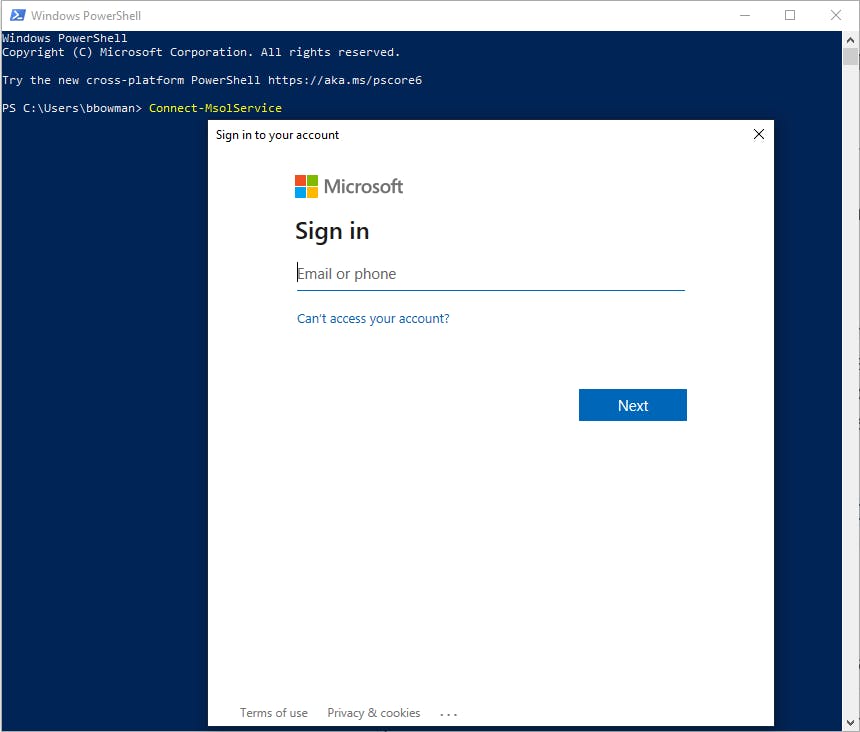
The first step in this process was to connect to launch the Windows Azure Active Directory Module for Windows PowerShell and enter the Connect-MsolService command. I then had to enter your Microsoft 365 administrator credentials for the domain.
I then had to transition our Microsoft 365 tenant from managed to federated. Following the steps in the documentation made it basically a copy and paste into my PowerShell console. The documentation states that "the transition of your Microsoft 365 tenant from managed to federated can take two hours or more." However, ours maybe took 10 minutes. To convert it from Federated to Managed you enter the following command.
Set-MsolDomainAuthentication –DomainName your365domain.com -Authentication Managed
Once you verify that your Microsoft 365 domain shows as Managed and not Federated, you need to gather the federation parameter information. The URLs needed for some of the variables are found in your DAG certification (dag.crt) file.
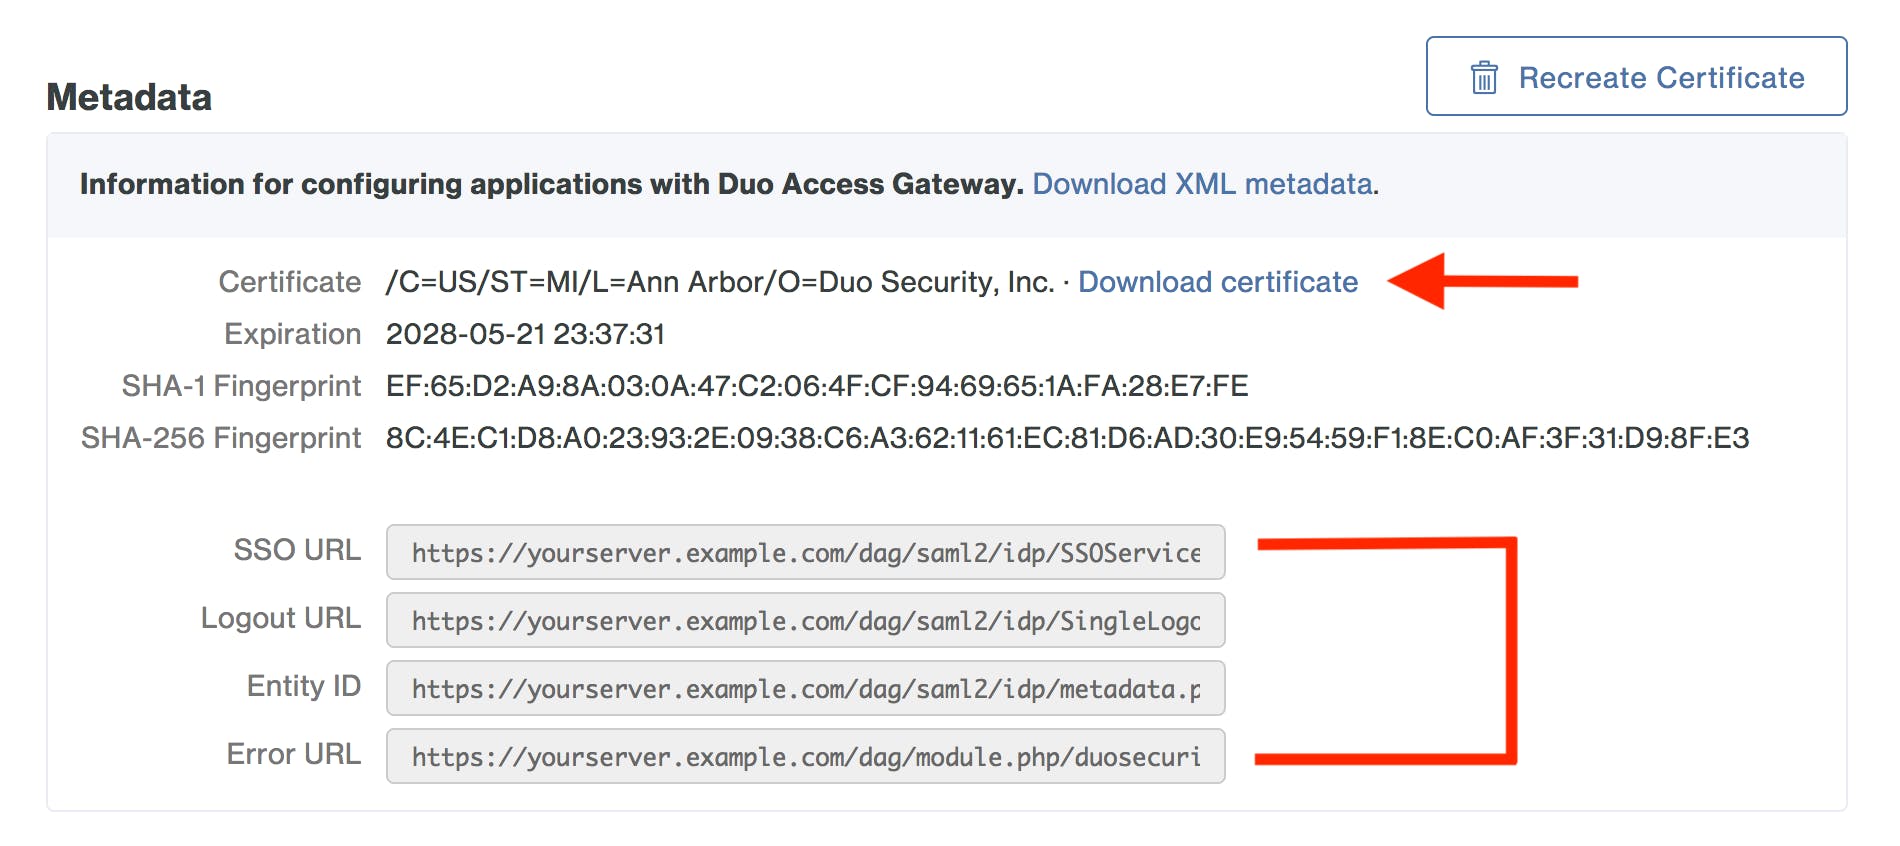
Then you need to set the federation parameters as PowerShell variables (shown in the documentation). This step took me a bit to figure out, as I had to locate all the correct pieces of information for the variables. You have to ensure that these variables are set correctly. I had to put in a support ticket on this, and the technical support engineer was able to help me see that I was missing an "h" in one of the Uri's. It was a bit of a pain since I was past the "point of no return" and couldn't go back to my AD FS Federation.
Verify SSO
Once my federation settings were verified, I could then verify my SSO.
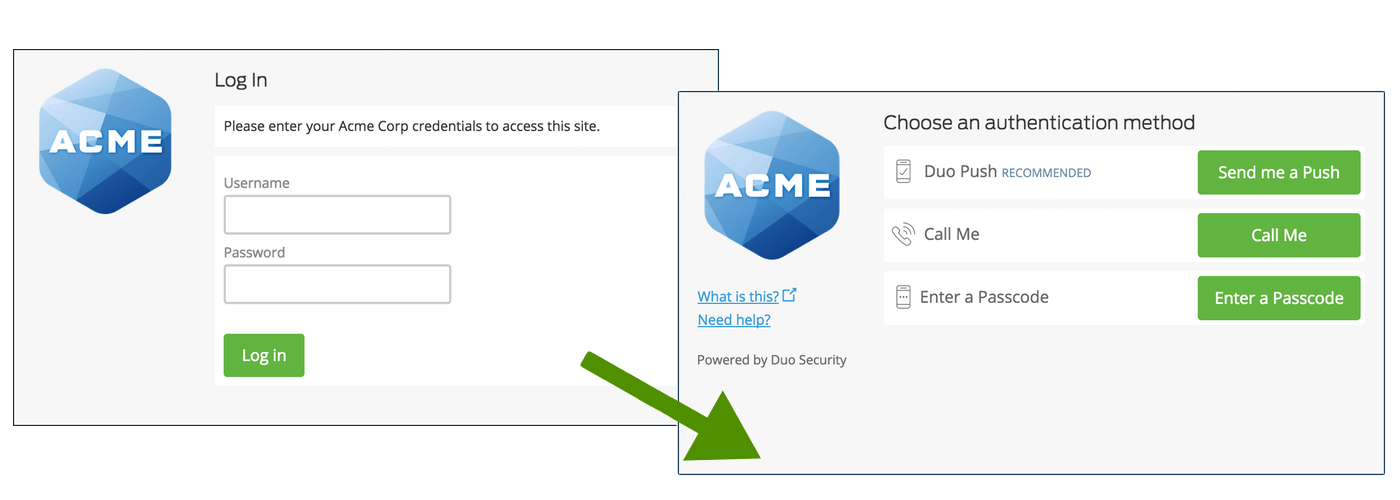
Thankfully I was successful and it has been working well since deployment. I also verified that mobile devices were able to use their native mail applications. I do intend to use our DAG to secure other applications in the future. But for now, it is just adding additional security on our Office 365 accounts.
Thank you so much for your time in reading this post. I know it was a lengthy one, but I hope someone will use this for their deployments. Please feel free to leave some comments!

