

Ubuntu Server 20.04 LTS Virtual Machine Deployment
Deploying and Configuring an Ubuntu Server virtual machine on an ESXi Server.

My name is Brandon, and I currently work as an Information Technology Consultant in the Atlanta metropolitan area.
I am not a developer, but I enjoy learning about cloud and data center technologies. I also technically own "Brandon's Cloud, LLC" as my own consulting company.
About once every couple of months, our resident Web Developer will ask me to “spin him up a Linux server.” As vague as that request can be, I usually have to ask him if he has any specifications for said Linux server.
Now I could just have a blank template server and then adjust my virtual machine settings as needed, but that wouldn’t be as much fun as doing it from scratch. However, Ubuntu does provide a method of automating server installs via a configuration file. This process is different from the cloud automation YAML files or playbooks (ie. Chef, Ansible, Puppet, Terraform, etc.) that you hear about today. This automates the installation of the Operating System by answering all the configuration questions ahead of time.
Since I am somewhat of a Linux newb and I am currently studying for the CompTIA Linux+ certification, getting some practice with Linux commands is always good. As a good method of habit to have the Ubuntu Server Guide open while I work. The documentation is pretty thorough, and I can quickly search for terms and find the correct documentation to help me.
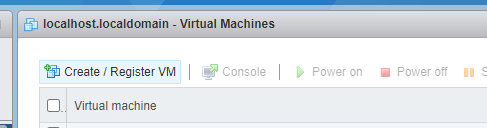
Register the Virtual Machine
In my work vSphere environment, we utilize the vCenter Server advanced server management software. This virtual appliance provides us with a centralized platform to control our entire vSphere environment on one single console. I am a big fan of using the vCenter Server as it gives me insight across all my ESXi hosts.
In this demonstration, I will be installing the Ubuntu Server VM on an ESXi server provided by Mike Gibbs and his team at Go Cloud Architect. This server access is made available to students of the Cloud Architect Career Development course. Students share access to their ESXi servers to build their virtual machines and cloud infrastructure.
First, we need to allocate the computing resources for the Virtual Machine. I first will click on Create /Register VM.
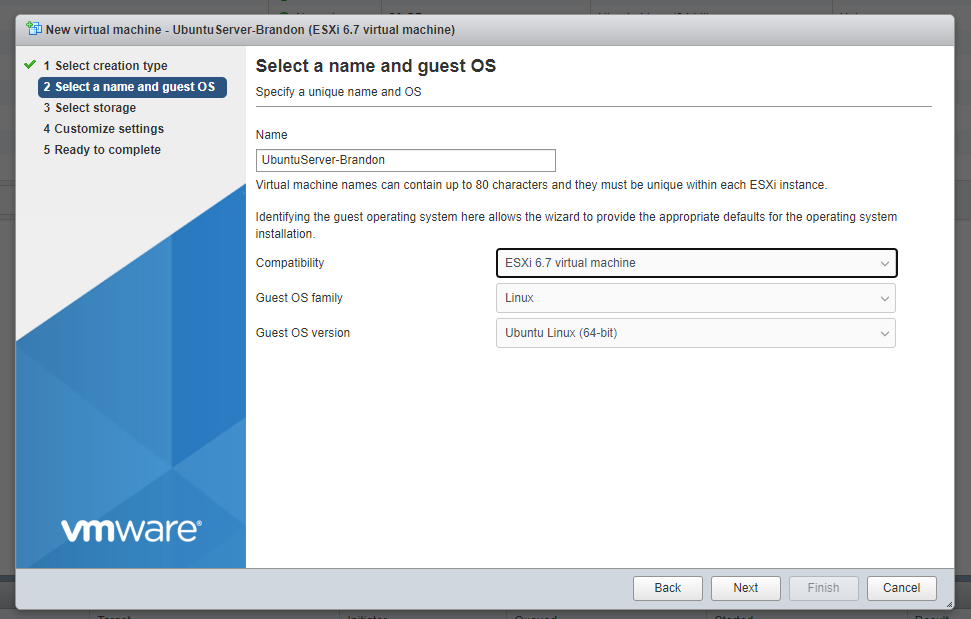
Then I will need to specify a unique name and OS for the virtual machine. If you mess up the name, you can always change it later. I will also select Linux as the Guest OS Family and Ubuntu Linux (64-Bit) as the Guest OS Version.
Next, I will need to select where I will store the virtual machine’s files and its’ virtual disks. Since this server has only one storage location, I will select datastore1.
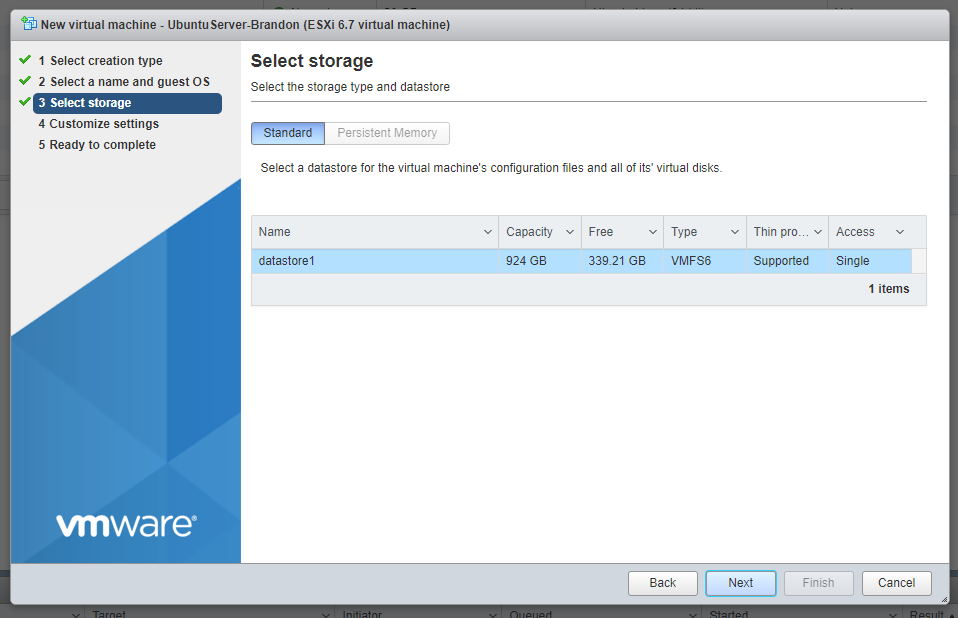
Side note.... Storage locations for ESXi servers do not have to be physically on the server. You can configure a connection to a SAN (Storage Area Network) to store your virtual machines. Quoting the documentation, using ESXi with a SAN improves flexibility, efficiency, and reliability. Using ESXi with a SAN also supports centralized management, failover, and load balancing technologies.
I will then customize the Virtual Hardware and edit the VM options. According to the Ubuntu Server documentation, the recommended system requirements are: • CPU: 1 gigahertz or better • RAM: 1 gigabyte or more • Disk: a minimum of 2.5 gigabytes
Depending on the usage of the server, I will not overload my VM with unnecessary computing resources. If the application calls for 1 vCPUs, 4GB of RAM, and 10GB of storage, I’ll usually allocate 2vCPUS, 8GB of RAM, and at least 20GB of storage. I don’t want the application to use all of the VM’s allocated resources, so I will double what is required in case of resource spikes caused by the operating system.
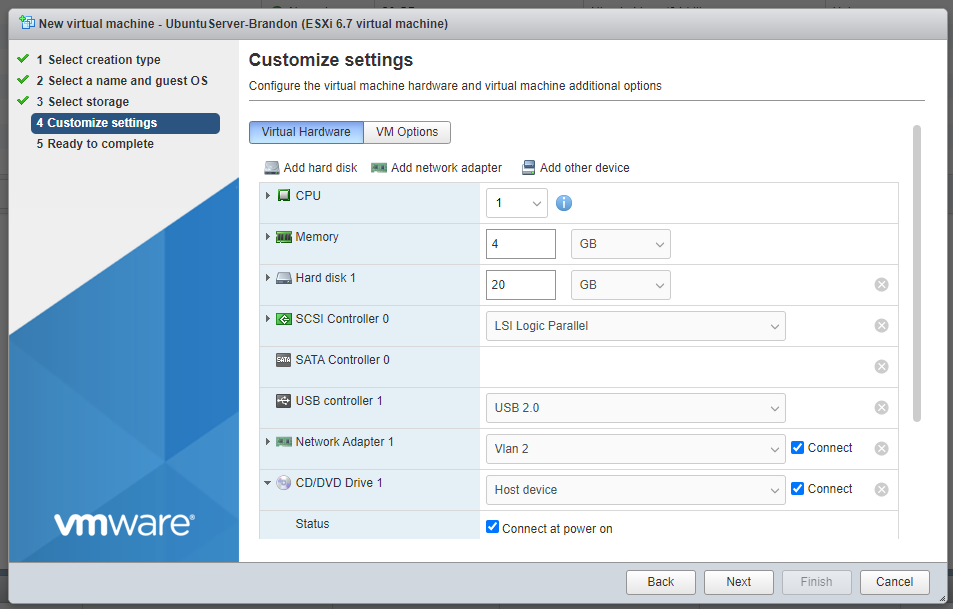
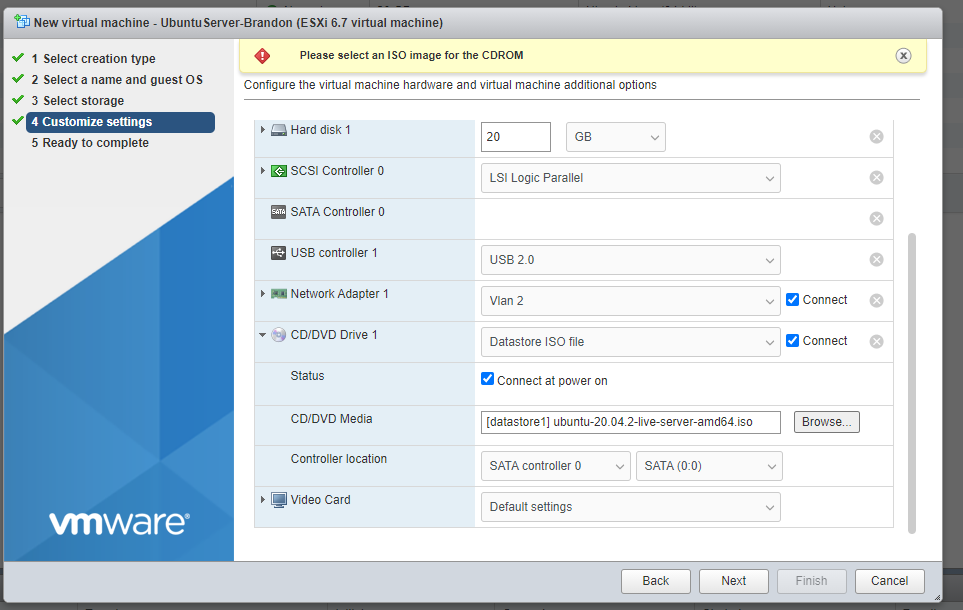
Since I am only using this server as a demonstration and this is a server provided by Go Cloud Architect, I will keep the resources down to a minimum. I can add things such as additional virtual Hard Disks, Network Adapters, and even CD/DVD drives. For the CD/DVD Media, you will need to change the selection to Datastore ISO File, then select the .ISO file which corresponds to the Operating System which you are trying to install.
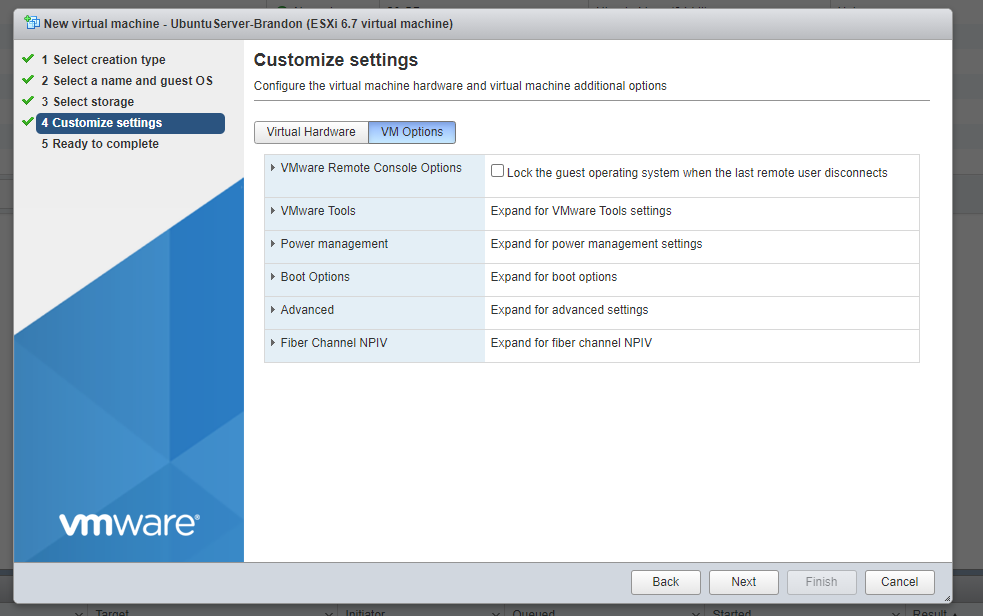
In the VM Options menu, you can configure different types of Boot Options and advanced settings. Typically, I do not use these options, but they are there if you need them.
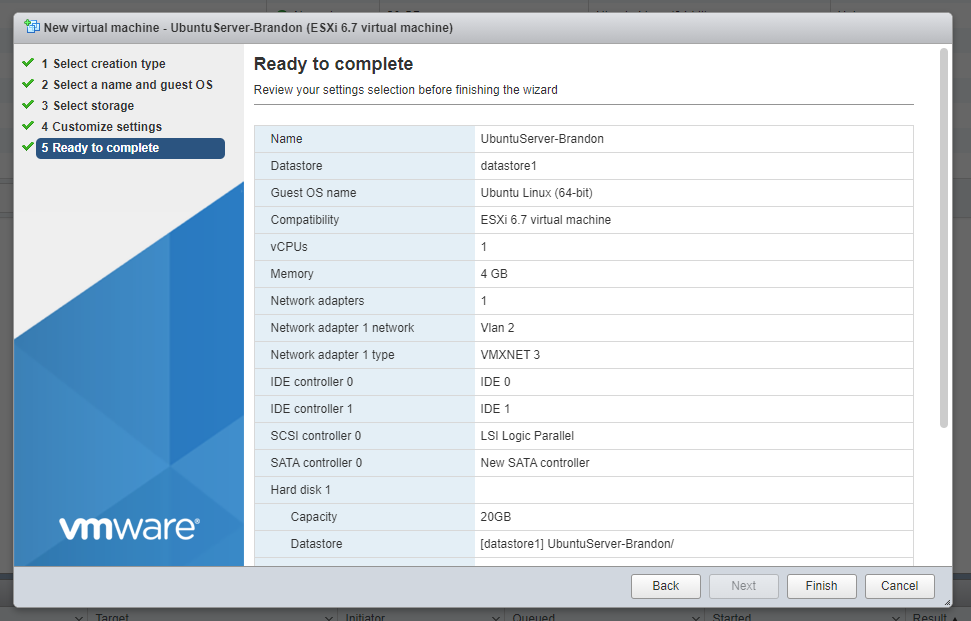
You will then review your selection and then select Finish to deploy the Virtual Machine on the ESXi host.
Once your VM is registered in the list on your ESXi host, you will select your Virtual Machine then select Power On. You will see your machine power on in the provided window. To get a better view, select Console to open a console window.
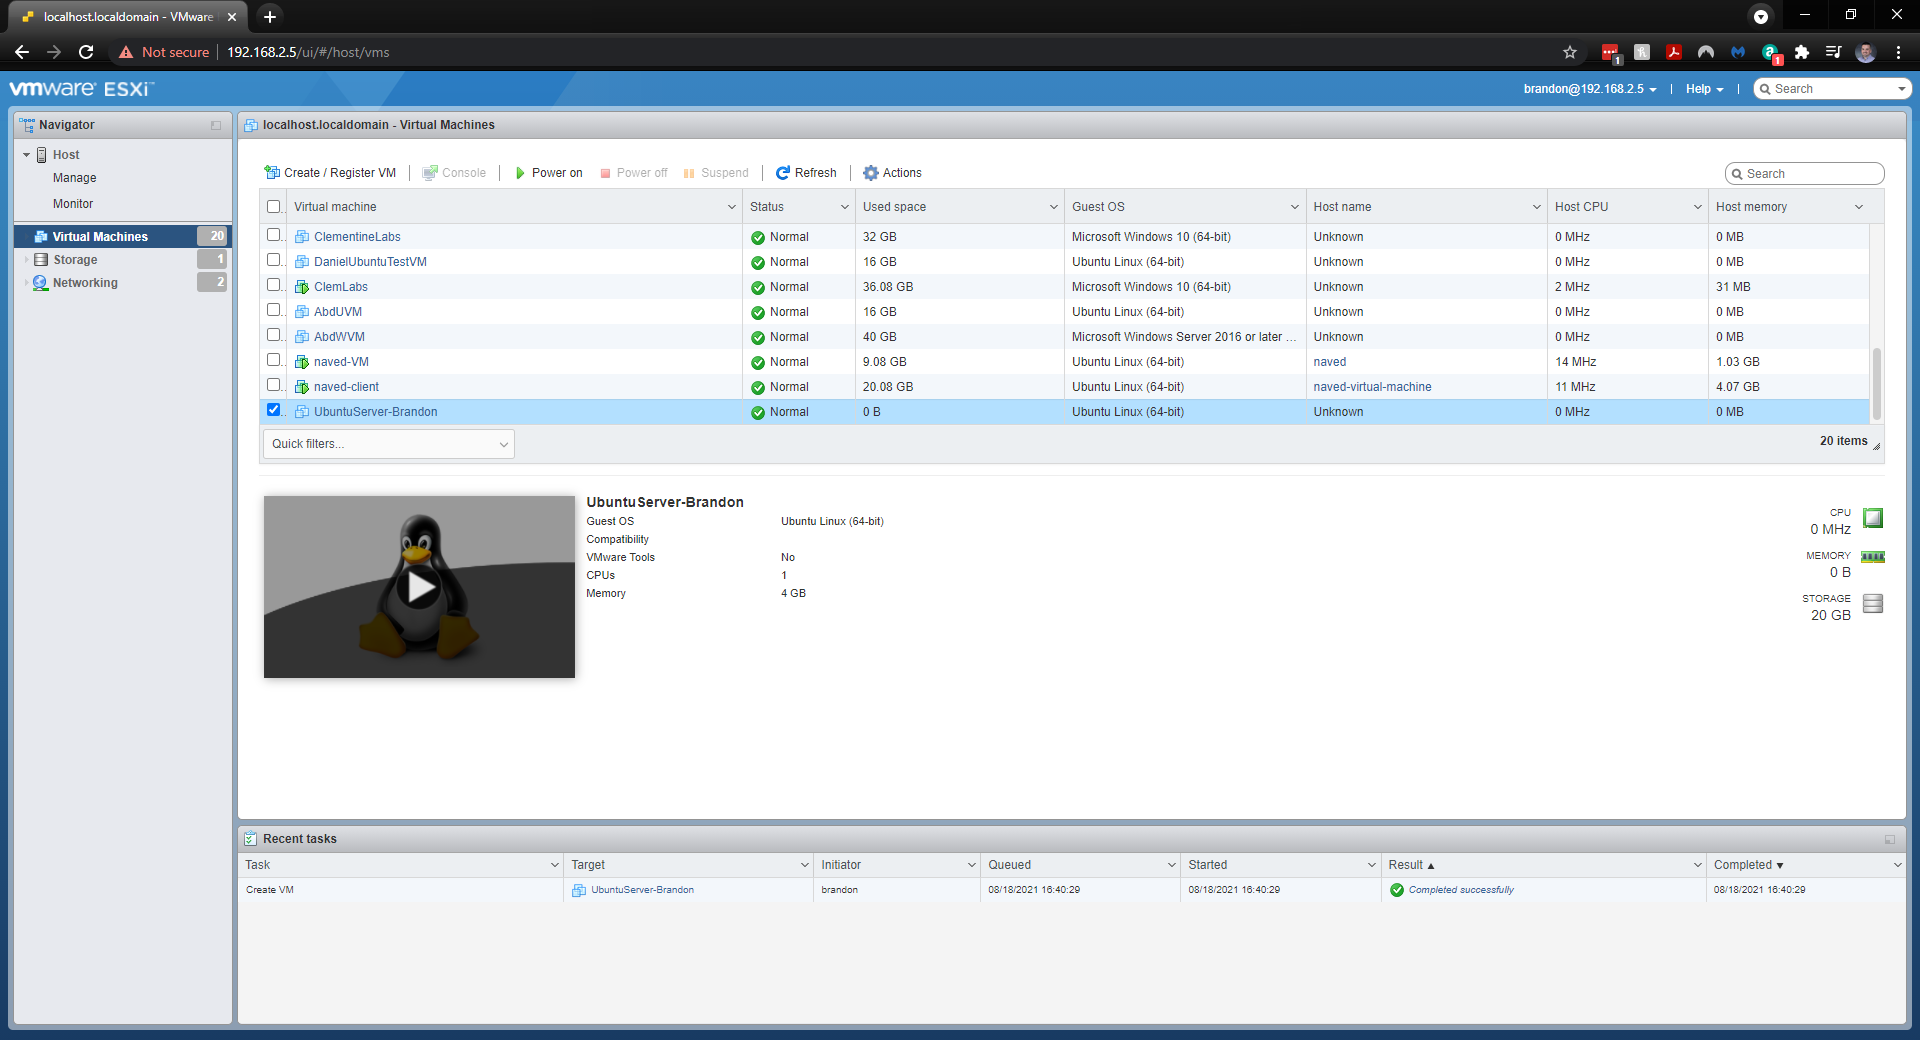
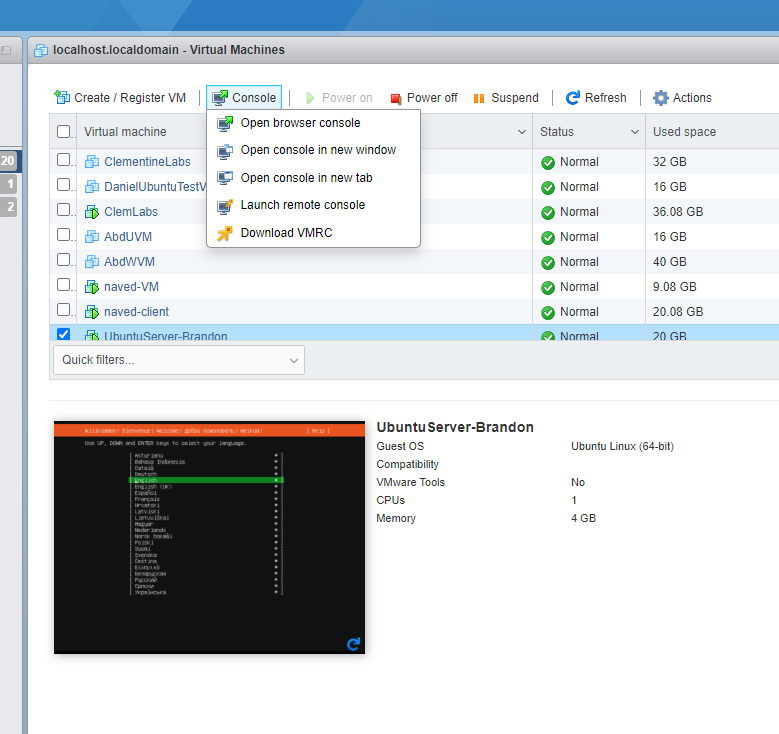
You can even click on the provided preview window and a small console window will open.
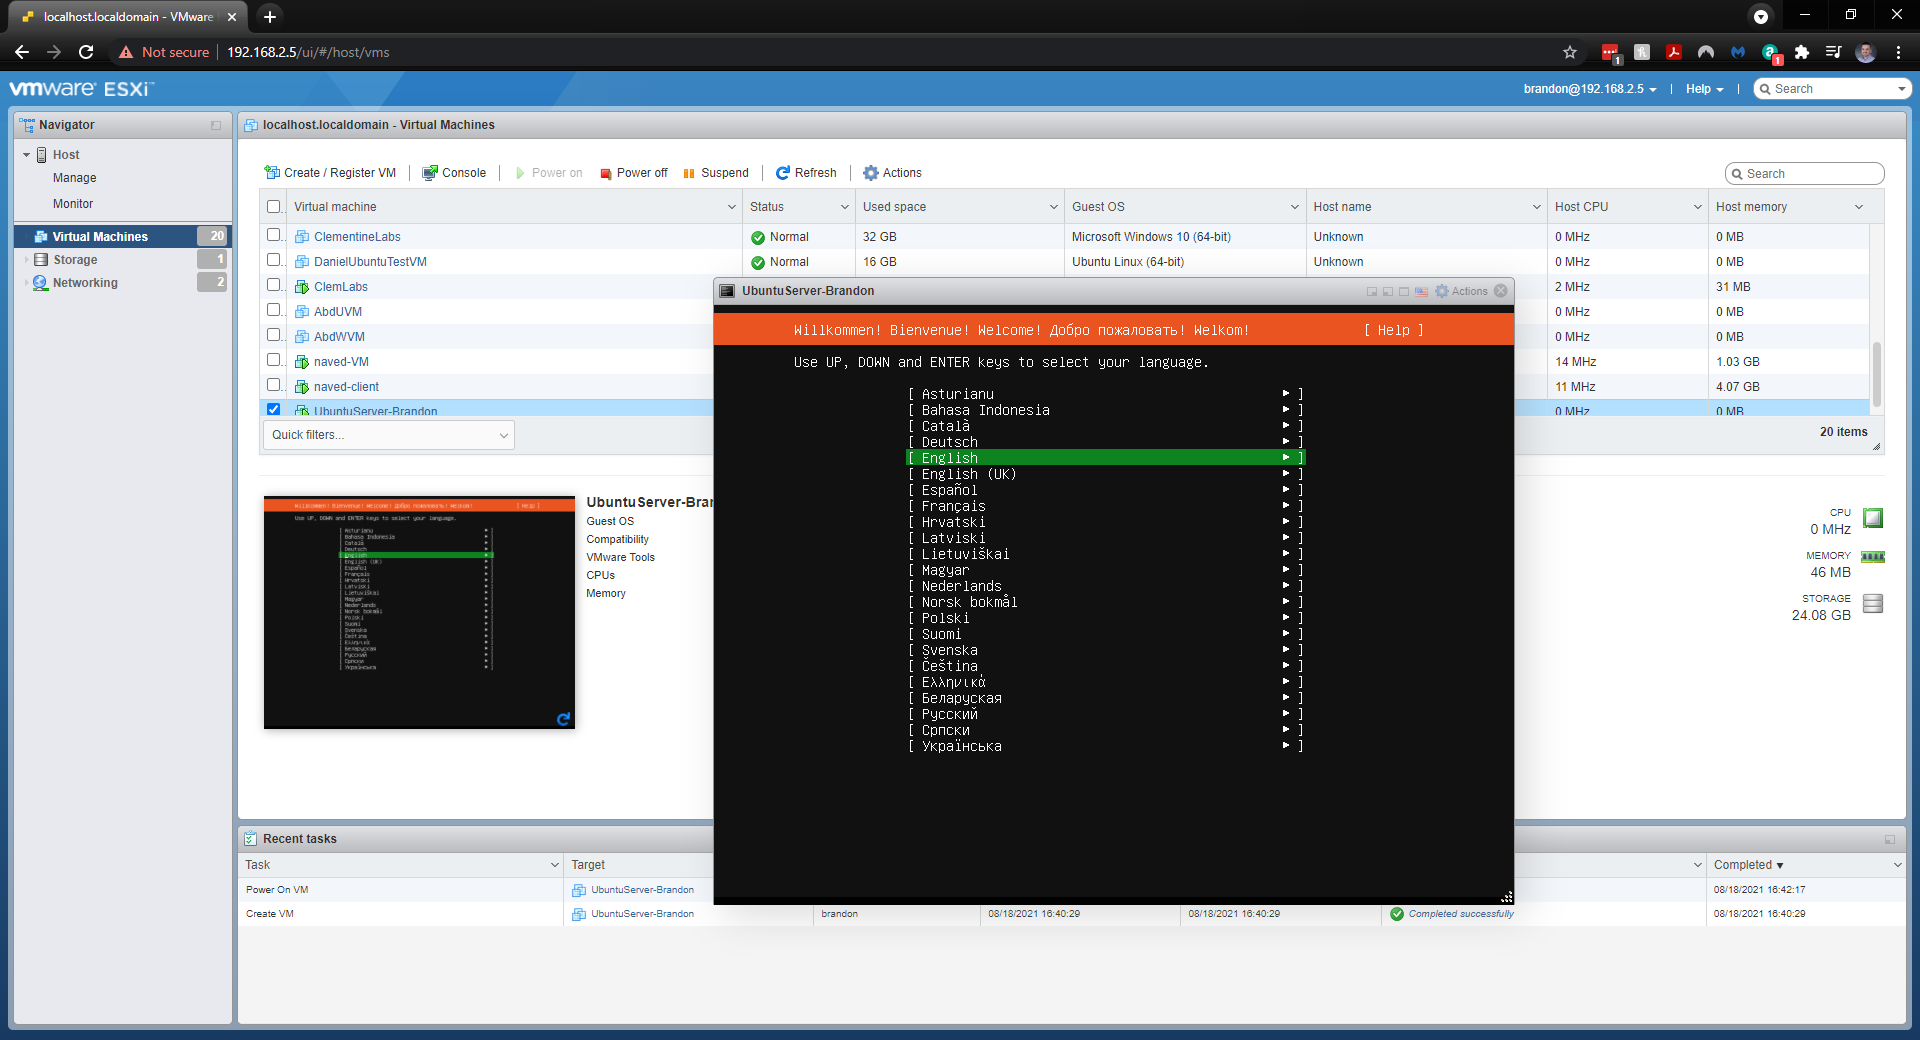
Installing and Configuring the Operating System
Now it’s time to go through the options to configure the OS. Almost there, my friends! After selecting the appropriate language option, you will then be taken into the Network Options.
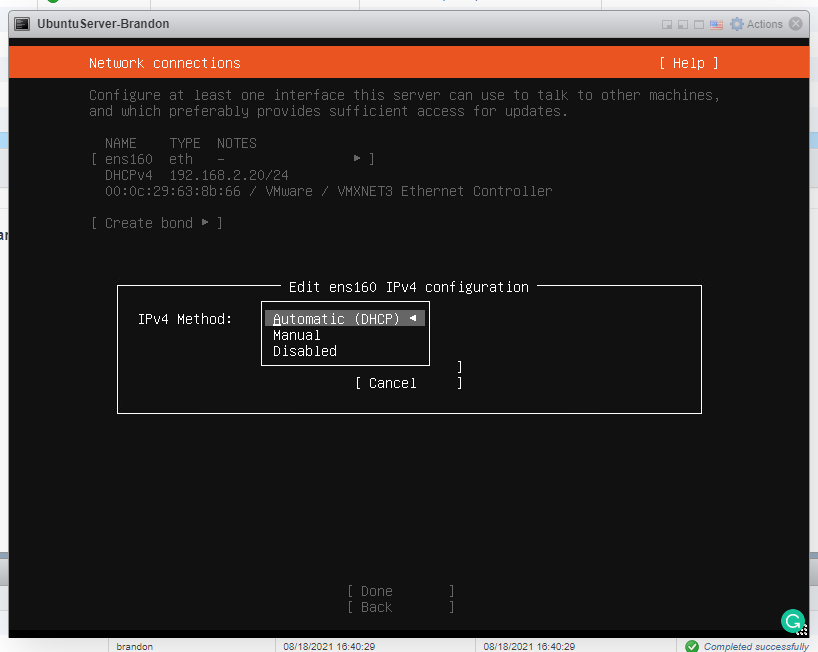
In the Network Connections menu, you can configure your virtual network interface. As a good rule of thumb, servers will almost always have a static private IP address. If you keep your server on DHCP and it is assigned a different IP address, some other services trying to connect to it will likely be unable to find the server on your network. You can assign your static private IP address here or wait to do it after the installation of the Operating System. In this scenario, I will leave it as is.
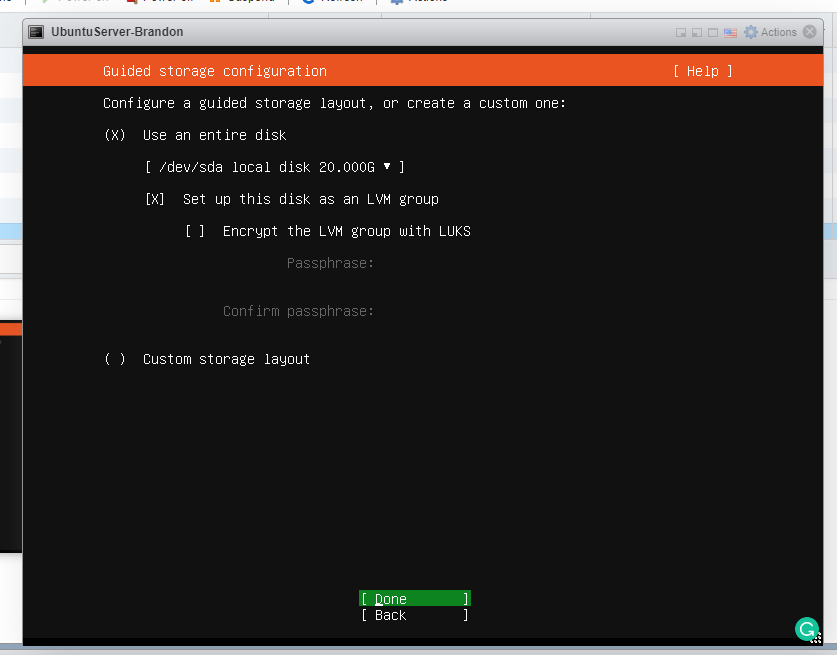
In the section labeled Guided Storage Configuration you will see several options. If you do not know what to select, the Ubuntu Server documentation for this section will help. The documentation states the following:
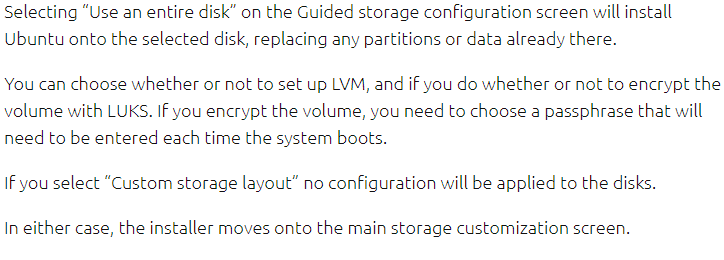
A couple of things to note… LVM stands for Logical Volume Management. It is a system of managing logical volumes or filesystems, that is much more advanced and flexible than the traditional method of partitioning a disk into one or more segments and formatting that partition with a filesystem.
LUKS stands for Linux Unified Key Setup-on-disk-format and is used for full-disk encryption. This is similar to the Windows Bitlocker Drive encryption service and will require the user to enter in a passphrase each time the system boots. This could be problematic if your server reboots automatically for updates.
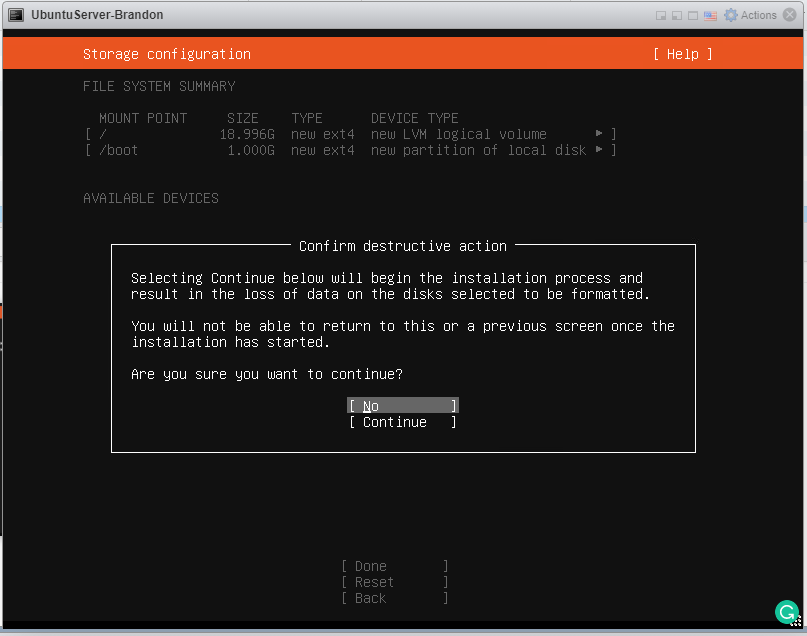
I usually keep the default settings and move on to Storage Configuration where I will review the options and select Done when I am satisfied with the partitions.
You will then select Continue on the Confirm Destructive Action screen.
The next window allows you to set up a profile for the administrator account and select a hostname, then chose a complex password. For this exercise, I will keep things simple.

Then I will enable the Install OpenSSH Server setup option for remote access to the server. Since this virtual machine is in my private network, and not exposed to the public internet, there is minimal risk of attacks.

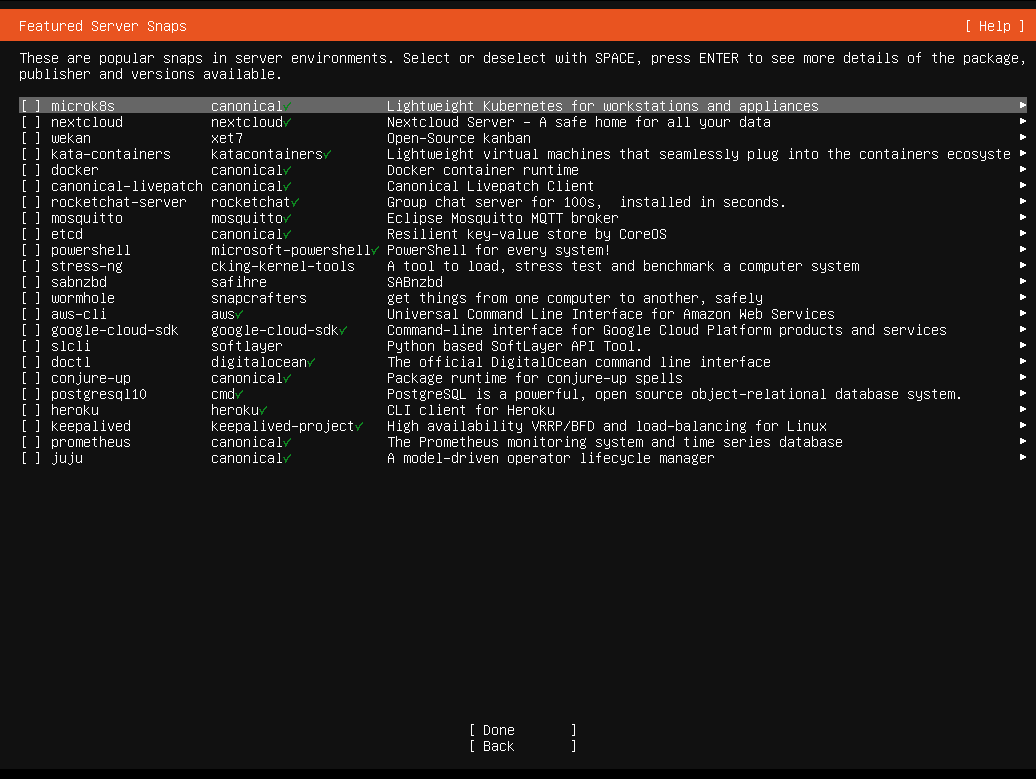
After the OpenSSH menu, you can select from a list of Featured Server Snaps. This feature could help should you have the need for some of these services (ie Docker, AWS CLI, etc). But for now, I will leave it blank and select Done to begin the installation of the operating system.
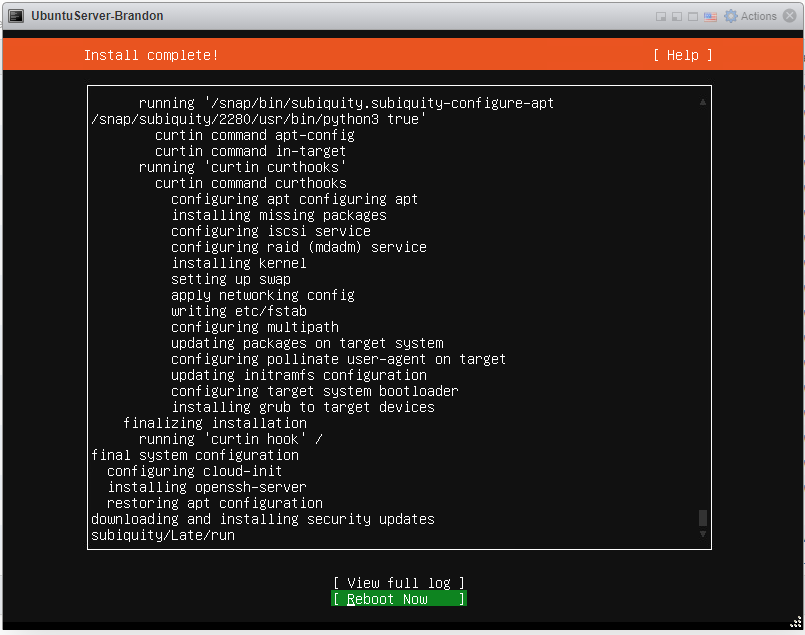
Once the installation is complete, you will select Reboot Now to reboot the Virtual Machine.
If you do not see a login prompt after reboot, press Enter on your keyboard, and the login prompt will appear.
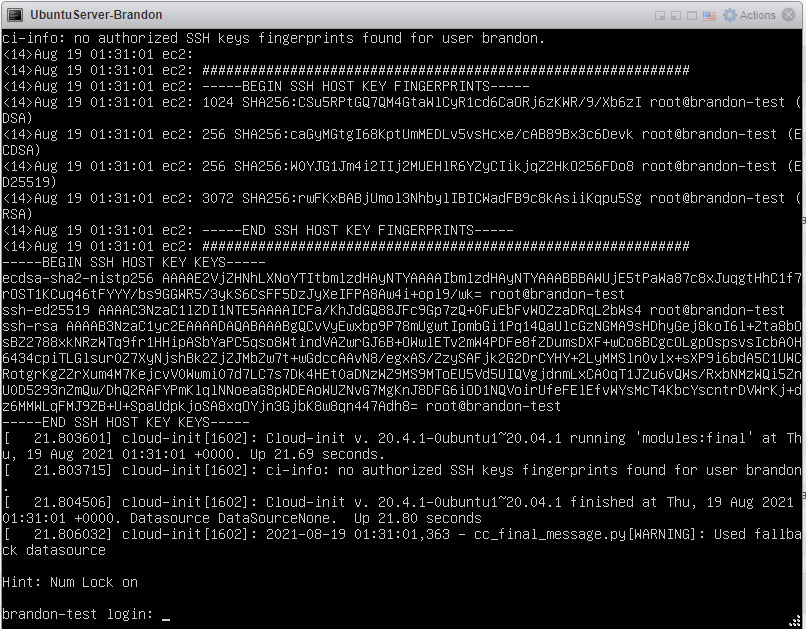
You will then log in to your Ubuntu Server with the credentials that you provided during the setup process.
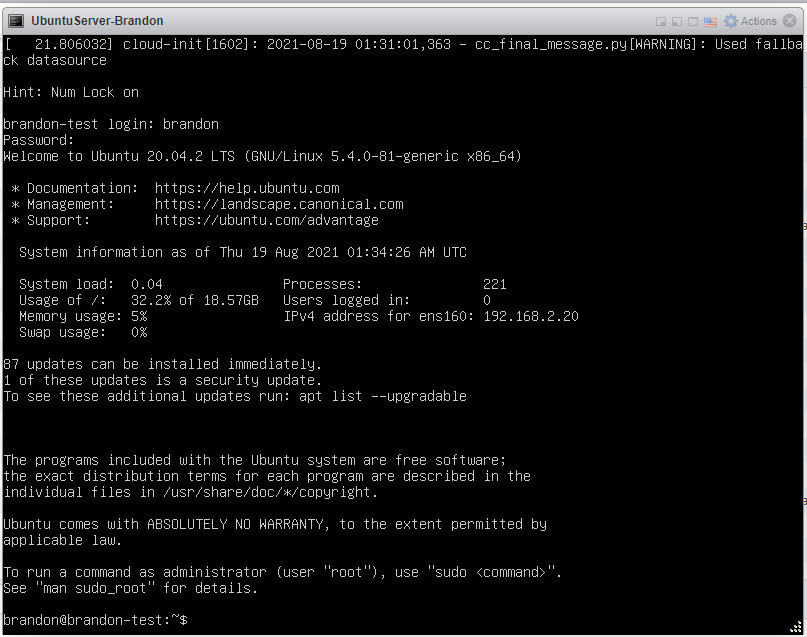
Since I installed the OpenSSH server during the OS configuration, I can now use an SSH client, such as Putty, to connect to the Ubuntu Server. This will make it easier for me to copy and paste Linux commands into the terminal session.
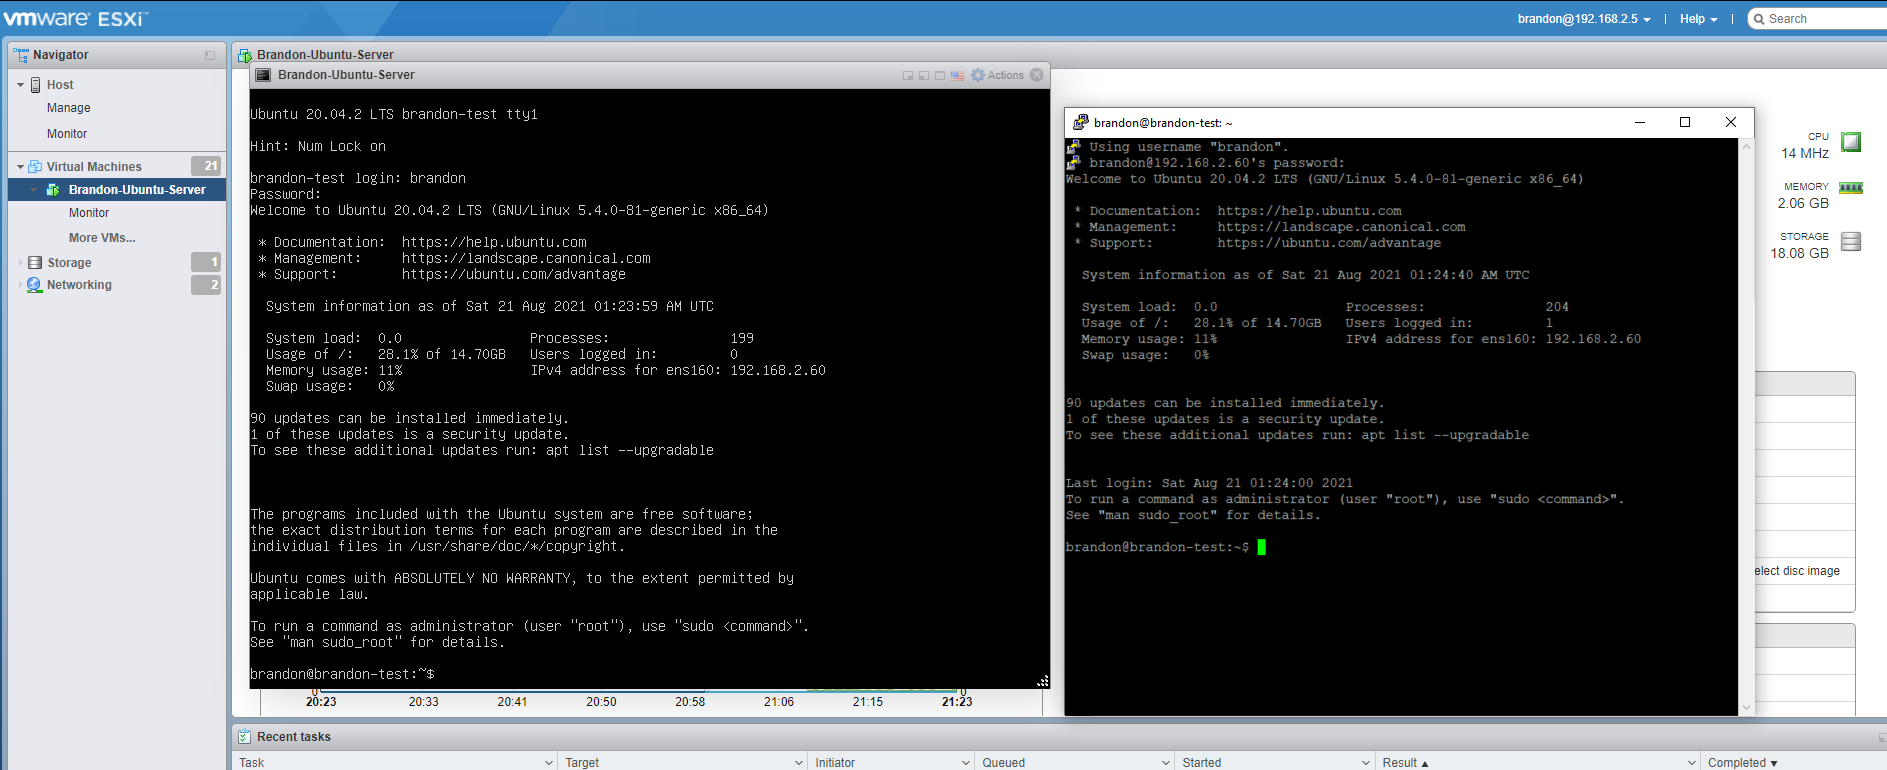
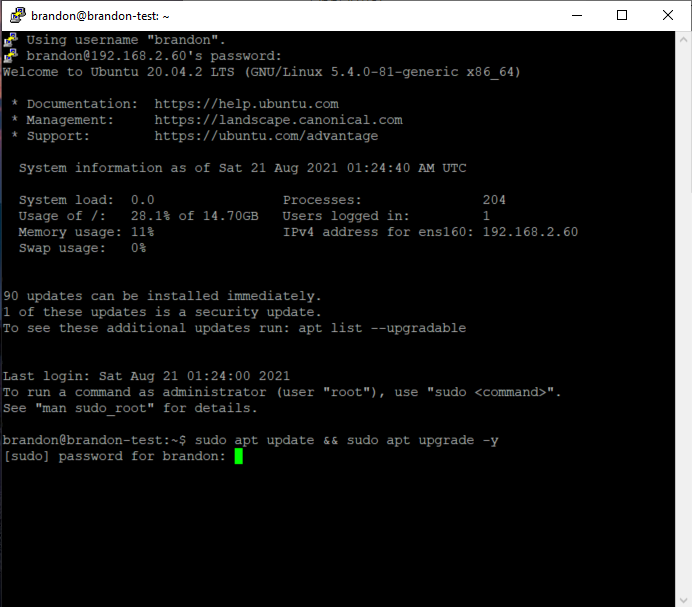
Once I am logged in to my Ubuntu Server, the first thing I typically like to do is to update and upgrade the Operating System packages using the following commands:
sudo apt update && sudo apt upgrade -y
From there, I will enable the default host-based firewall tool for Ubuntu named the Uncomplicated Firewall (UFW). Typically I will know what services should be allowed to the server. For instance, if I know that this server will be used as a web server, I will allow access to ports 22 (SSH), 80 (HTTP), and 443 (HTTPS) using the following commands:
sudu ufw enable
sudo ufw allow ssh
sudo ufw allow http
sudo ufw allow https
sudu ufw status
Always check the documentation to see if there are commands you could use to allow other services to your server.
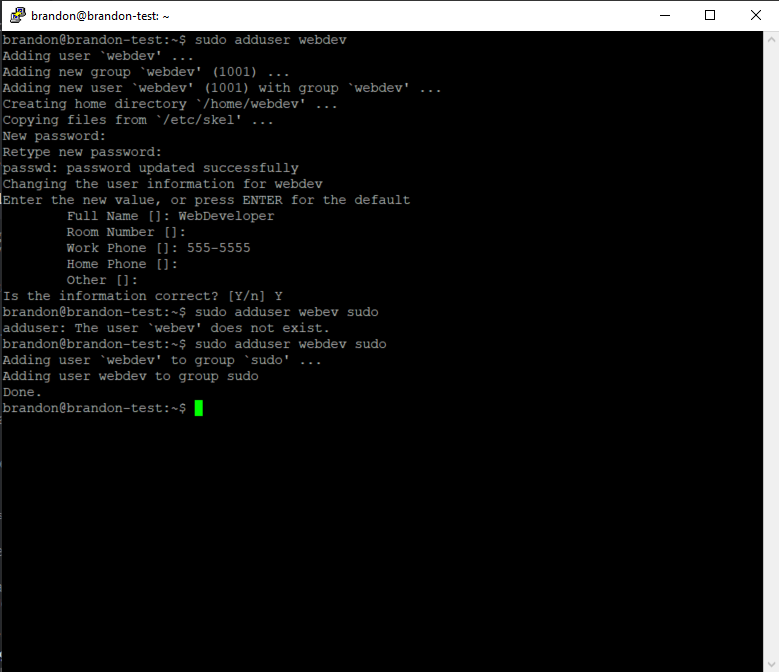
My next step would be to create authorized user accounts. For example, my Web Developer needs access to the server, I would create an appropriate level account for him. In this scenario, I would give him root/administrator level permissions. I would use the following commands:
sudo adduser webdev
sudo adduser webdev sudo
From there, it is up to the Web Developer what applications or services he wants to install on the server. I have met the requirement to produce a functioning Ubuntu Server Virtual Machine.
Thank you for your time in reading this! I hope you enjoyed this post.


